什么是spring-boot
- Spring Boot是一个脚手架
- 用于快速搭建一个基于Spring的web应用,开箱即用!创建即可开发业务代码。
- 其设计目的是用来简化Spring应用的初始搭建以及开发过程
使用idea 创建一个sping-boot 项目
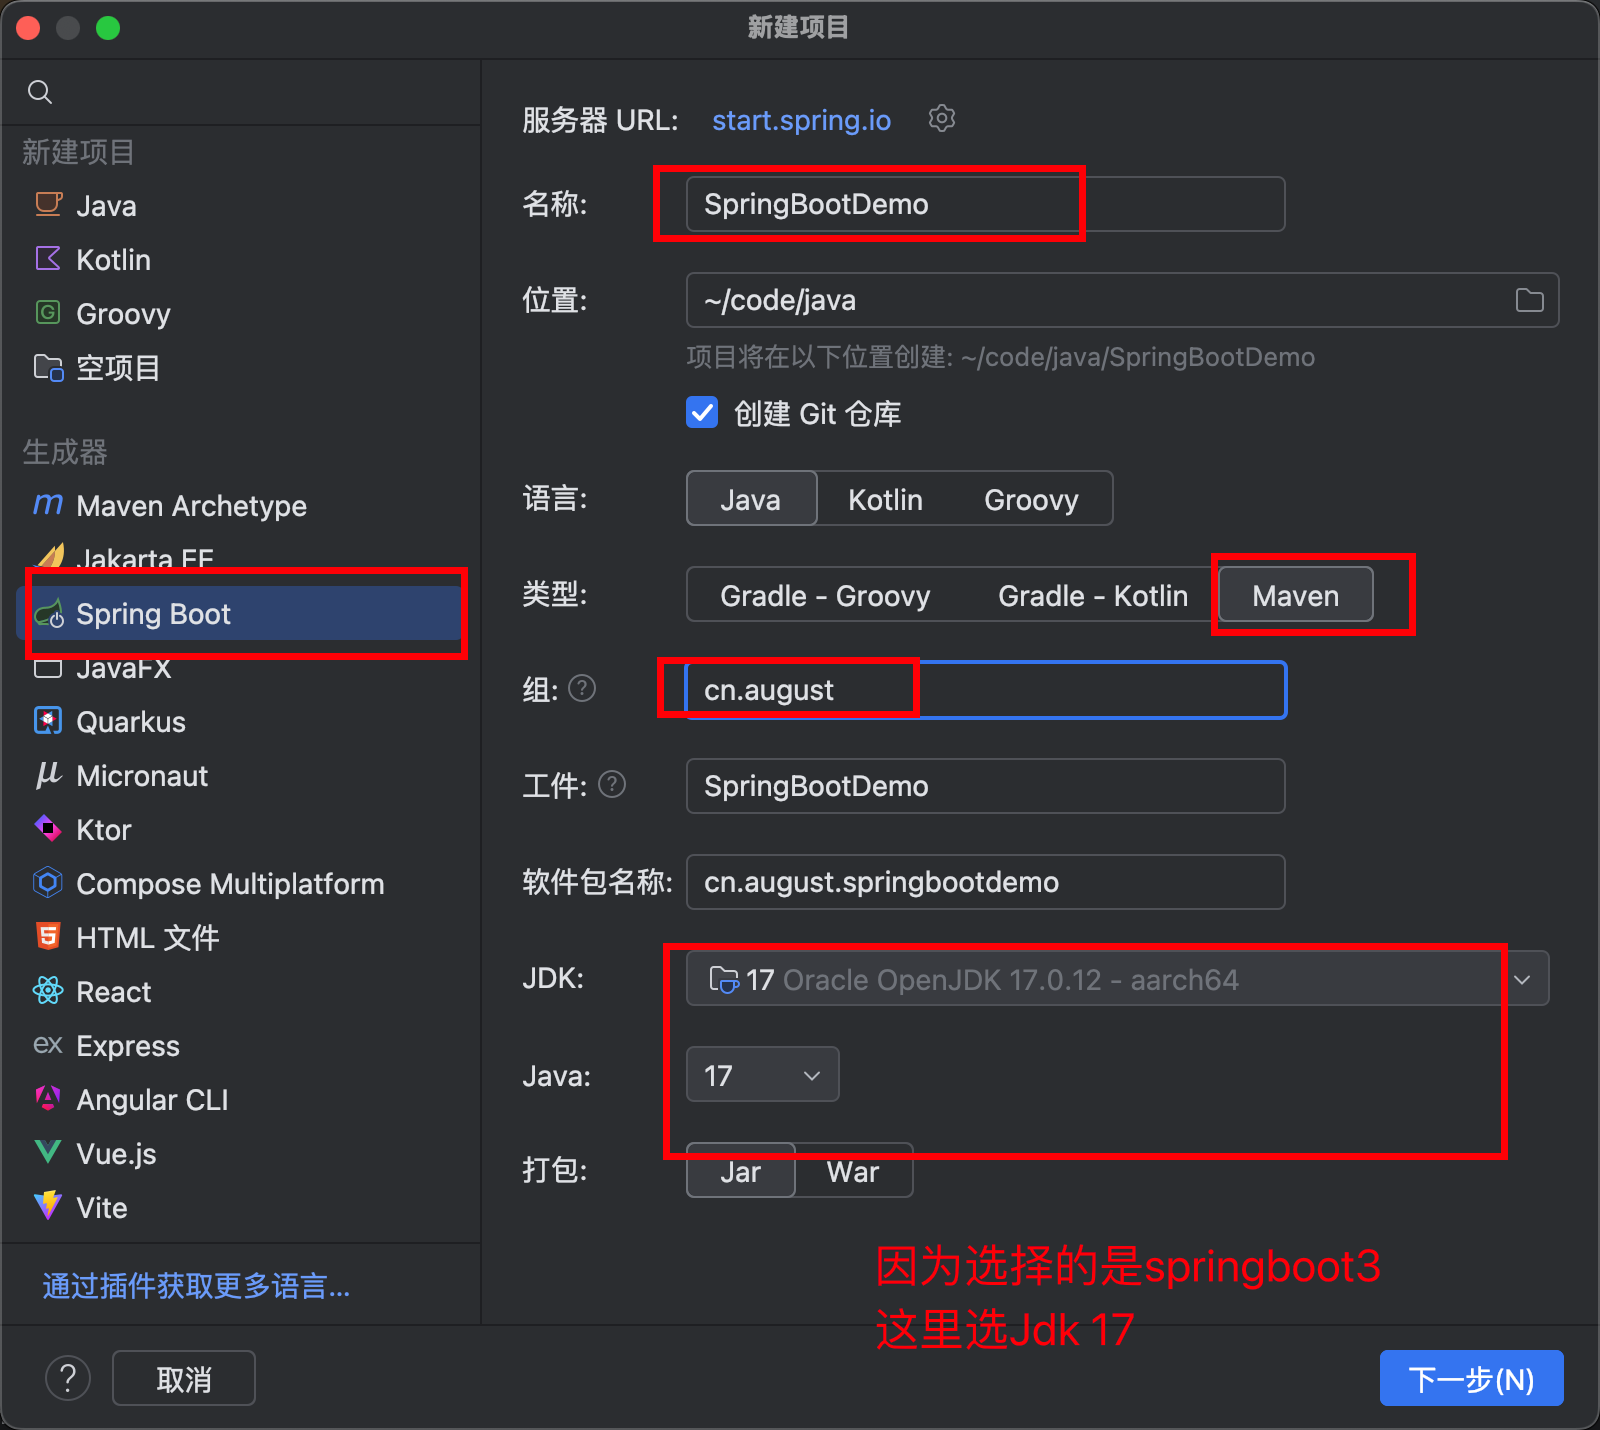
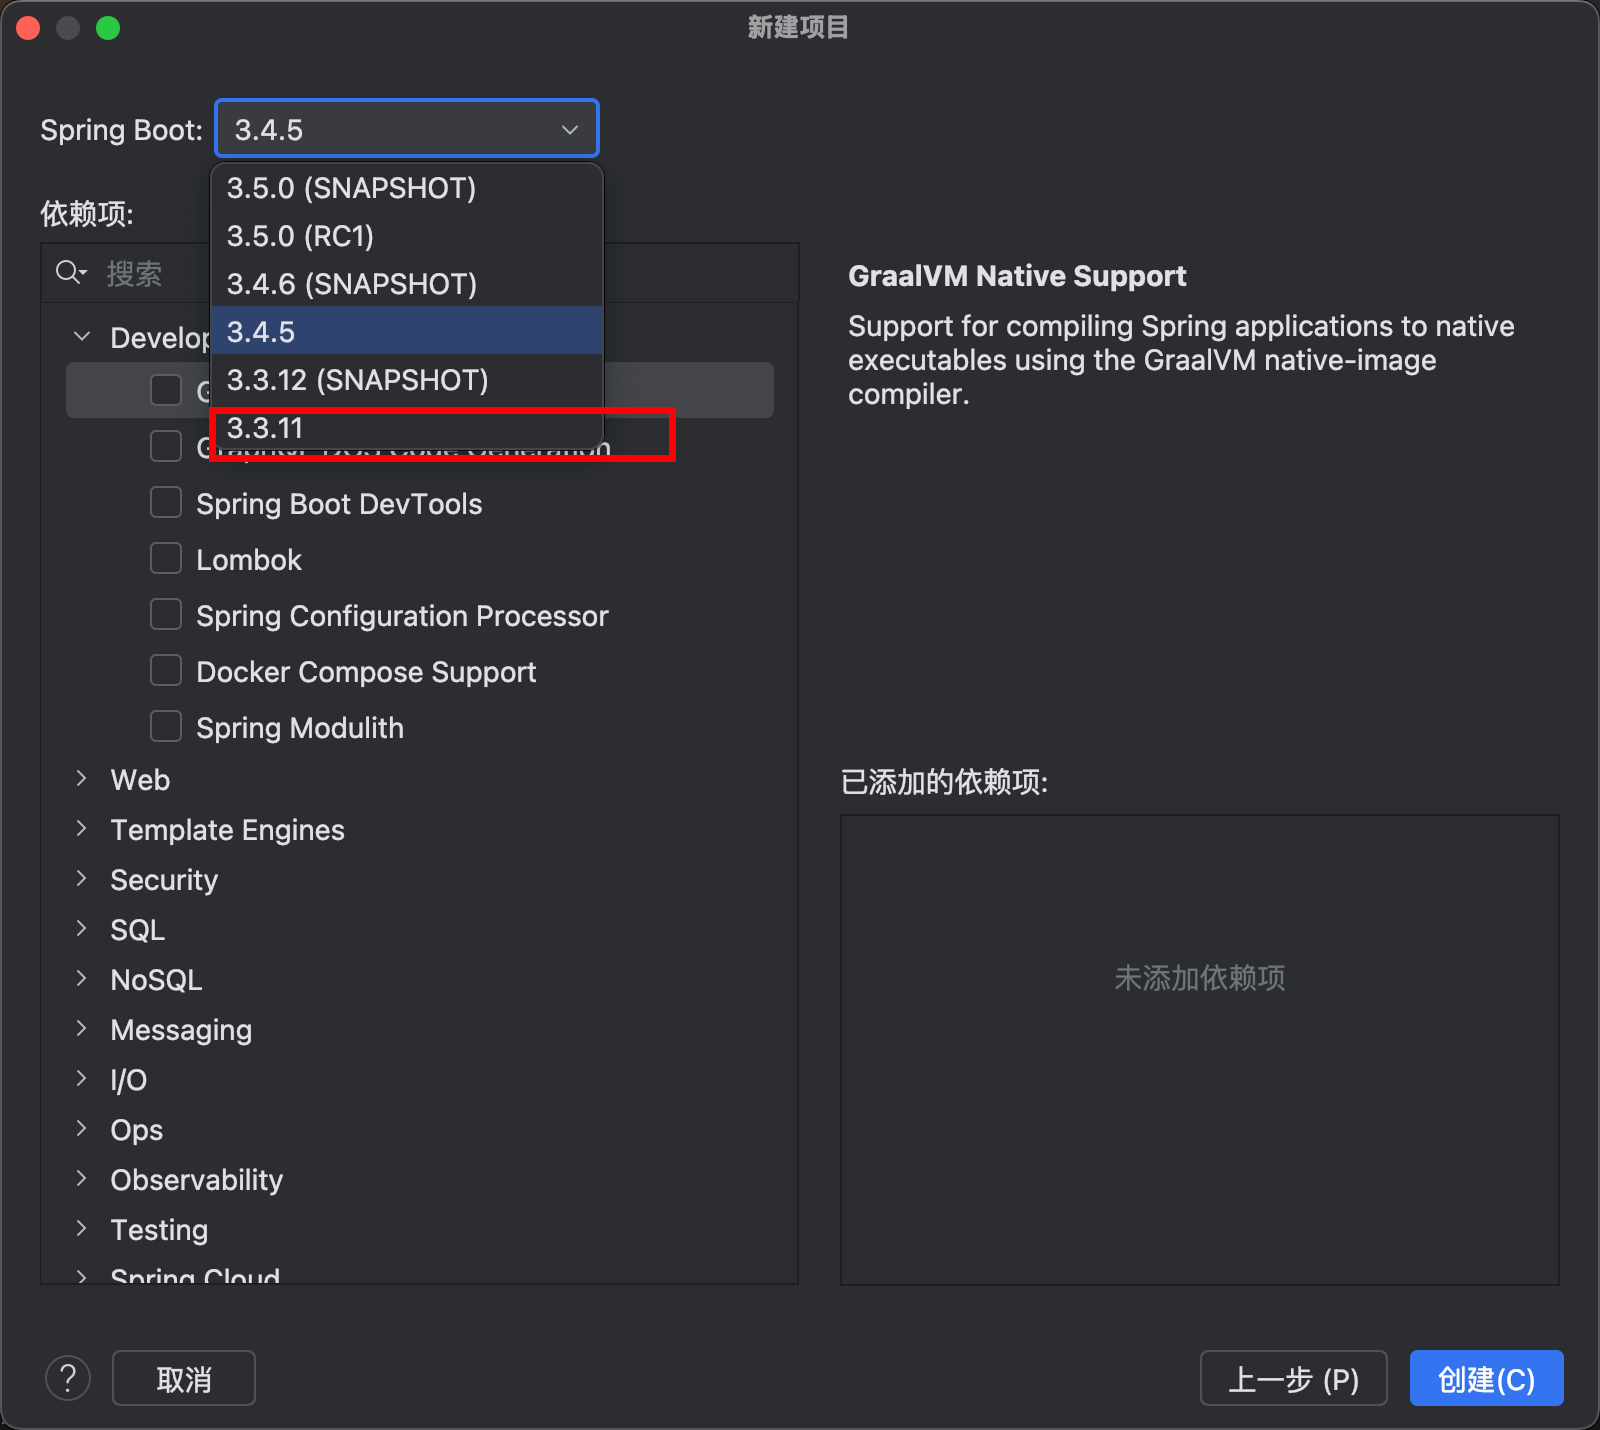
别选太新的,也不要选shapshot 版本
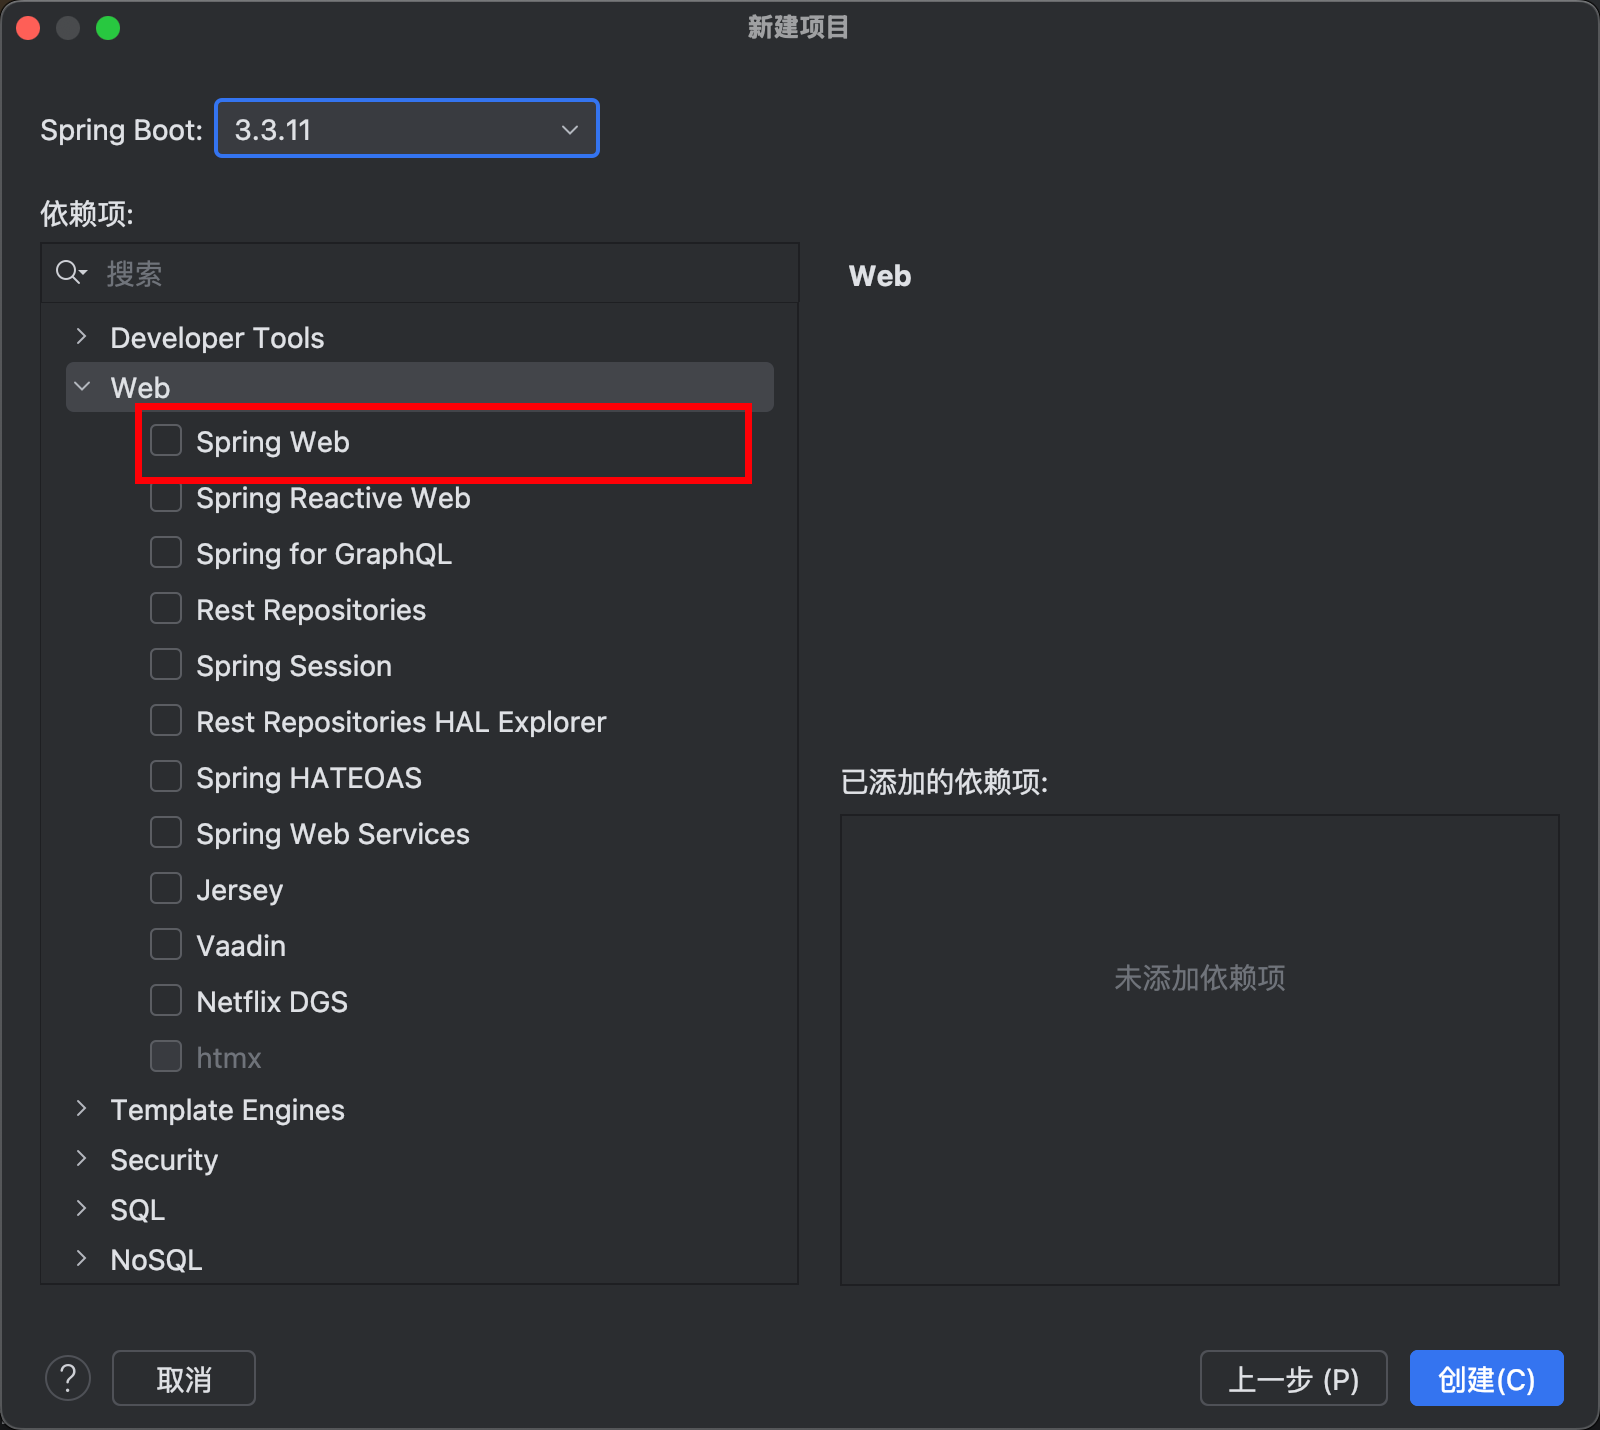
勾选上
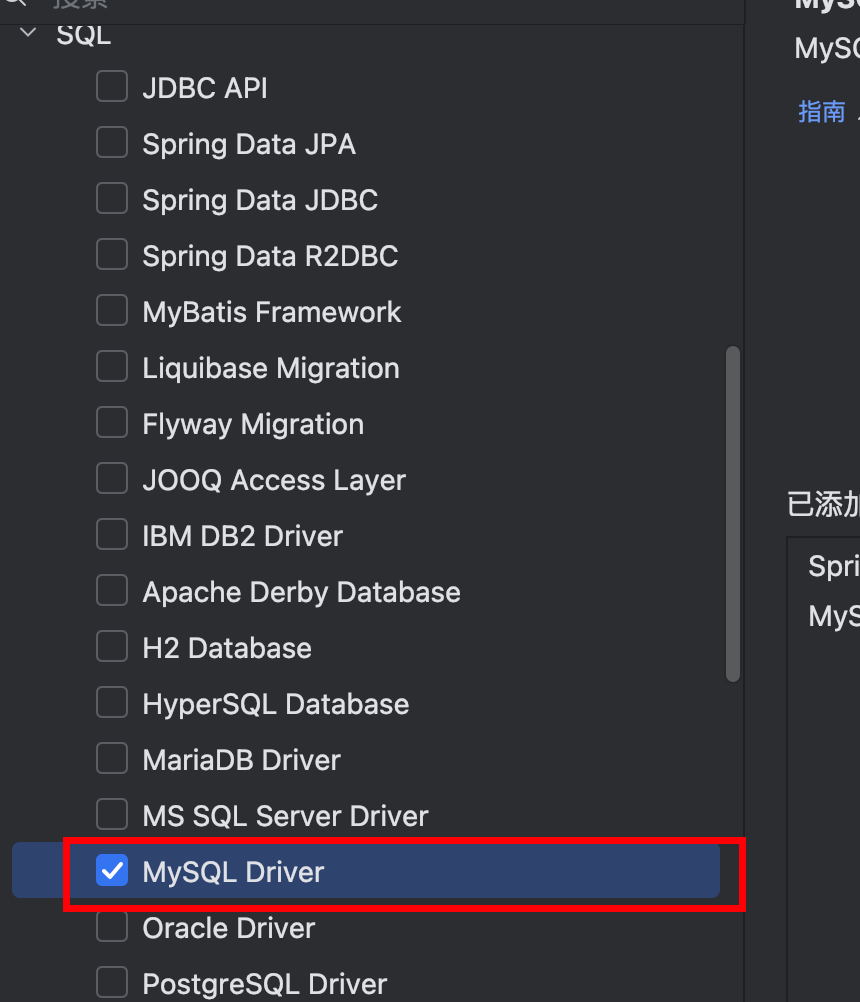
需要那个版本勾选哪个数据库版本
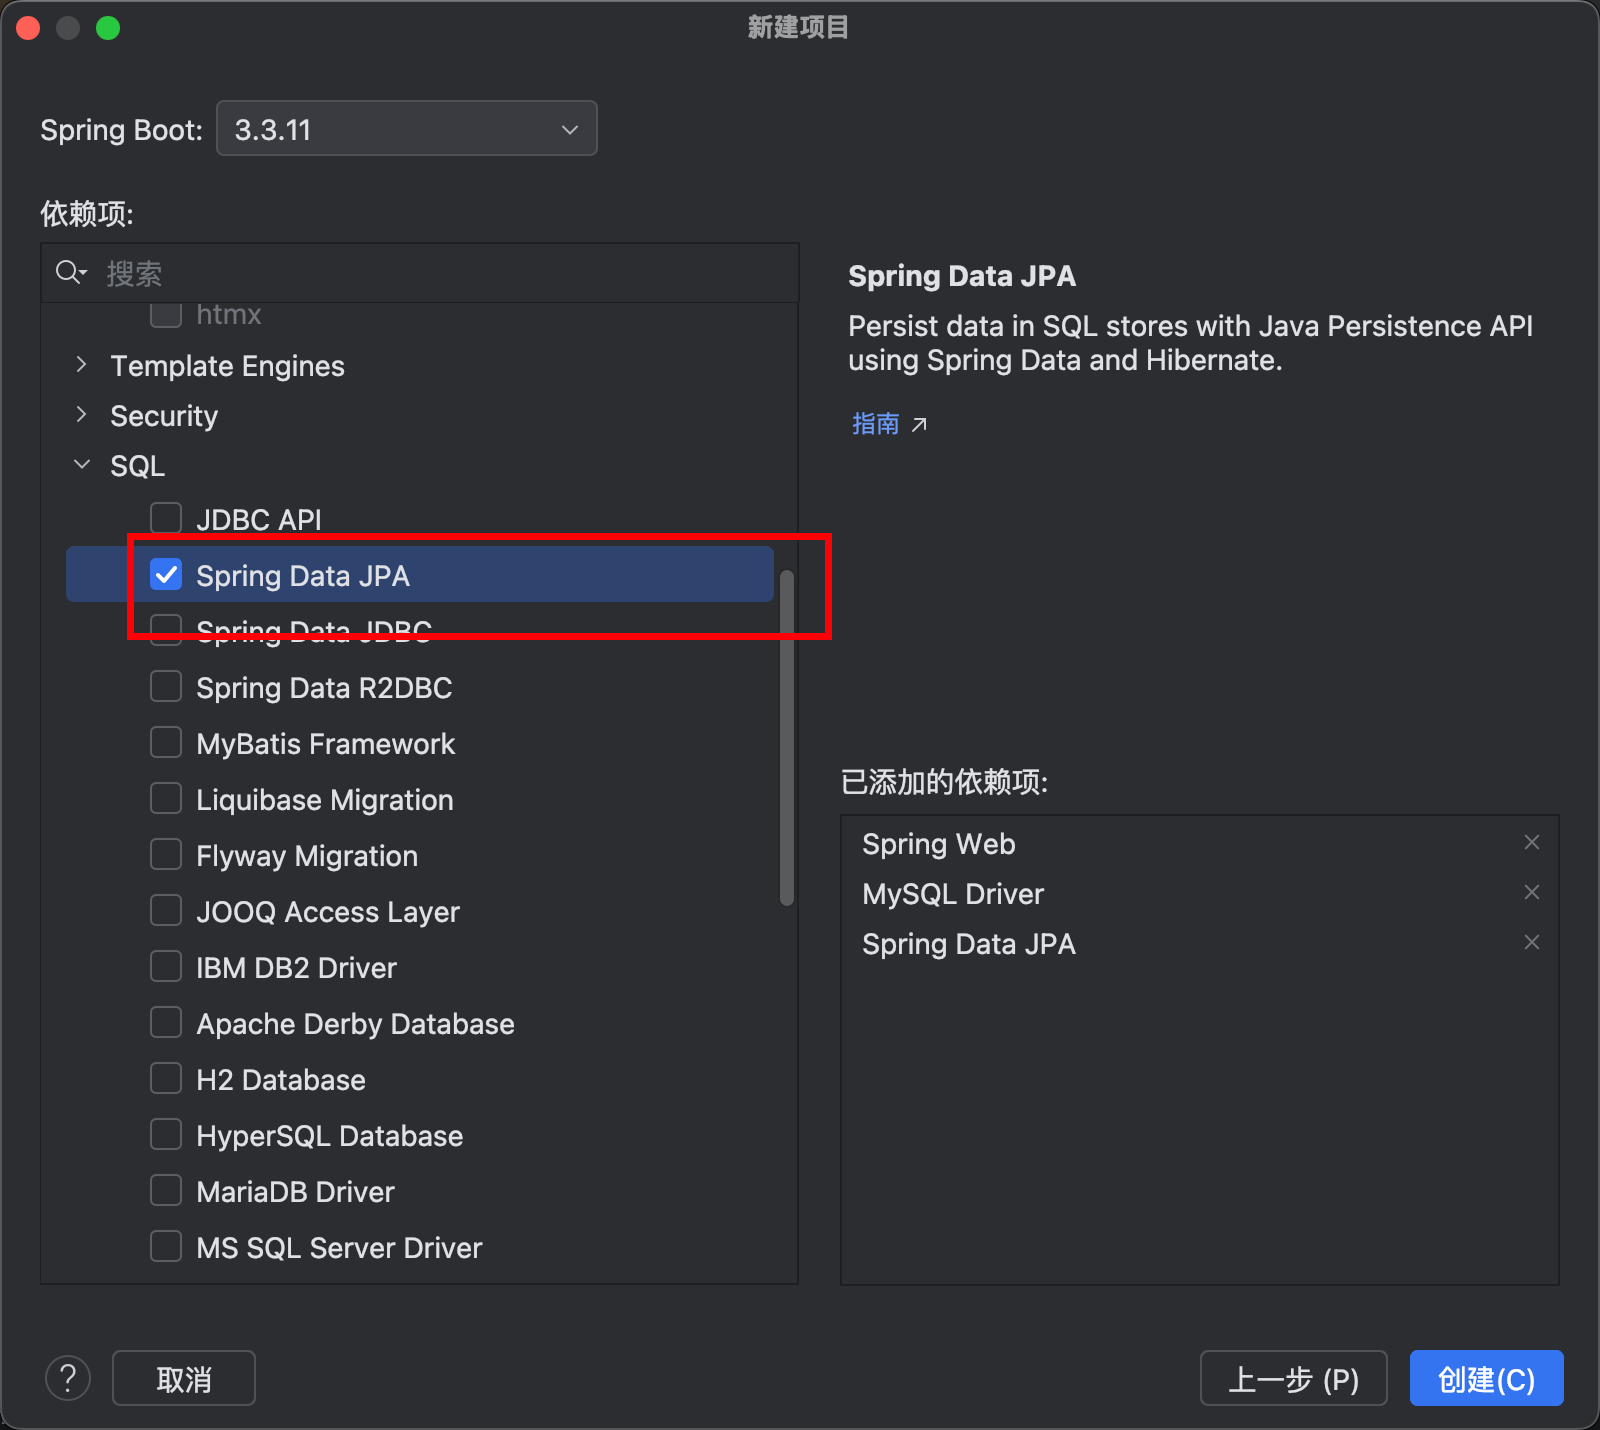
jpa 是操作数据库的
然后点击创建
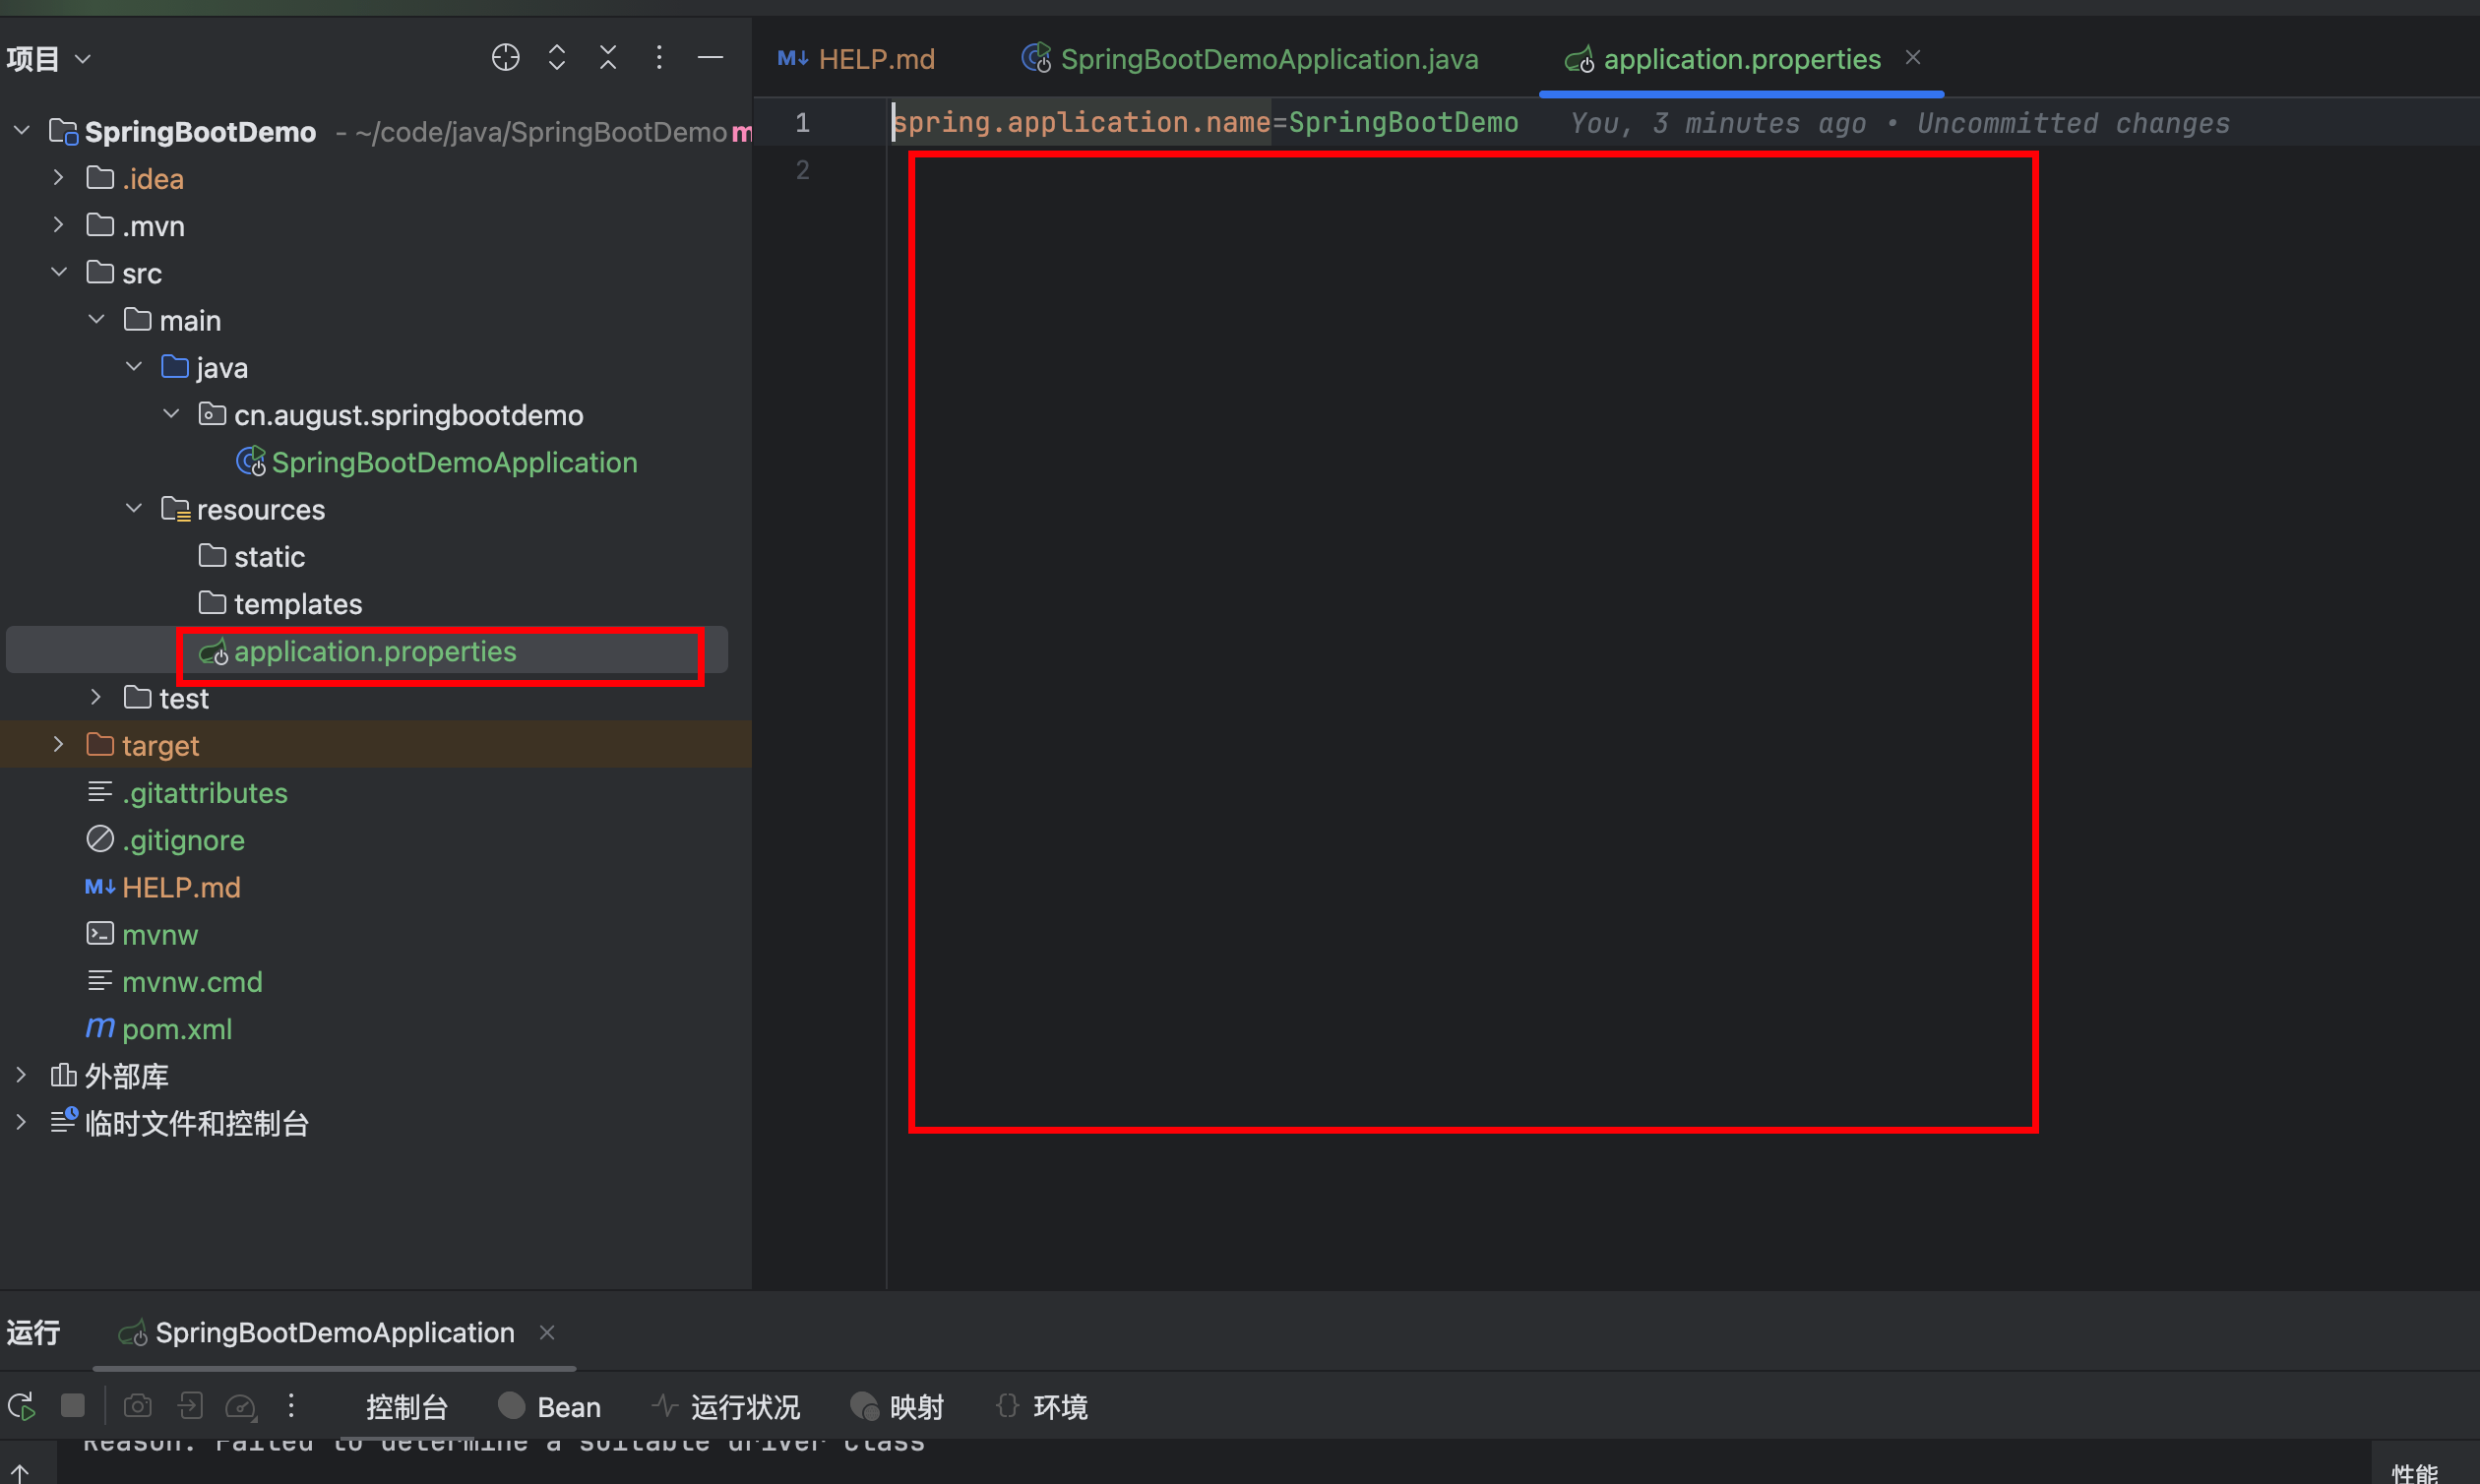
接下来配置数据库的连接地址
1
2
3
4
5
6
7
8
9
10
11
12
13
14
15
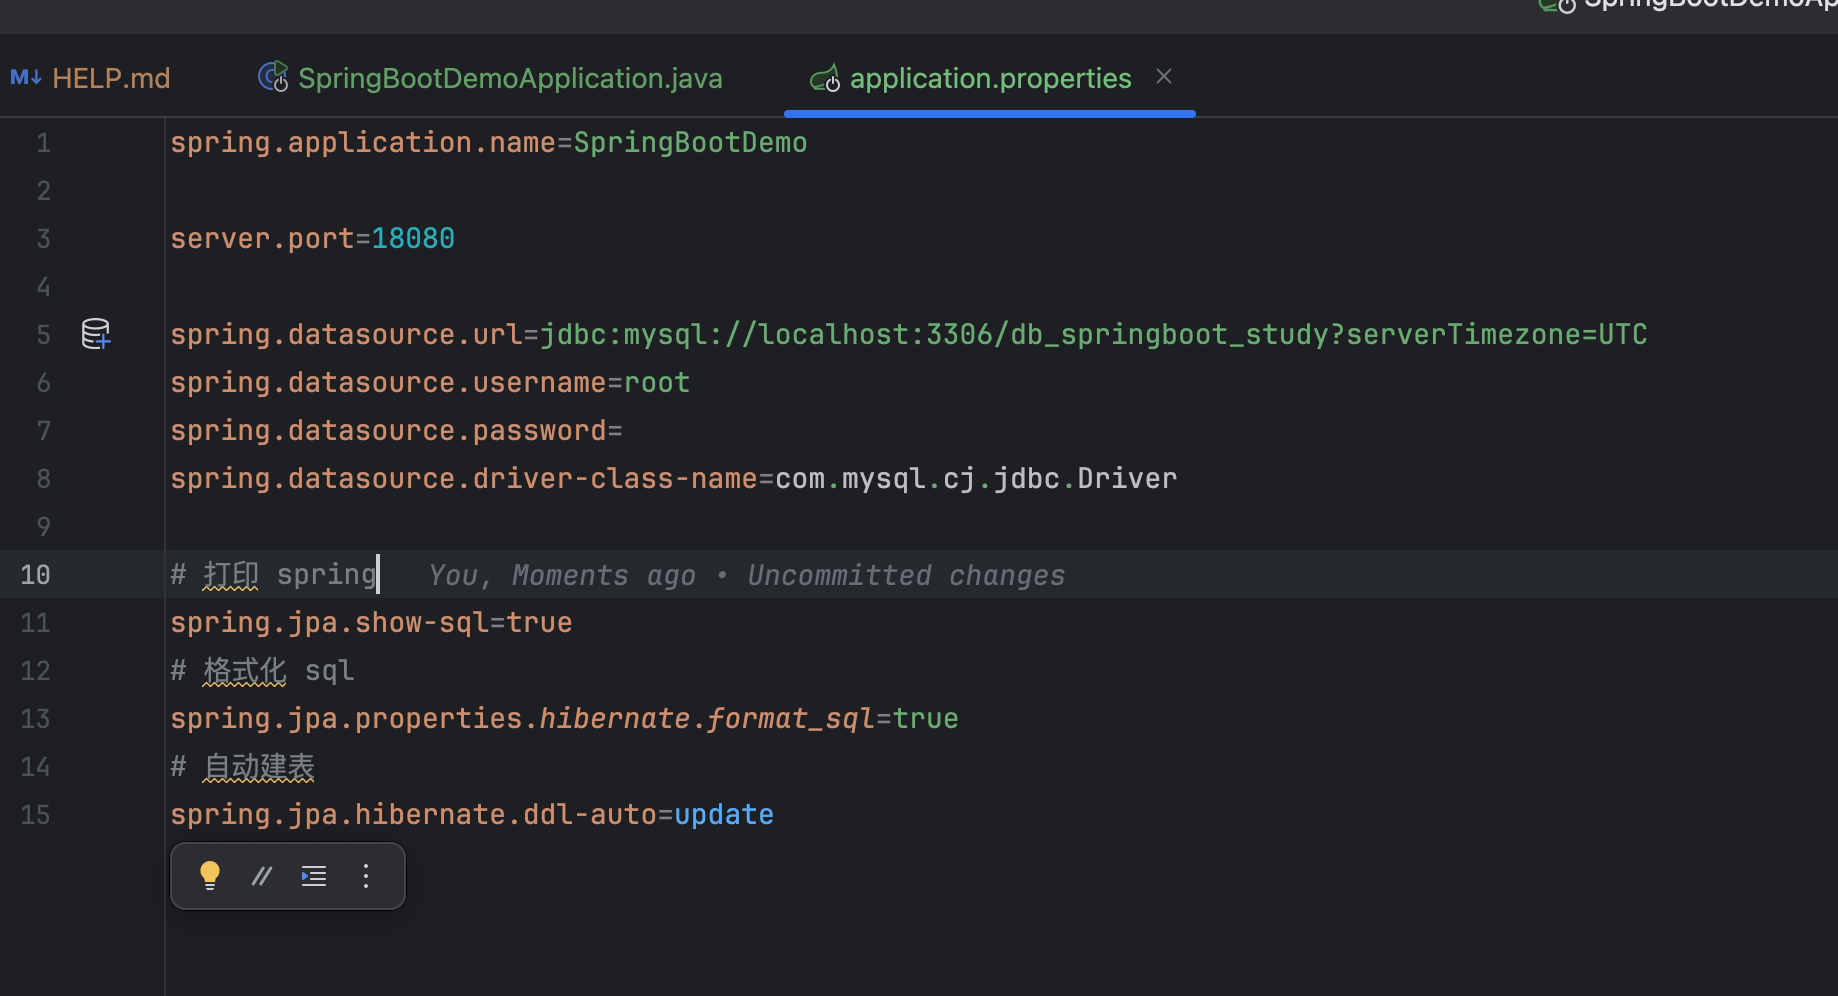
| spring.application.name=SpringBootDemo
server.port=18080
spring.datasource.url=jdbc:mysql://localhost:3306/db_springboot_study?serverTimezone=UTC
spring.datasource.username=root
spring.datasource.password=
spring.datasource.driver-class-name=com.mysql.cj.jdbc.Driver
spring.jpa.show-sql=true
spring.jpa.properties.hibernate.format_sql=true
spring.jpa.hibernate.ddl-auto=update
|
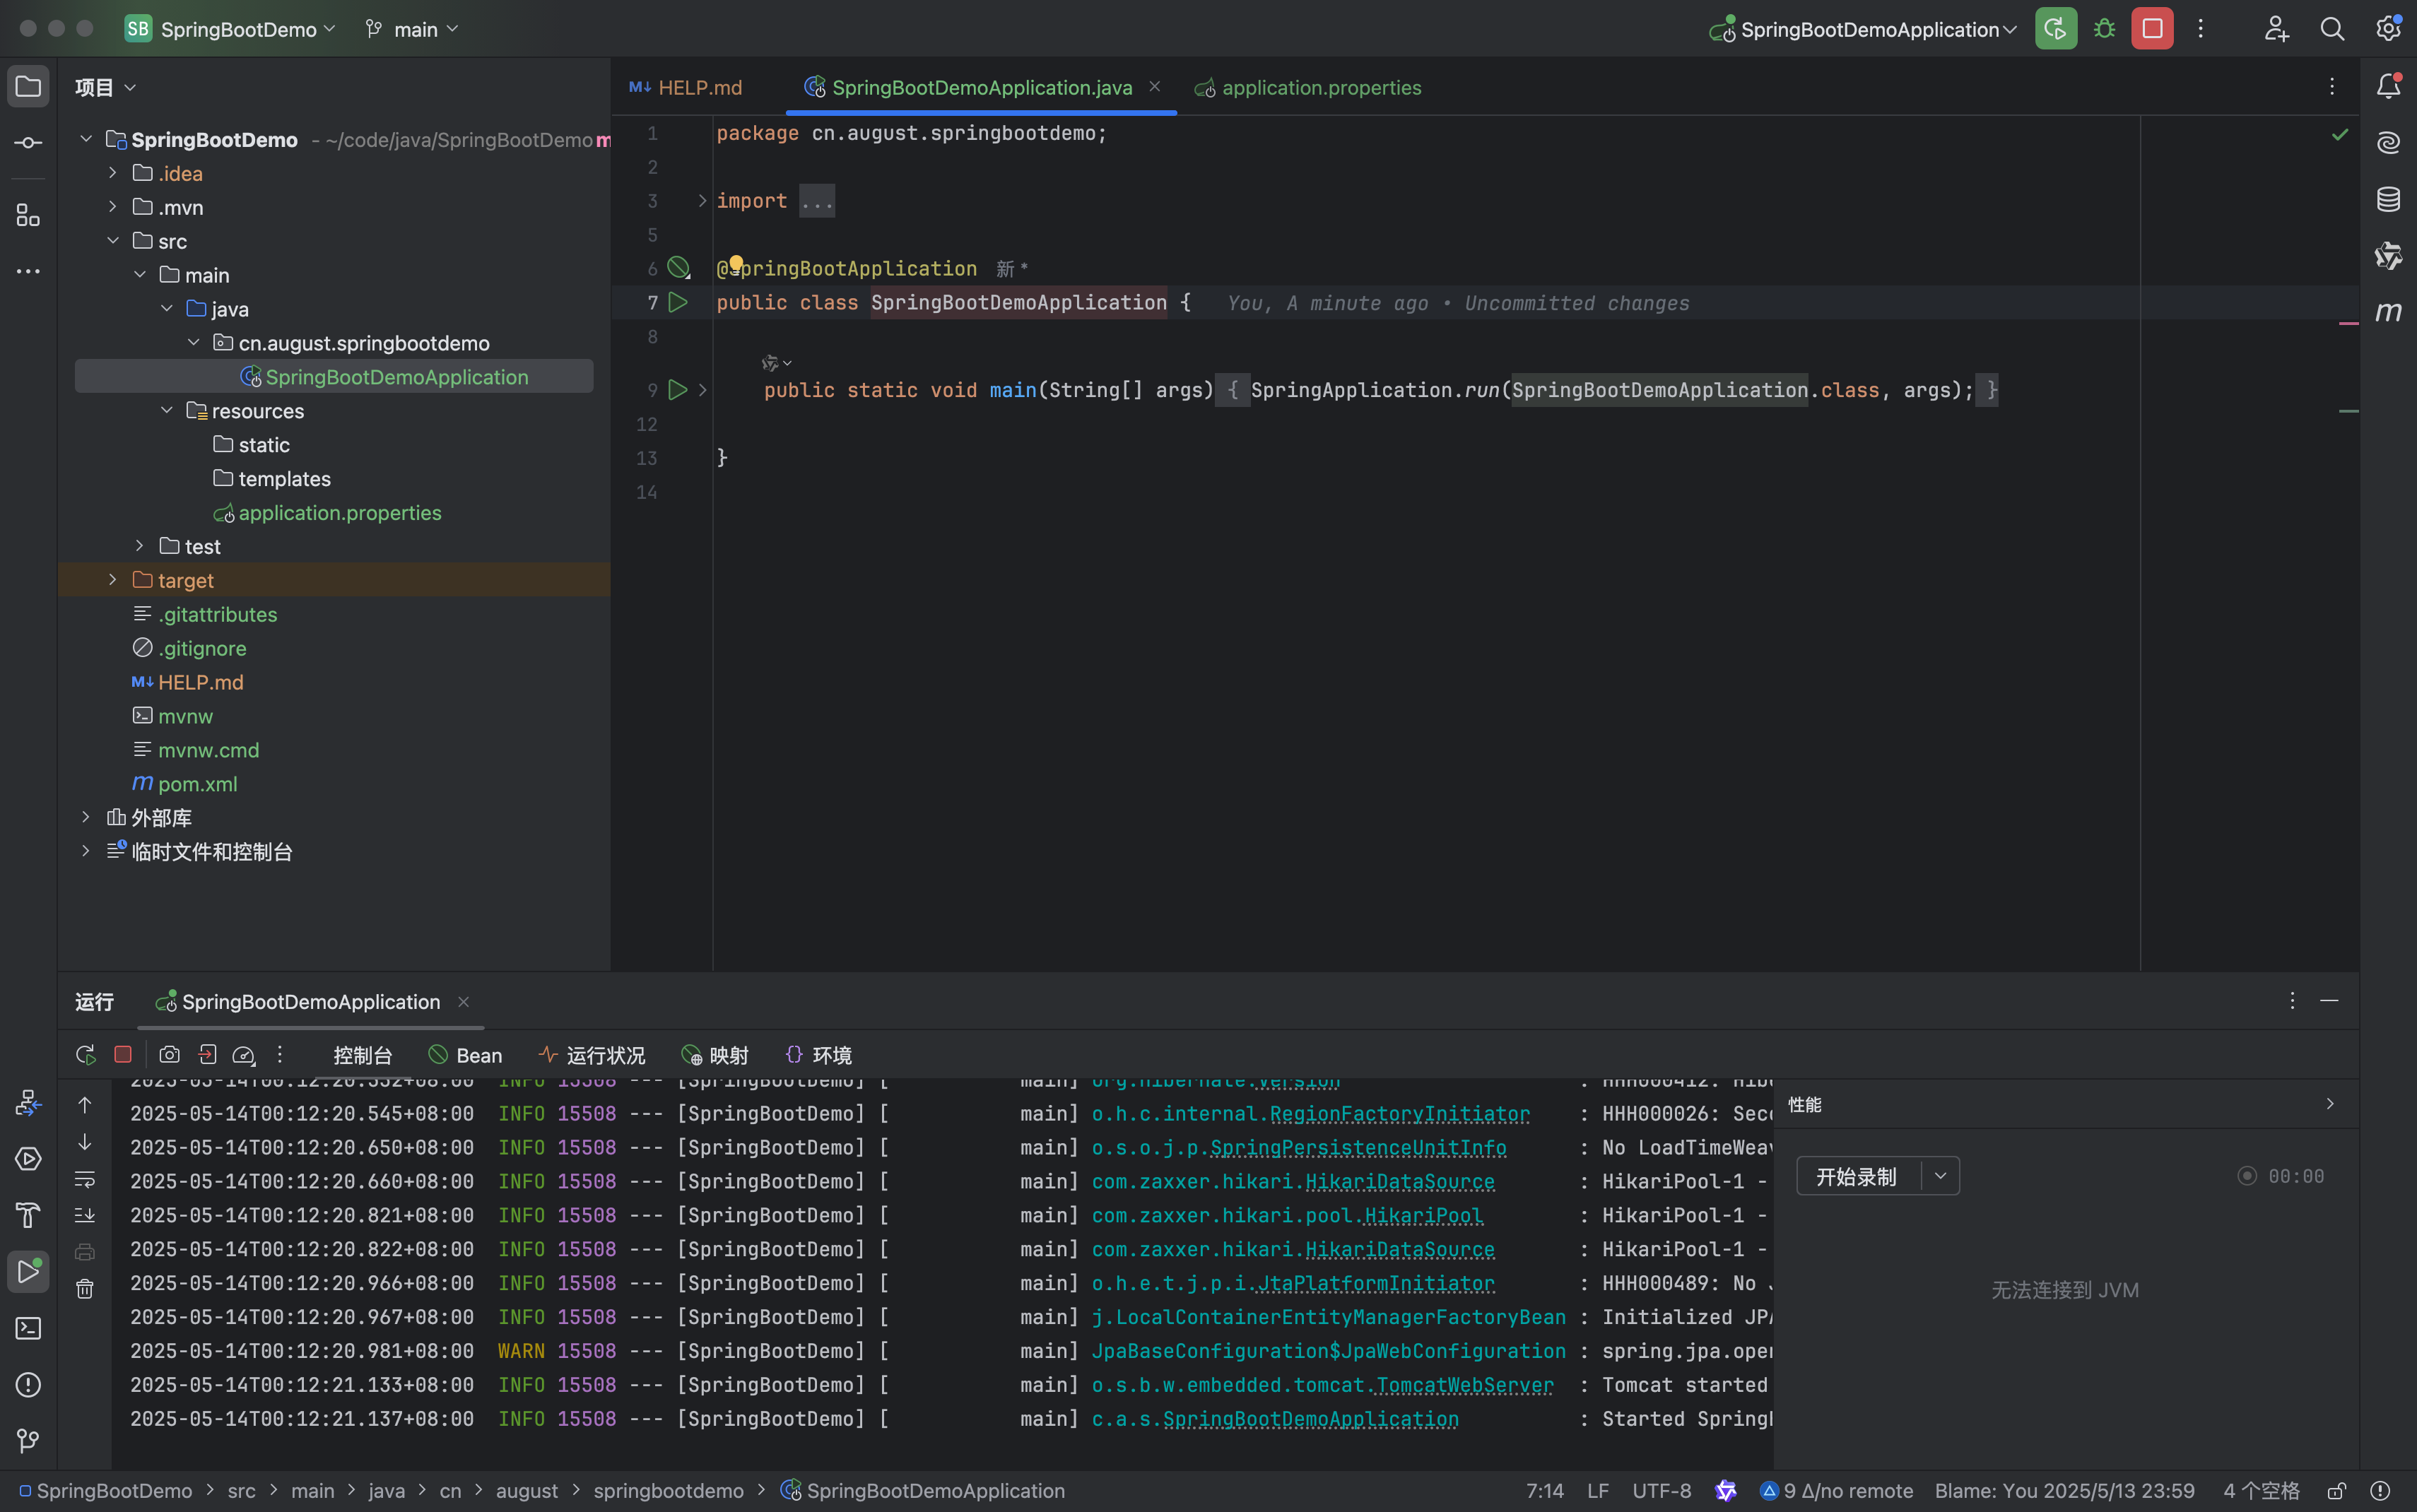
尝试启动
项目结构
SpringBoot : 一个较完整的SpringBoot项目的目录结构_springboot项目目录结构-CSDN博客
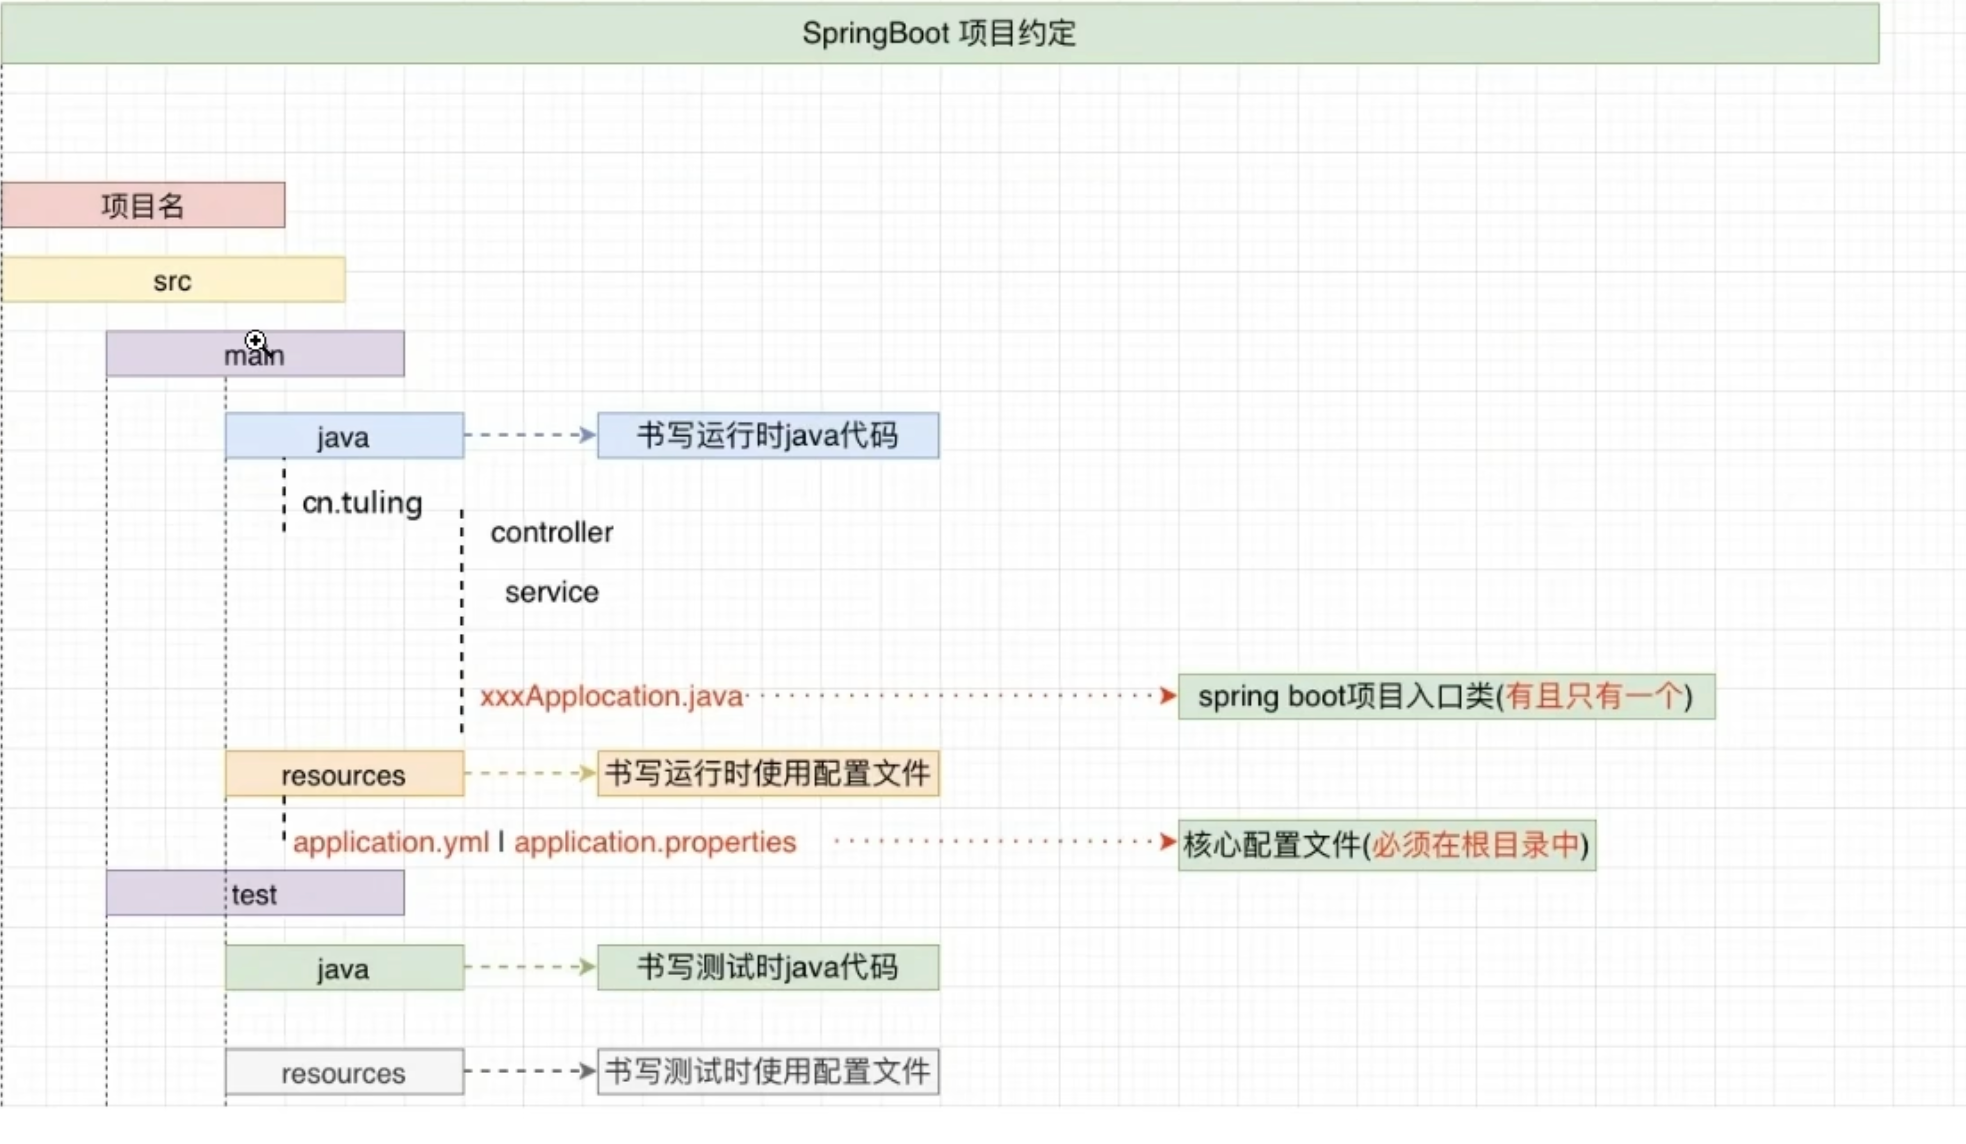
启动类
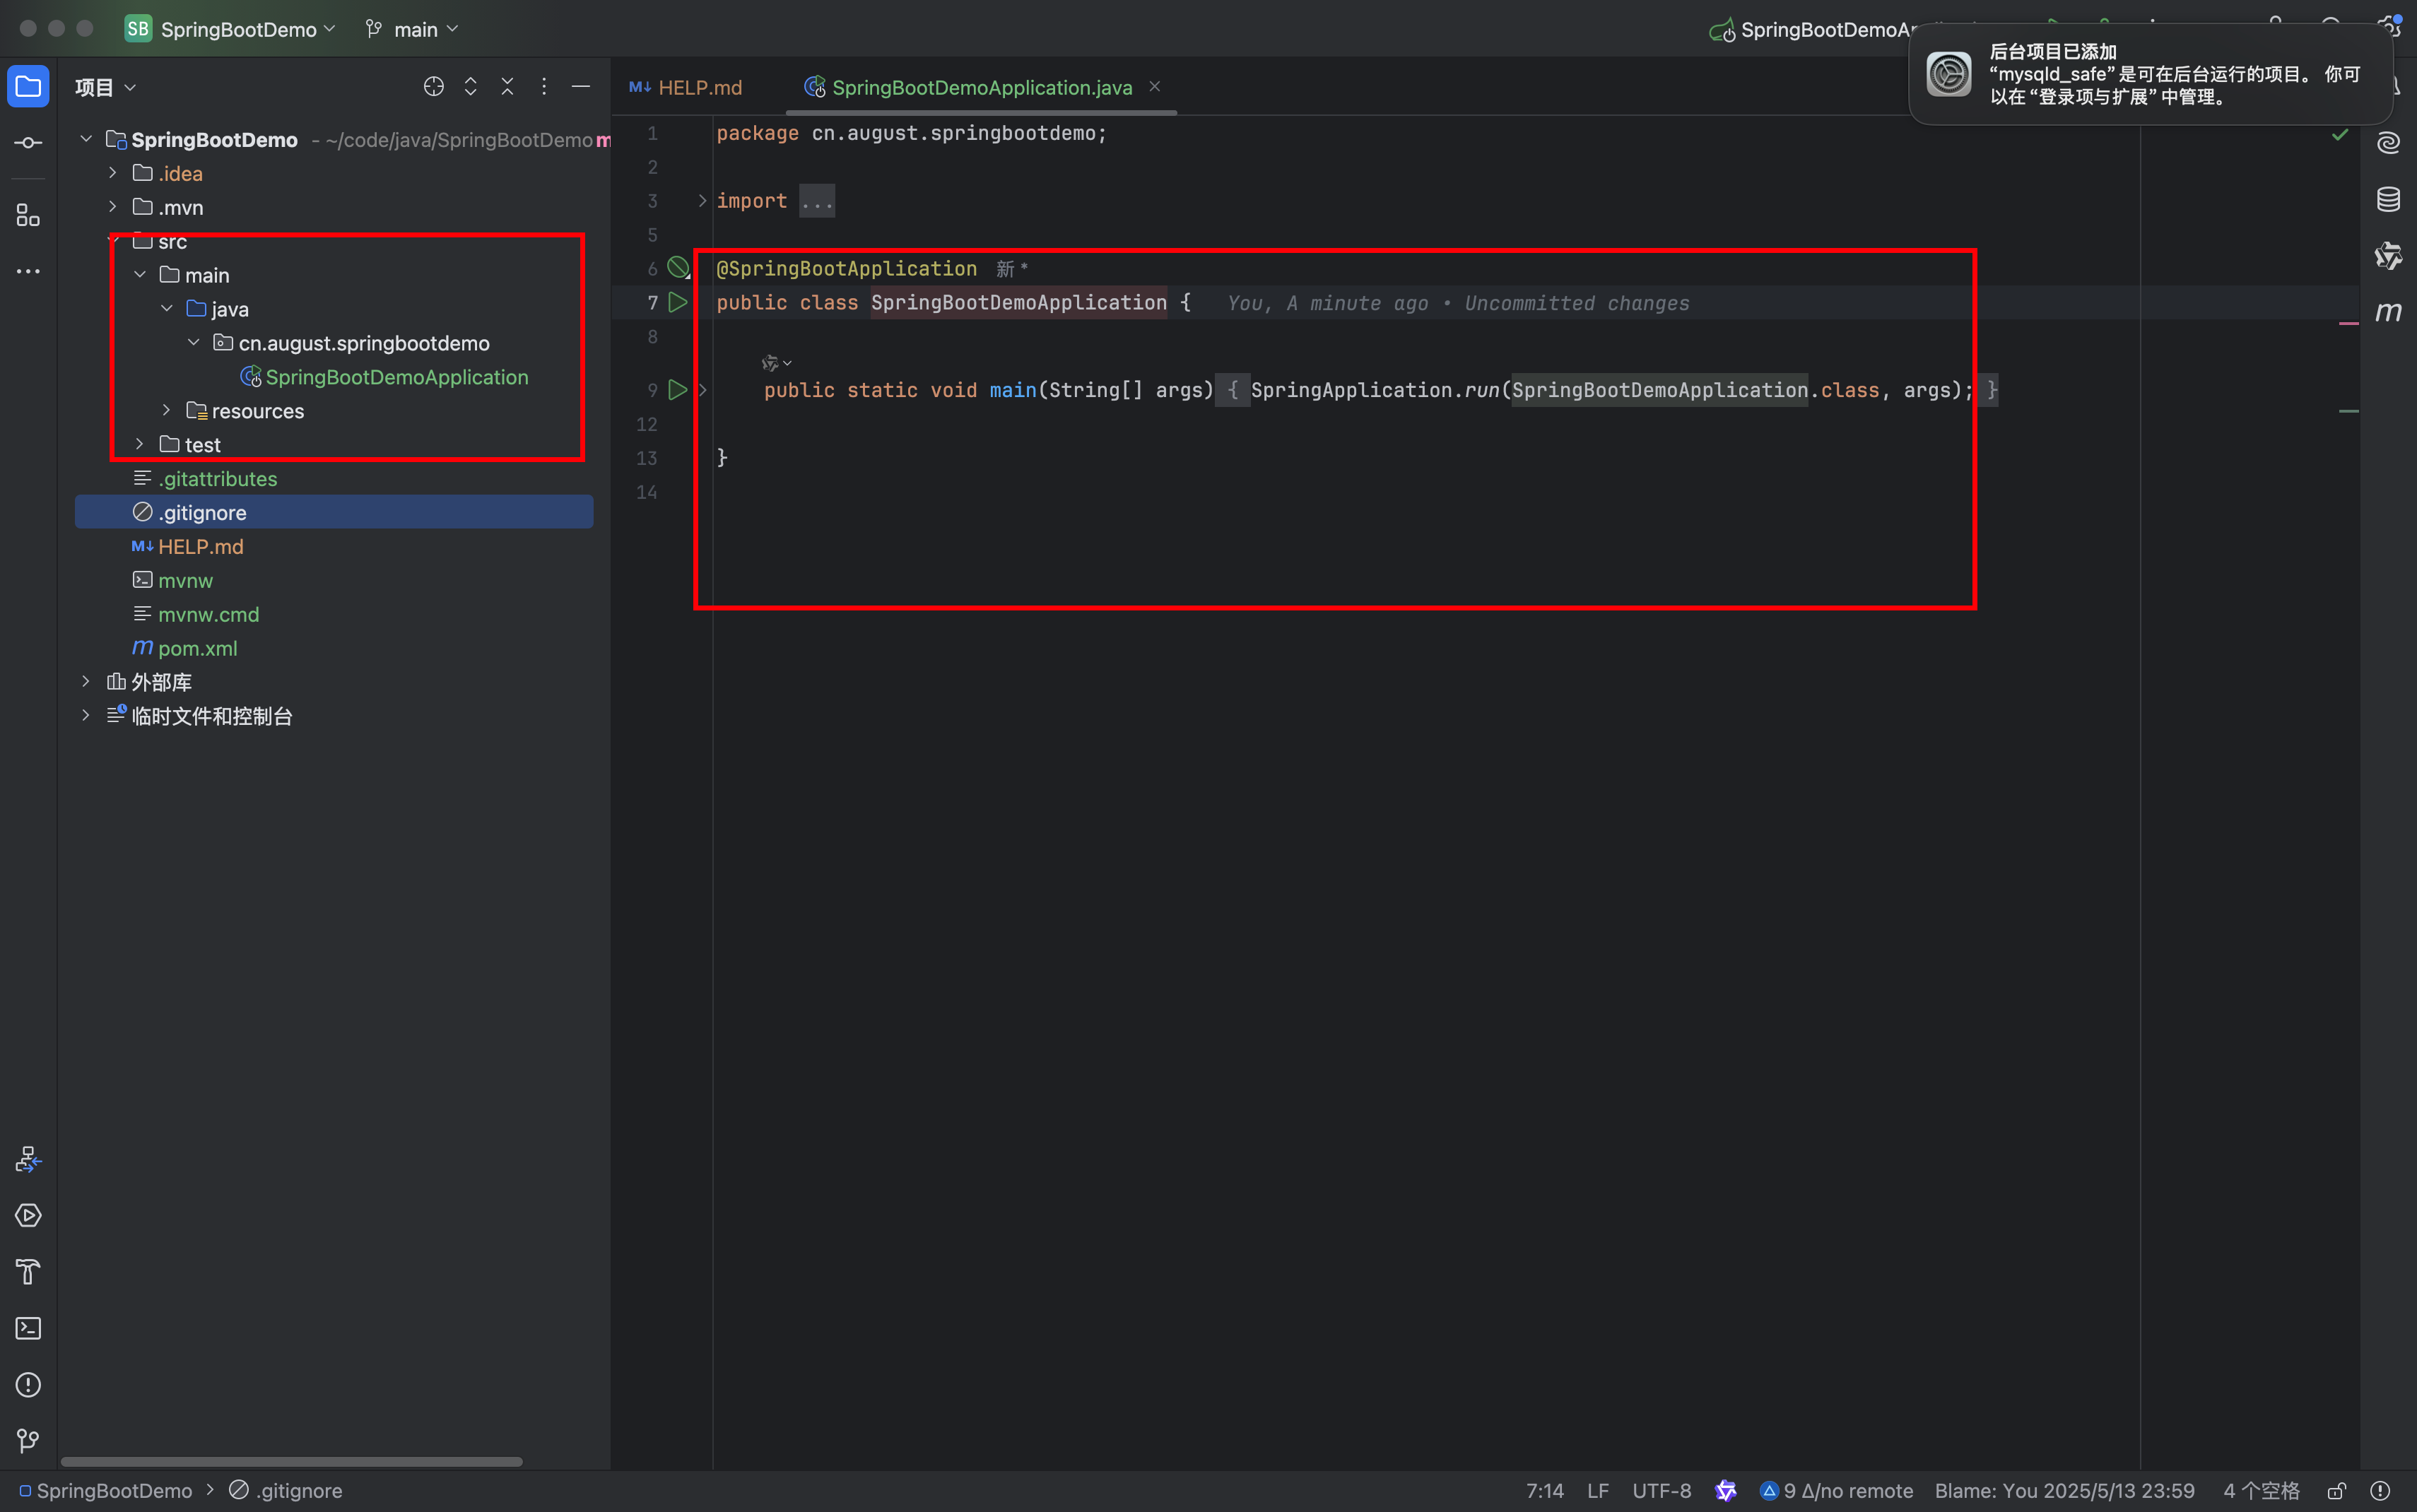
简单的项目结构

controller(访问控制层)
处理 HTTP 请求,接收客户端参数,调用 Service 层处理业务逻辑,并返回响应结果给客户端。
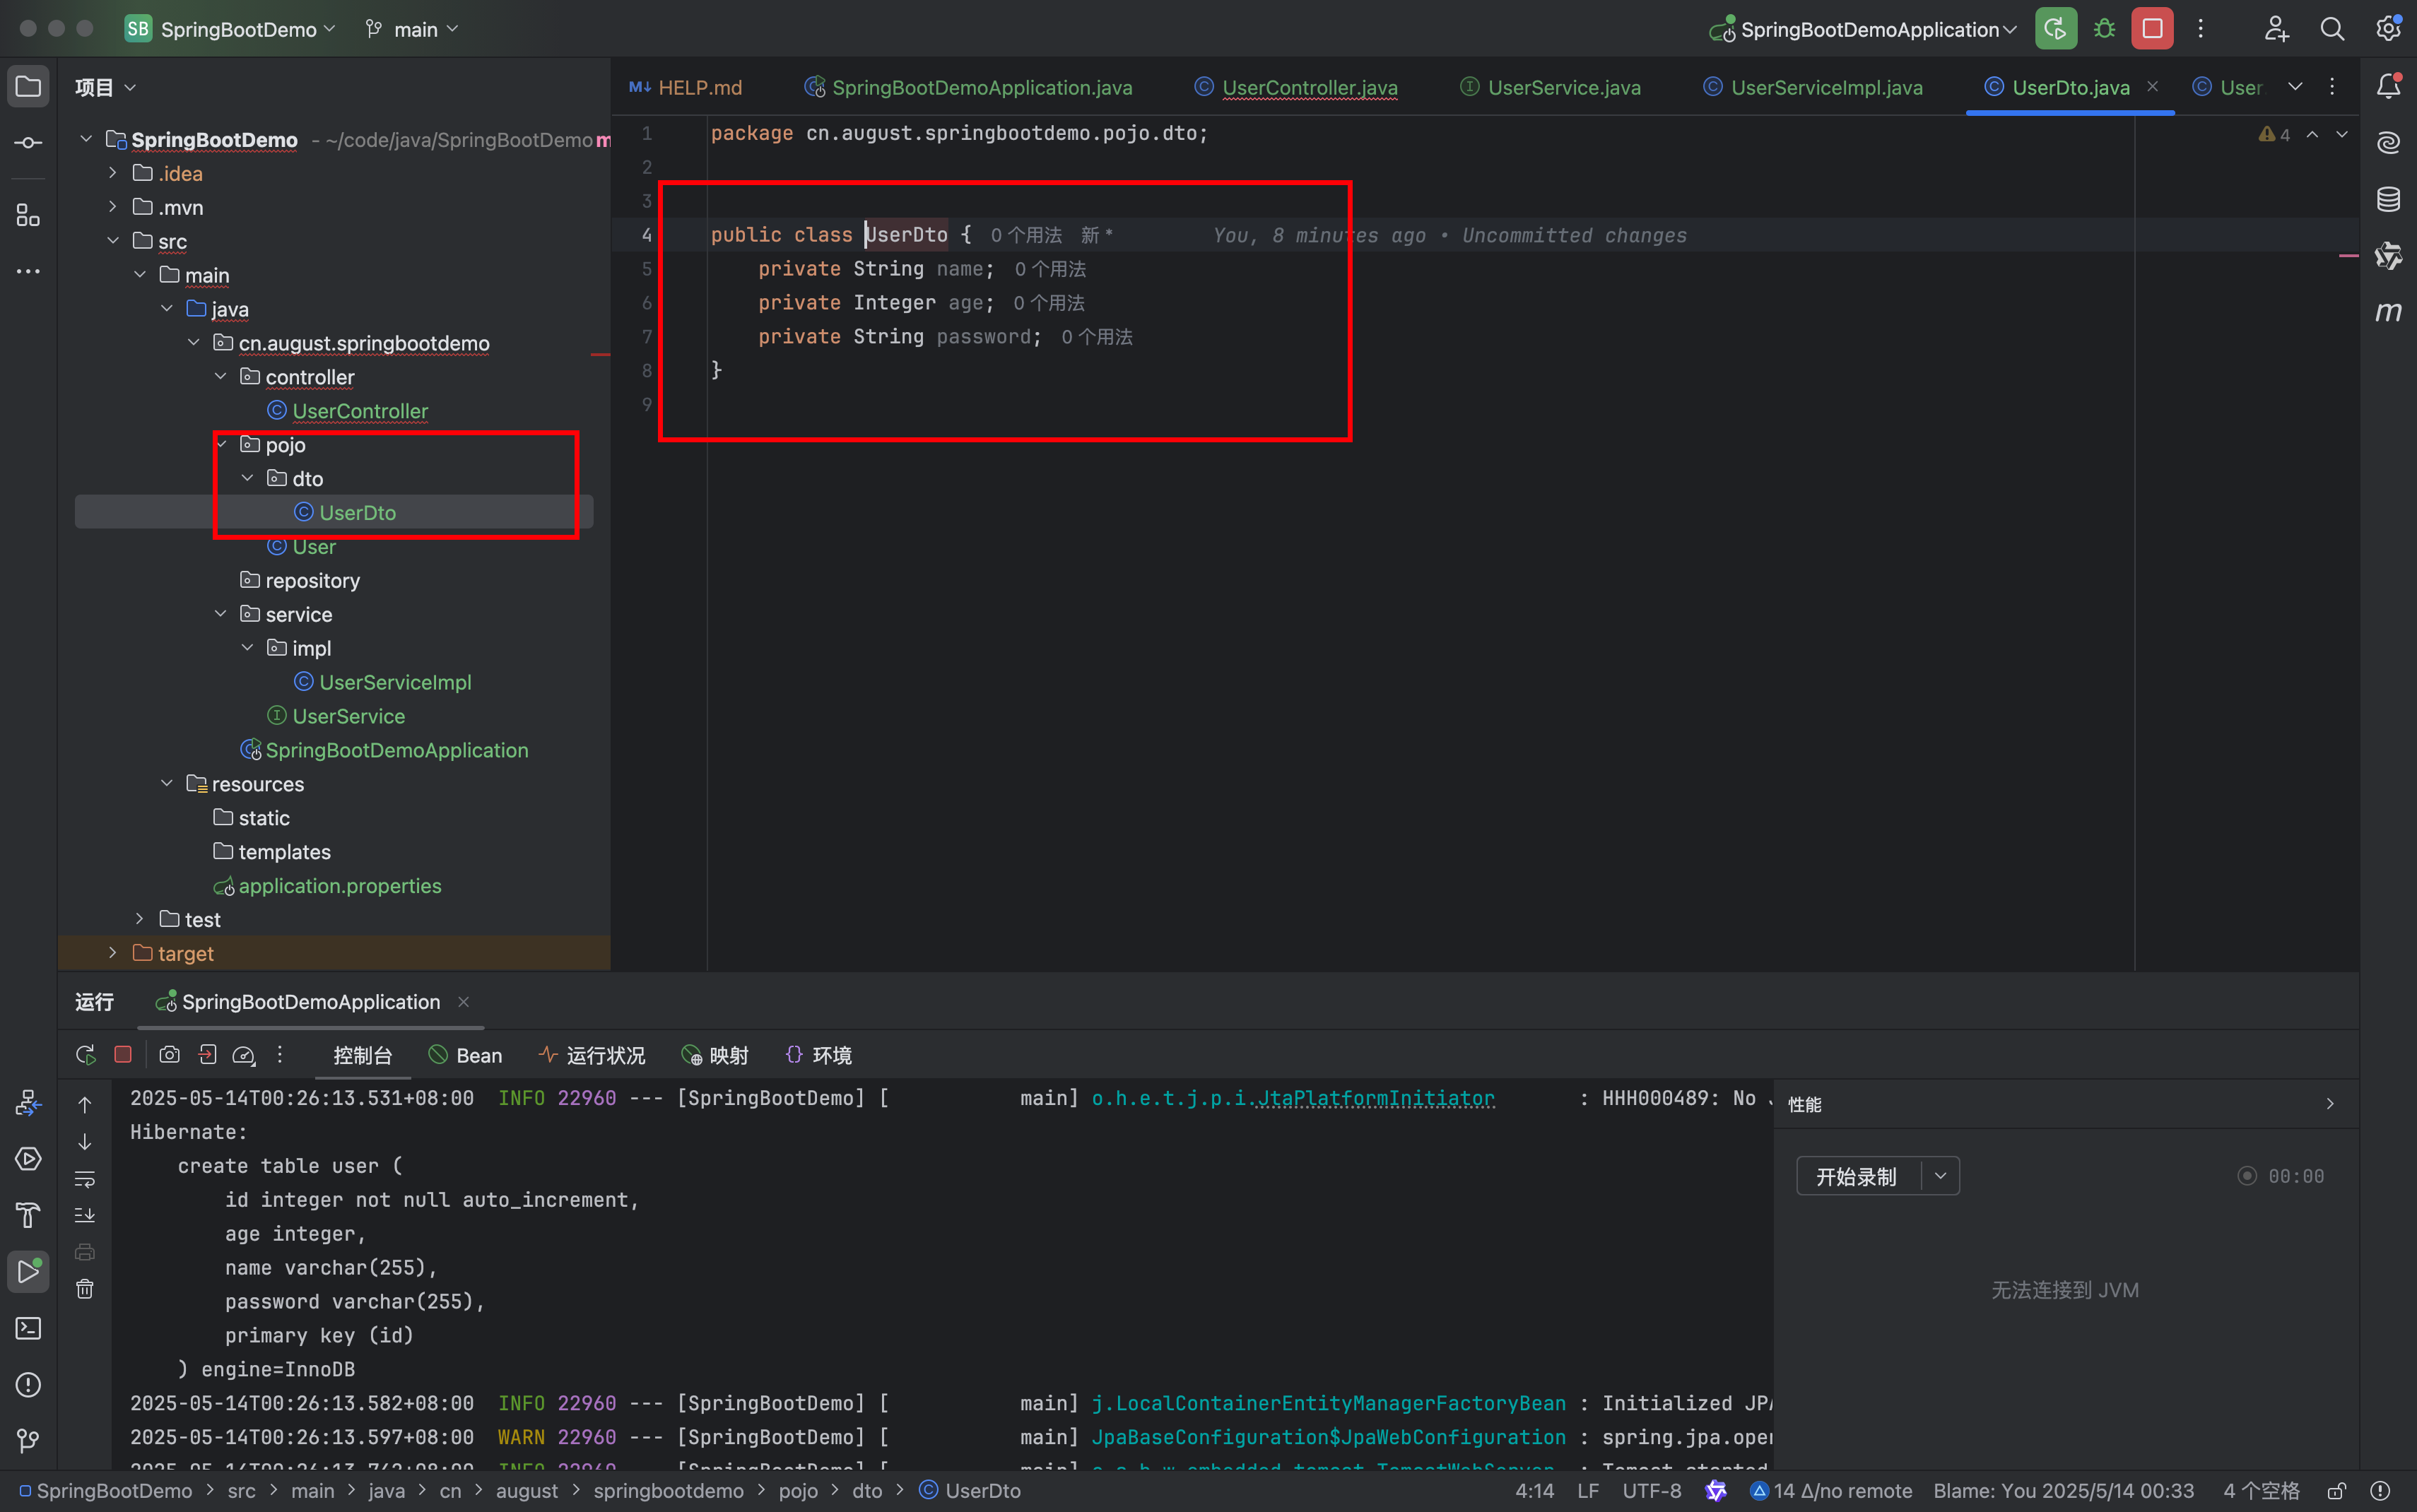
pojo(Plain Old Java Object)
定义数据模型,包括实体类(Entity)和数据传输对象(DTO)。
repository(数据访问层)
与数据库交互,提供数据持久化操作(增删改查)。
service(业务逻辑层)
实现核心业务逻辑,协调 Repository 层完成数据操作,并处理事务、权限等。
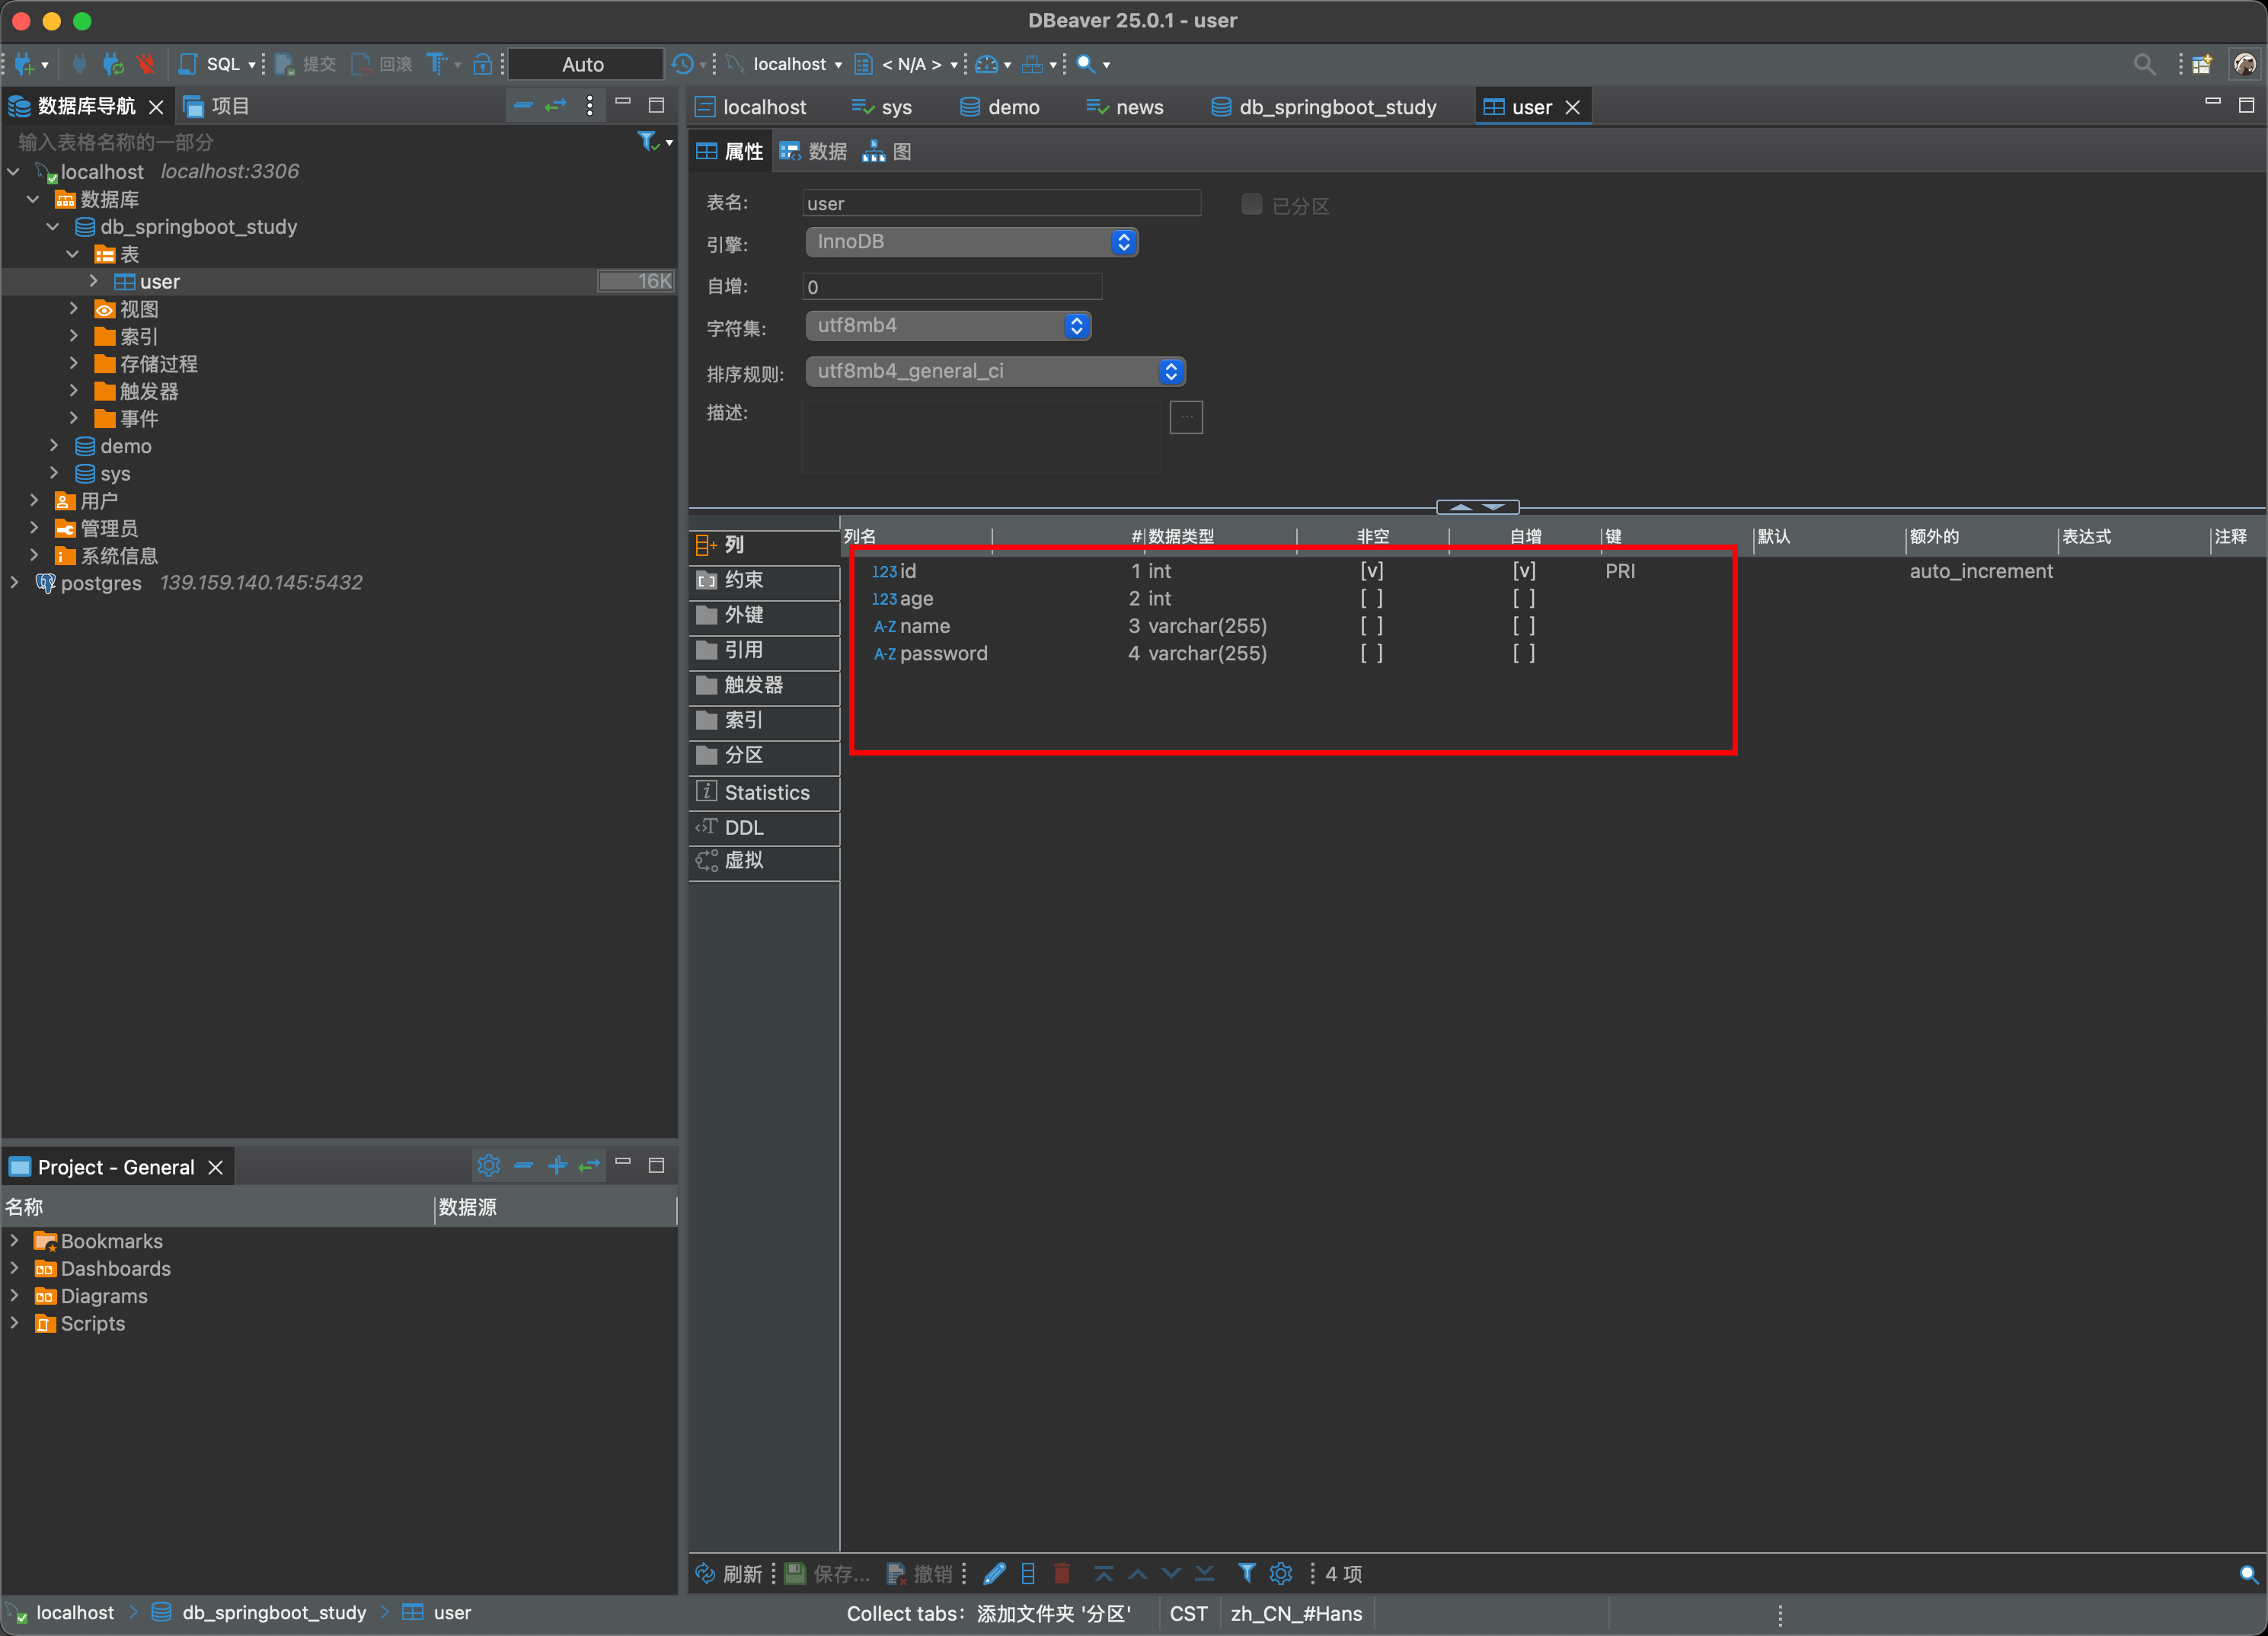
编写数据库表
在pojo 软件包中
添加User.class
1
2
3
4
5
6
7
8
9
10
11
12
13
14
15
16
17
18
19
20
21
22
23
24
25
26
27
28
29
30
31
32
33
34
35
36
37
38
39
40
41
42
43
44
45
46
47
48
49
50
51
52
53
54
55
56
57
58
59
60
61
62
| package cn.august.springbootdemo.pojo;
import jakarta.persistence.*;
@Table(name = "user")
@Entity
public class User {
@Id
@GeneratedValue(strategy = GenerationType.IDENTITY)
@Column(name = "id")
private Integer id;
@Column(name = "name")
private String name;
@Column(name = "age")
private Integer age;
@Column(name = "password")
private String password;
public void setId(Integer id) {
this.id = id;
}
public void setName(String name) {
this.name = name;
}
public void setAge(Integer age) {
this.age = age;
}
public void setPassword(String password) {
this.password = password;
}
public Integer getId() {
return id;
}
public String getName() {
return name;
}
public Integer getAge() {
return age;
}
public String getPassword() {
return password;
}
@Override
public String toString() {
return "User{" +
"id=" + id +
", name='" + name + '\'' +
", age=" + age +
", password='" + password + '\'' +
'}';
}
}
|
由于我们使用了配置
1
| spring.jpa.hibernate.ddl-auto=update
|
那么在启动的时候自动更新这个表。没有就创建
编写逻辑
AddUser
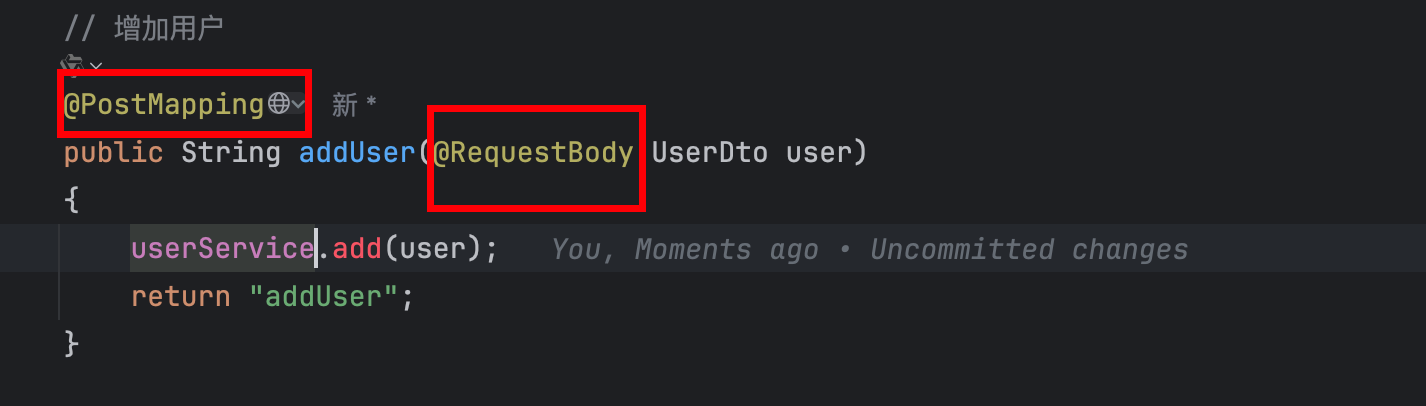
这个地方add 函数先忽略
使用post 作为请求方法
将UserDto 作为接受参数
UserDto 在这里的作用可以理解成go zero 中go api 层的传入,但是这个不能由表结构接受。因为可能字段不一样
1
2
3
4
5
6
7
8
9
10
11
12
13
14
15
16
17
18
19
20
21
22
23
24
25
26
27
28
29
30
31
32
33
| package cn.august.springbootdemo.pojo.dto;
public class UserDto {
public String getName() {
return name;
}
public void setName(String name) {
this.name = name;
}
public Integer getAge() {
return age;
}
public void setAge(Integer age) {
this.age = age;
}
public String getPassword() {
return password;
}
public void setPassword(String password) {
this.password = password;
}
private String name;
private Integer age;
private String password;
}
|
然后创建service
UserService.class
1
2
3
4
5
| package cn.august.springbootdemo.service;
public interface UserService {
}
|
UserServiceImpl.class
1
2
3
4
5
6
7
8
9
10
11
| package cn.august.springbootdemo.service.impl;
import cn.august.springbootdemo.pojo.dto.UserDto;
import cn.august.springbootdemo.service.UserService;
import org.springframework.stereotype.Service;
@Service
public class UserServiceImpl implements UserService {
}
|
添加了Service 注解之后在controller 添加
1
2
| @Autowired
UserService userService;
|
迄今为止全部代码
1
2
3
4
5
6
7
8
9
10
11
12
13
14
15
16
17
18
19
20
21
22
23
24
25
26
27
28
29
30
31
32
33
| package cn.august.springbootdemo.controller;
import cn.august.springbootdemo.pojo.dto.UserDto;
import cn.august.springbootdemo.service.UserService;
import cn.august.springbootdemo.service.impl.UserServiceImpl;
import org.springframework.beans.factory.annotation.Autowired;
import org.springframework.web.bind.annotation.PostMapping;
import org.springframework.web.bind.annotation.RequestBody;
import org.springframework.web.bind.annotation.RequestMapping;
import org.springframework.web.bind.annotation.RestController;
@RestController
@RequestMapping("/user")
public class UserController {
@Autowired
UserService userService;
@PostMapping
public String addUser(@RequestBody UserDto user)
{
userService.add(user);
return "addUser";
}
}
|
由于这个地方add 爆红,直接组织爆红!
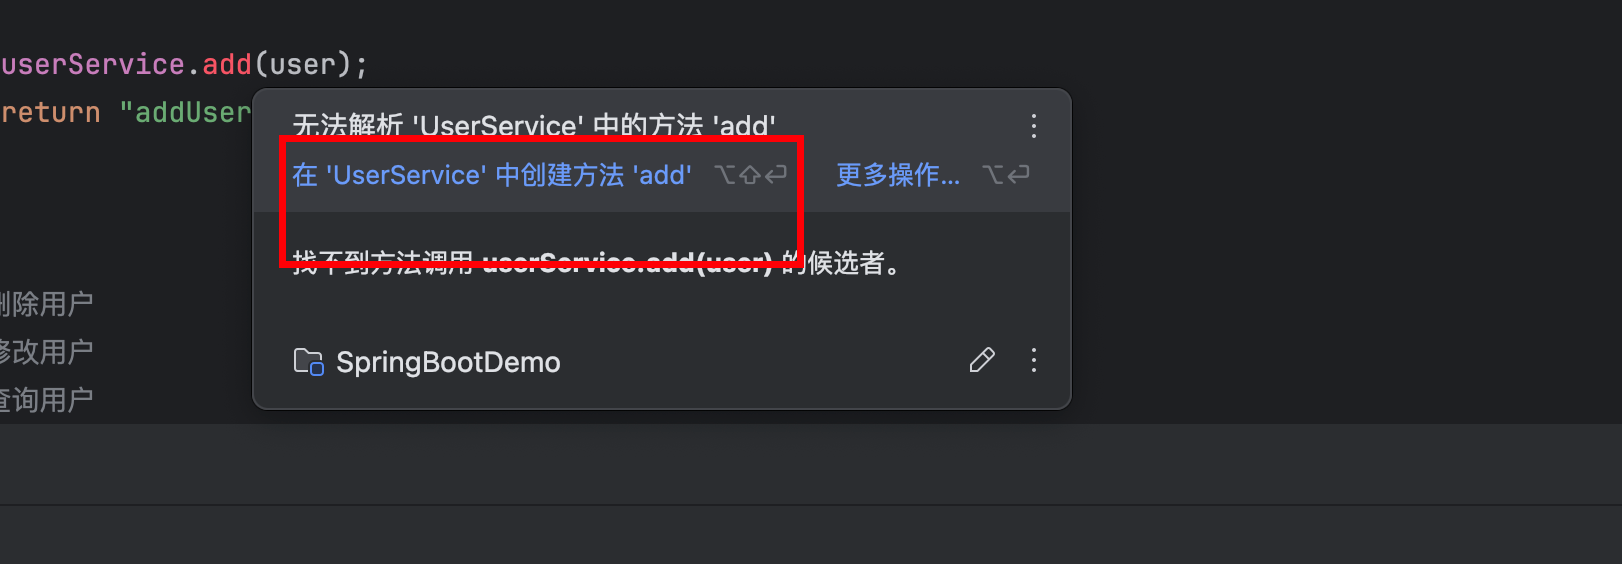
UserService.java
1
2
3
4
5
6
7
8
9
10
11
12
| package cn.august.springbootdemo.service;
import cn.august.springbootdemo.pojo.dto.UserDto;
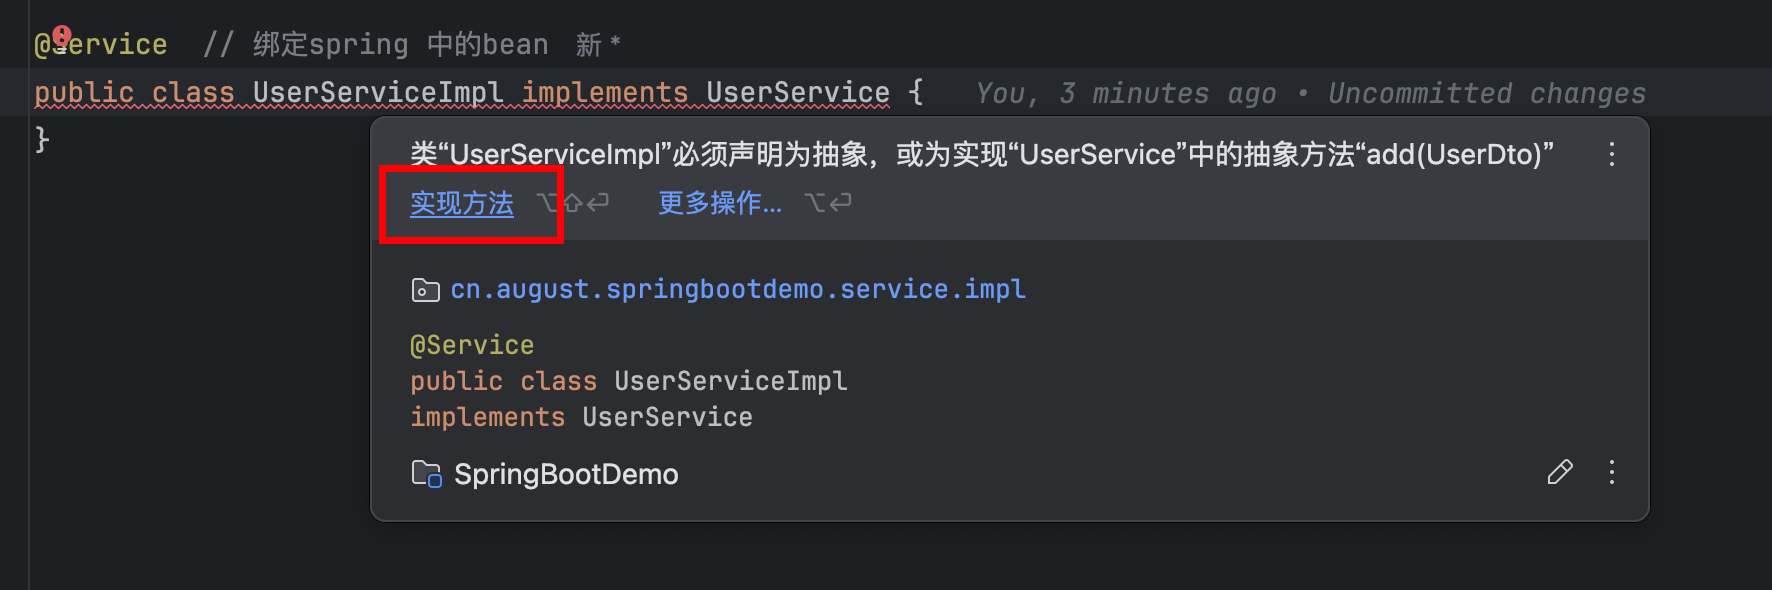
public interface UserService {
void add(UserDto user);
}
|
UserServiceImpl.java
1
2
3
4
5
6
7
8
9
10
11
12
13
14
15
| package cn.august.springbootdemo.service.impl;
import cn.august.springbootdemo.pojo.dto.UserDto;
import cn.august.springbootdemo.service.UserService;
import org.springframework.stereotype.Service;
@Service
public class UserServiceImpl implements UserService {
@Override
public void add(UserDto user) {
}
}
|
到这一步需要在数据库中操作了,比如添加一个用户
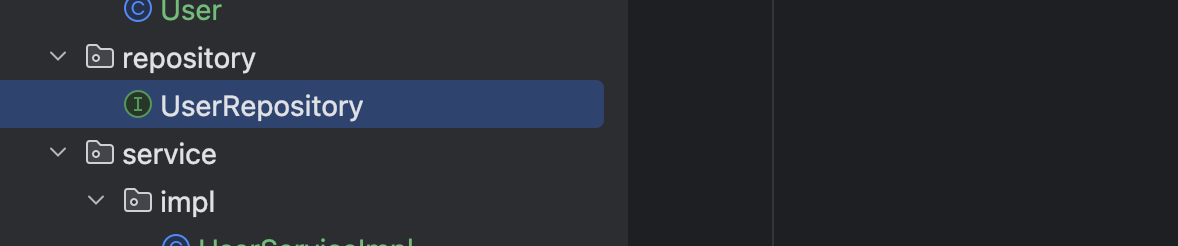
需要添加一个repository
UserRepository.class
1
2
3
4
5
6
7
8
9
10
11
| package cn.august.springbootdemo.repository;
import cn.august.springbootdemo.pojo.User;
import org.springframework.data.repository.CrudRepository;
import org.springframework.stereotype.Repository;
@Repository
public interface UserRepository extends CrudRepository<User, Integer> {
}
|
在回到UserServiceImpl 进行装在
1
2
3
4
5
6
7
8
9
10
11
12
13
14
15
16
17
18
19
20
21
22
23
24
25
| package cn.august.springbootdemo.service.impl;
import cn.august.springbootdemo.pojo.User;
import cn.august.springbootdemo.pojo.dto.UserDto;
import cn.august.springbootdemo.repository.UserRepository;
import cn.august.springbootdemo.service.UserService;
import org.springframework.beans.BeanUtils;
import org.springframework.beans.factory.annotation.Autowired;
import org.springframework.stereotype.Service;
@Service
public class UserServiceImpl implements UserService {
@Autowired
private UserRepository userRepository;
@Override
public User add(UserDto user) {
User userPojo = new User();
BeanUtils.copyProperties(user,userPojo);
return userRepository.save(userPojo);
}
}
|
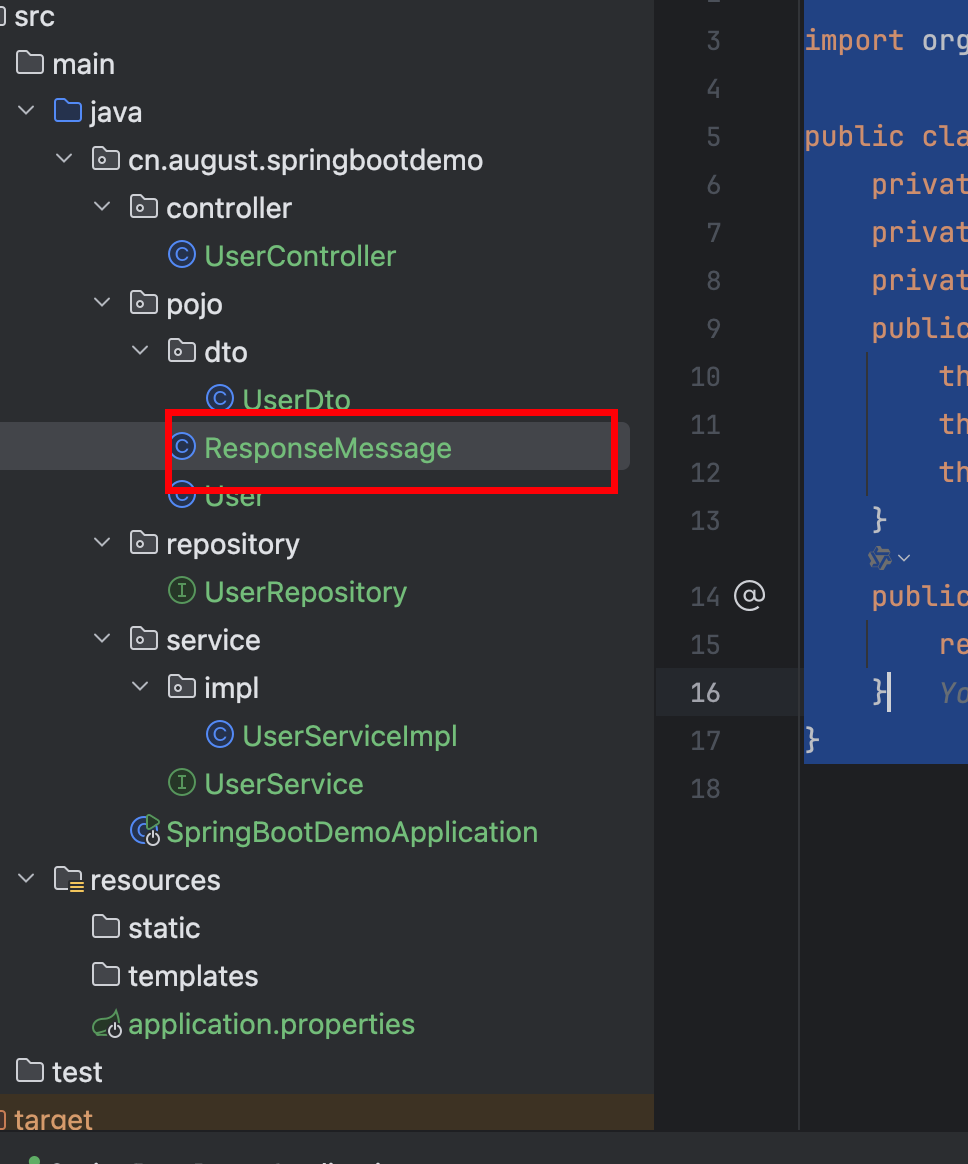
创建一个响应的结构
1
2
3
4
5
6
7
8
9
10
11
12
13
14
15
16
17
18
| package cn.august.springbootdemo.pojo;
import org.springframework.http.HttpStatus;
public class ResponseMessage<T> {
private Integer code;
private String message;
private T data;
public ResponseMessage(Integer code, String message, T data) {
this.code = code;
this.message = message;
this.data = data;
}
public static <T> ResponseMessage<T> success(T data){
return new ResponseMessage<T>(HttpStatus.OK.value(),"success",data);
}
}
|
修改controller
1
2
3
4
5
6
7
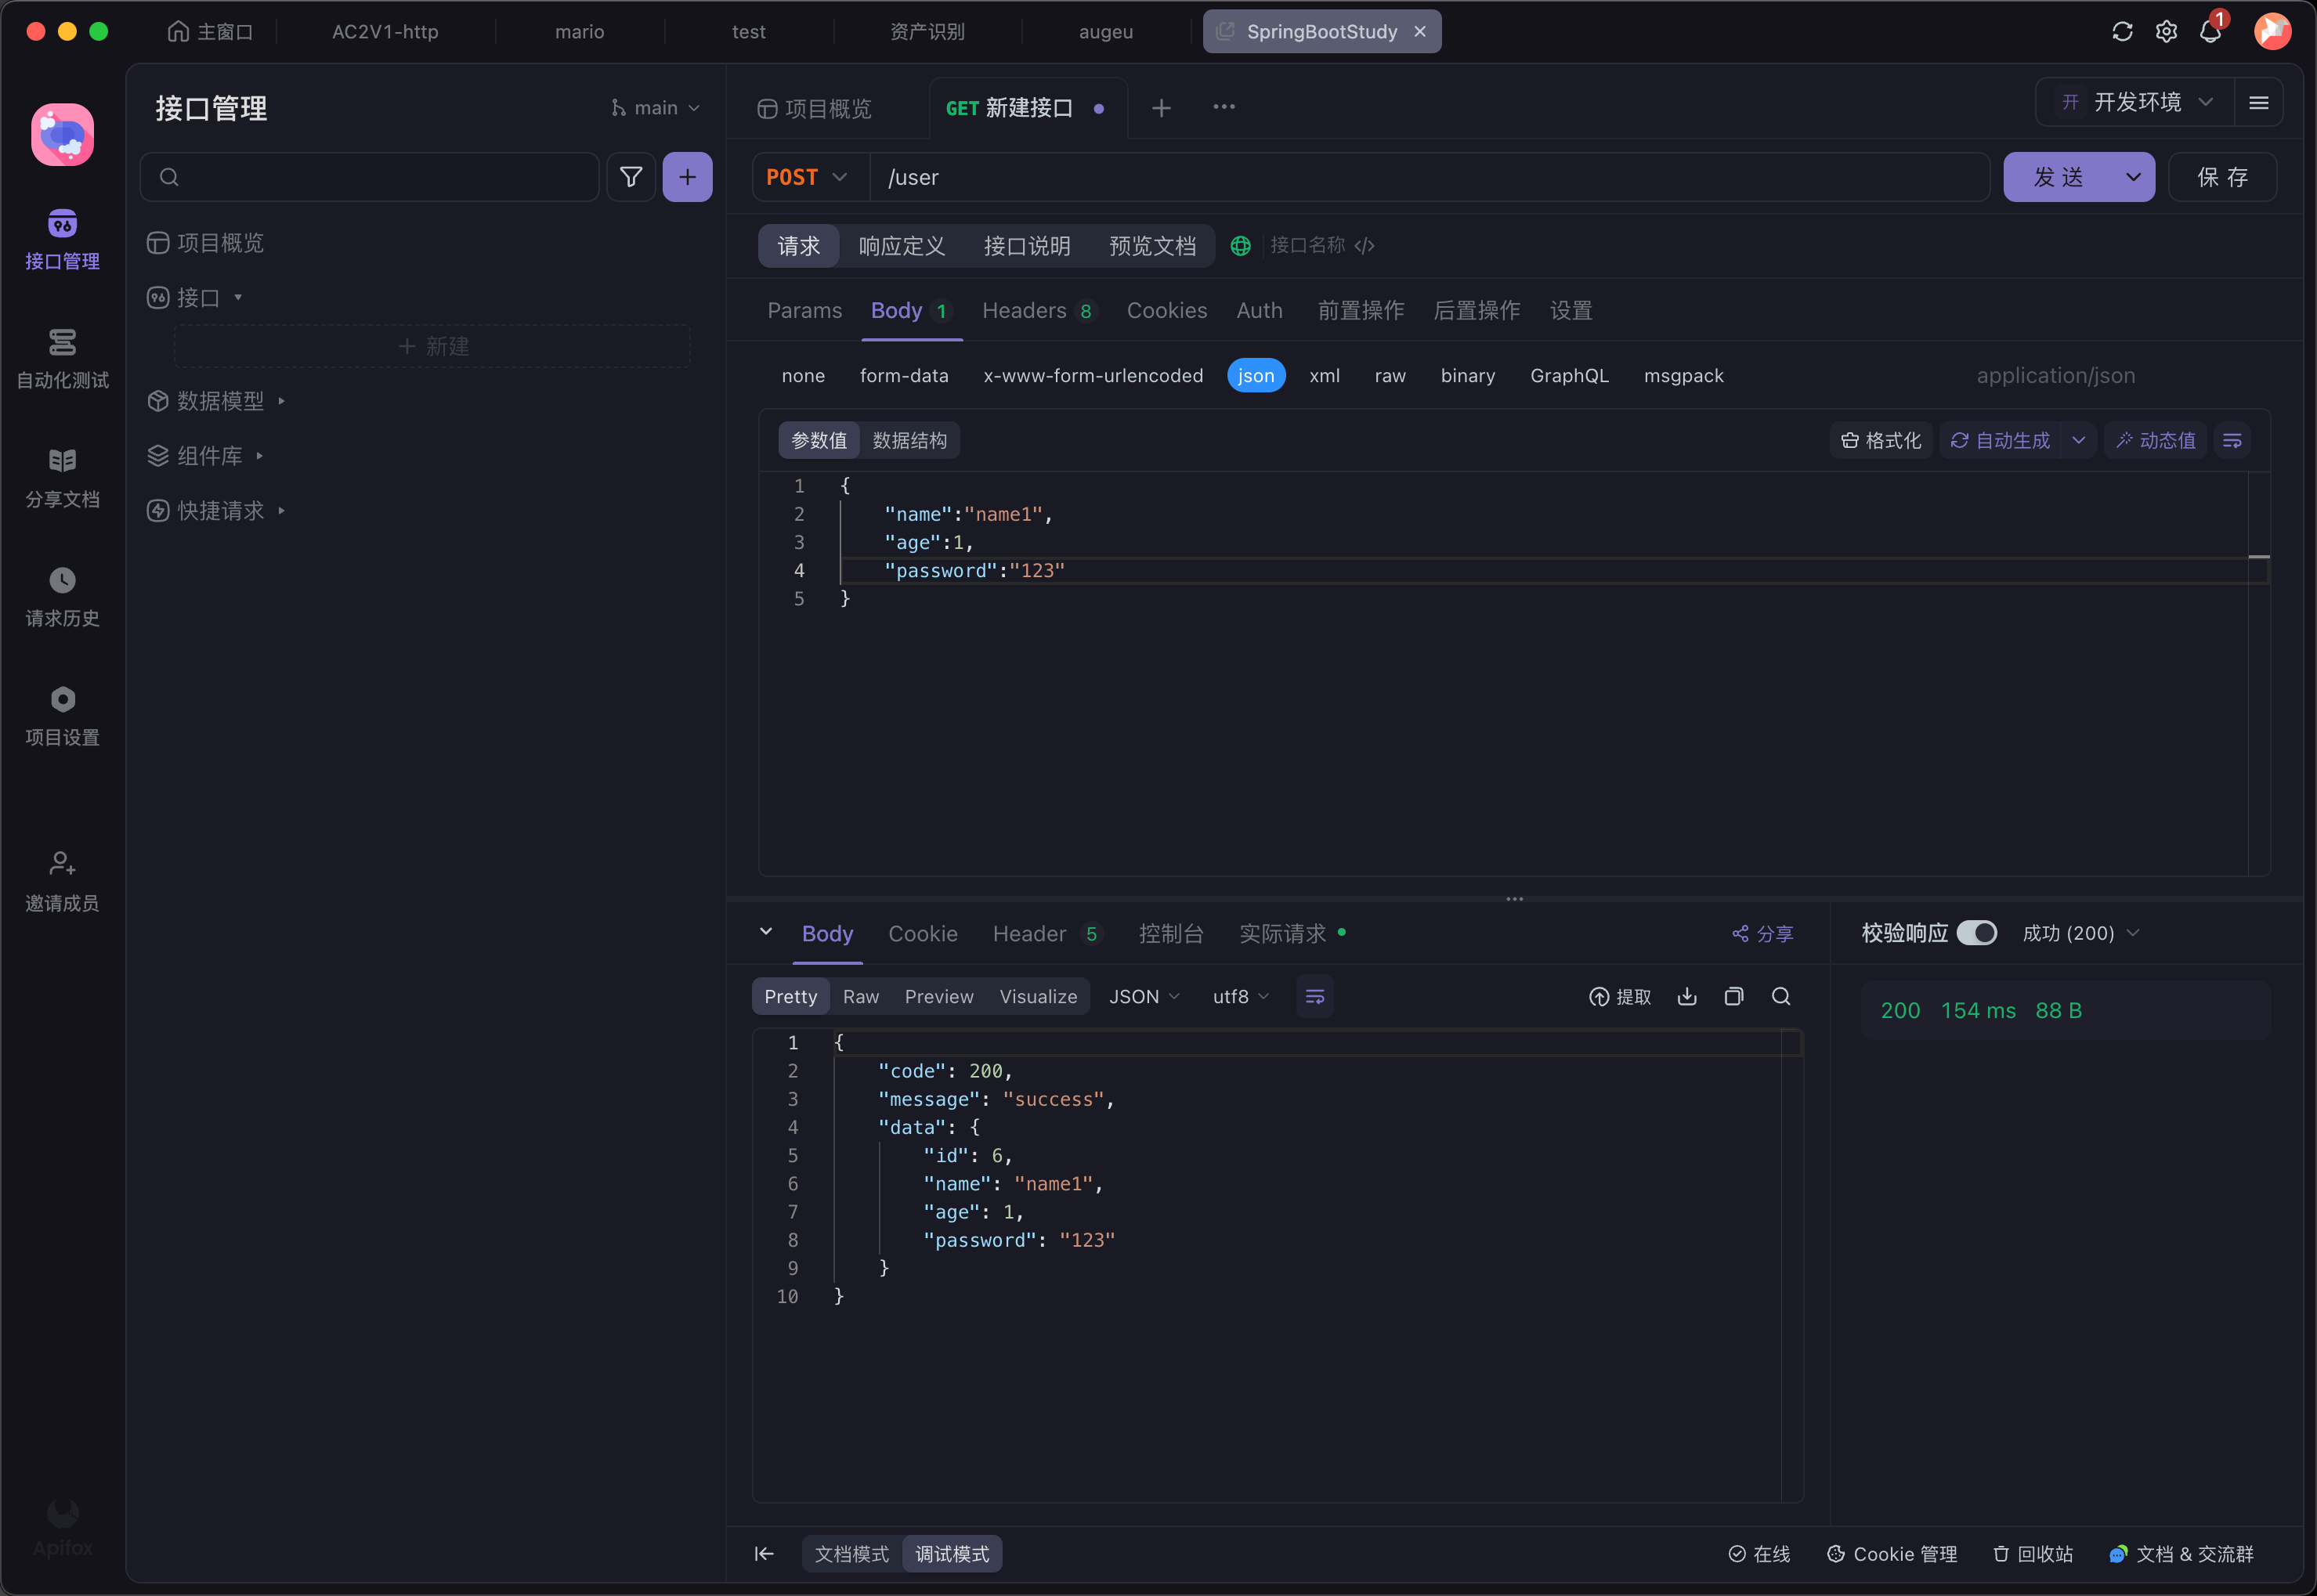
| @PostMapping
public ResponseMessage<User> addUser(@RequestBody UserDto user)
{
User newUser=userService.add(user);
return ResponseMessage.success(newUser);
}
|
发送请求
引入参数验证库
1
2
3
4
| <dependency>
<groupId>org.springframework.boot</groupId>
<artifactId>spring-boot-starter-validation</artifactId>
</dependency>
|
然后在dto 添加 注解
1
2
3
4
5
6
7
8
9
| @NotBlank(message = "用户名不能为空")
private String name;
@NotBlank(message = "年龄不能为空")
private Integer age;
@NotBlank(message = "密码不能为空")
private String password;
@Email(message = "邮箱格式错误")
private String email;
|
然后在controller
1
2
3
4
5
6
| @PostMapping
public ResponseMessage<User> addUser(@Validated @RequestBody UserDto user)
{
User newUser=userService.add(user);
return ResponseMessage.success(newUser);
}
|
添加统一异常处理器通知