python学习计划
23_9_22
python版本推荐3.8和2,7最好都安装
用着挺方便的,反正不要太新了
搭建vscode环境
https://zhuanlan.zhihu.com/p/165379391
我的文件结构
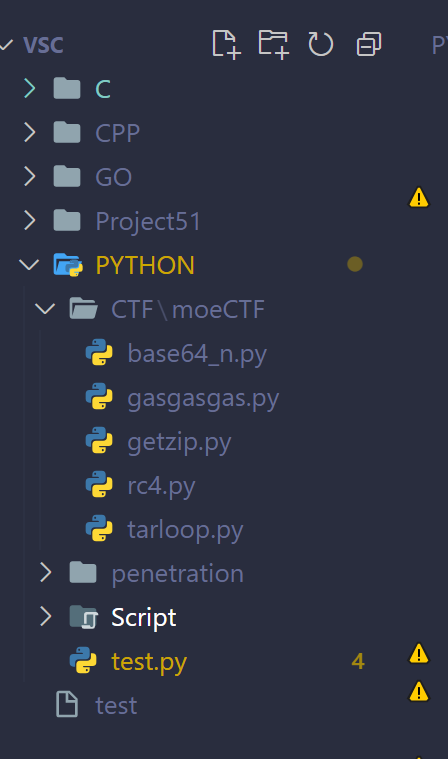
假如我想使用python
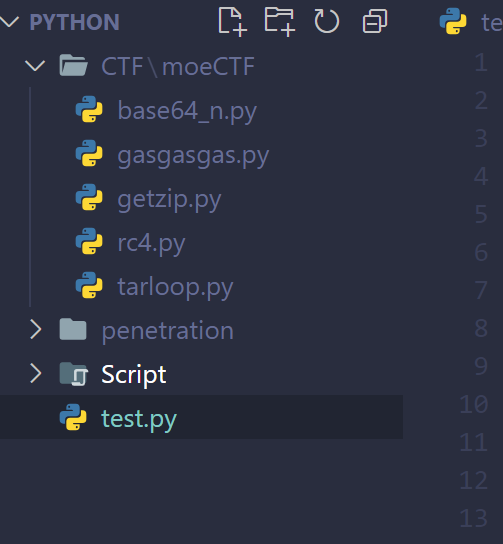
单独打开code就可以了
我是则会么做的,防止了不同环境的混用,乱
安装ipython
相比于命令行还是好用很多,这个是睿那里偷的
不知道你有没有,反正我把我知道推荐给你
https://blog.csdn.net/weixin_39526564/article/details/113627531
23_9_23
语言学习
尝试以下代码
ipython
1
import this我反正是看不懂英语
1
2
3
4
5
6
7
8
9
10
11
12
13
14
import turtle
turtle.pensize(4)
turtle.pencolor('red')
turtle.forward(100)
turtle.right(90)
turtle.forward(100)
turtle.right(90)
turtle.forward(100)
turtle.right(90)
turtle.forward(100)
turtle.mainloop()挺有趣的,挺强大的
了解变量的命名
回答问题
- __实例属性用单个下划线开头
- __实例属性用两个下划线开头
类型与检查
Python中可以使用
type函数对变量的类型进行检查1
2
3
4
5
6
7
8
9
10
11
12a = 100
b = 12.345
c = 1 + 5j
d = 'hello, world'
e = True
print(type(a)) # <class 'int'>
print(type(b)) # <class 'float'>
print(type(c)) # <class 'complex'>
print(type(d)) # <class 'str'>
print(type(e)) # <class 'bool'>如何经行类型转换?
运算符
- 取下标:
- 切片:
- 按位取反, 正负号:
- 乘,除,模,整除:
- 加,减:
- 右移,左移:
- 按位与:
- 按位异或,按位或:
- 小于等于,小于,大于,大于等于:
- 等于,不等于:
- 身份运算符:
- 成员运算符:
- 逻辑运算符:
项目
虽然看起来很简单,但是还是做一下
- 输入半径计算圆的面积
23_9_24
复习
- 找出一段(1000-…)时间的闰年
- 二分查找循序表
if-else
项目
将成绩换成等级
如果输入的成绩在90分以上(含90分)输出A;80分-90分(不含90分)输出B;70分-80分(不含80分)输出C;60分-70分(不含70分)输出D;60分以下输出E。
23_9_27
生成斐波那契数列的前20个数。
尝试使用递归和循环分别构造
尝试定义函数函数
1
2
3
4if __name__ =='__mian__' #理解为主函数
def function_name #注意命名规范这个我还没写,可以等我写了,你在做
23_9_28
尝试使用可变参数函数写一个加法器
关键词:
*args使用model
可以理解为C语言的头文件
写一个两个model里面有两个func(*args)的程序
第一个func为减法
第二个func为加法
23_10_5
抱歉,因为我的问题,把你的学习时间拉长了
- 原谅(哈哈哈哈)
- 判断是不是回文数
- 判断是不是素数
23_10_6
使用这行的字符串打印静夜诗(意思一下就行,重点再折行也就是使用
""")学习使用
\表示8进制和16进制\u八进制\x十六进制学习字符串的相关符号
in
not in
[]
[:]
学习字符串的操作
- 计算长度
- 获得==全部大写==的拷贝
- 查找,返回下标
- 是否是数字构成
1
2
3
4
5len()
upper()
find()
isdigit()格式化字符串
23_10_7
使用列表
定义列表可以将列表的元素放在
[]list1 = [1, 3, 5, 7, 100]
看一个比较东西:
list1=[‘hello’]
list2=list1*3
print(list2) # [‘hello’, ‘hello’, ‘hello’]
1
2
3
4
5
6
7
8
9
10
11
12
13
14
15
16
17
18
19
20
21
22
23
24
25
26
27
28
29
30
31
32
33
34
35
36
37
38下标(索引)运算
print(list1[0]) # 1
print(list1[4]) # 100
# range 循环
for index in range(len(list1)):
print(list1[index])
# 通过for循环遍历列表元素
for elem in list1:
print(elem)
# 通过enumerate函数处理列表之后再遍历可以同时获得元素索引和值
for index, elem in enumerate(list1):
print(index, elem)
# 添加元素
list1.append(200)
list1.insert(1, 400)
# 从指定的位置删除元素
list1.pop(0)
list1.pop(len(list1) - 1)
# 清空列表元素
list1.clear()
# 列表切片
fruits2 = fruits[1:4]可以尝试其他的东西,我觉得用的多的就是这些
23_10_8
今天学习一下生成器
生成器
1
2f = [x for x in range(1, 10)]
f = [x + y for x in 'ABCDE' for y in '1234567']
23_10_12
一不小心都这么久没给你布置任务了….
再次道歉
今天学习元组+项目练手
跑马灯
1
2
3
4
5
6
7
8
9
10import os
import time
string = "四川成都欢迎你!"
while True:
os.system("cls")
print(string)
time.sleep(0.2)
string = string[1:] + string[0]生成指定的长度的随机数
1
2
3
4
5
6
7
8
9
10
11
12import random
passwd_len = 10
all_chars = "0123456789abcdefghijklmnopqrstuvwxyzABCDEFGHIJKLMNOPQRSTUVWXYZ"
passwd = ""
for i in range(passwd_len):
index = random.randint(0, len(all_chars) - 1) # 想想为什么减一嘞
passwd += str(all_chars[index])
print(passwd)元组
元组与列表类似
不同之处在于元组的元素不能修改
1
2
3# 定义元组
t = ('wx','四川成都',1,False)
# 除了1,2有意思其他的没有哈哈哈获取元组的值
便于元组
转换成列表
1
list()
23_10_13
完成下面这个
这个是一道经典算法
1
2
3
4"""
《幸运的基督徒》
有15个基督徒和15个非基督徒在海上遇险,为了能让一部分人活下来不得不将其中15个人扔到海里面去,有个人想了个办法就是大家围成一个圈,由某个人开始从1报数,报到9的人就扔到海里面,他后面的人接着从1开始报数,报到9的人继续扔到海里面,直到扔掉15个人。由于上帝的保佑,15个基督徒都幸免于难,问这些人最开始是怎么站的,哪些位置是基督徒哪些位置是非基督徒。
"""
23_10_15
开始学习面向对象
经过java的学习,你应该知道什么是面向对象,所以对思想我就不再细说了,开始尝试学习在python运用这种思想
直接看这段代码
1
2
3
4
5
6
7
8
9
10
11
12
13
14
15
16
17
18
19
20
21
22
23
24
25
26
27
28
29
30
31# 类名大写
class Student:
# 构造函数,可以理解为构造器
# name,age作为成员变量
def __init__(self, name, age, sno):
self.name = name # 理解尾public
self.__age = age # 理解为private
self.__sno = sno # 理解为private
# 由于python没有私有这一说,添加_只是一种较为合理的代码风格,表面是私有,我们通过方法却能访问
# 我喜欢驼峰命名法
def getName(self):
return self.name
# 貌似这种命名python更加喜欢
def set_name(self, name):
self.name = name
# 类的实例化
wx = Student("wx", 19, "2022125008")
print(wx.getName())
print(wx.name)
wx.set_name("wen")
print(wx.getName())
print(wx.getAge())
# 访问age私有变量
print(wx._Student__age)练习定义点(Point)类
成员:x,y
方法:set,get
23_10_16
最近应该都是代码演示有问题提出来
装饰器
1
2
3
4
5
6
7
8
9
10
11
12
13
14
15
16
17
18
19
20
21
22
23
24
25
26
27
28
29
30
31
32
33
34class Student():
def __init__(self,name,age,sex,school) -> None:
# 单下划线强调变量受保护的
self._name=name
self._age=age
self._sex=sex
self._school=school
# 真正的getter
@property
def name(self):
return self._name
@property # 可以使用object.name而不需要使用()
def age(self):
return self._age
@name.setter # 创建了property才能使用
def name(self,name):
self._name=name
@age.setter
def age(self,age):
self._age=age
wx=Student("wx",19,"w","cuit")
# 由于添加了@property可以像成员变量一样访问,但是更加的安全
print(wx.name)
wx.name="wwxx"
print(wx.name)使用装饰器修改昨天的代码
修改定义点(Point)类
23_10_17
学习继承
继承,作为脚本语言这个用的不是很多(至少是我)
开发用的多
静态方法
这个java里面有默认你知道
1
2
3@staticmethod # 静态方法
def get_age():
return super.__age就是添加了一个修饰
类方法
类方法代表了与类本身信息相关的函数,第一个参数规定了是
cls下面是我理解的用法
1
2
3@classmethod # 类方法
def getClassName(cls):
return cls.__name__ # 返回当前类的名称继承
注意看Student的括号,需要包含父类,也就是需要继承的类
1
2
3
4
5
6
7
8
9
10
11
12
13
14
15
16
17
18
19
20
21
22
23
24
25class Person:
# 限定Person对象只能绑定_name, __age和__sex属性
_slots_ = ("__name", "__age", "__sex")
def __init__(self, name, age, sex) -> None: # 后置返回值
self.__name = name
self.__age = age
self.__sex = sex
class Student(Person):
def __init__(self, name, age, sex, school) -> None:
super().__init__(name, age, sex) # 调用父类的构造函数
self.__school = school
def get_name(self):
return super.__name
@staticmethod # 静态方法
def get_age():
return super.__age
@classmethod # 类方法
def getClassName(cls):
return cls.__name__多态
我们也可以对一个父类函数进行重写,当多个子类的调用同一个方法的结果不一样,这个就是多态(我的理解)
23_10_18
抽象就是虚函数之类的东西
给vscode安装以下
Better Comments
Error Lens
研究代码
1
2
3
4
5
6
7
8
9
10
11
12
13
14
15
16
17
18
19
20
21
22
23
24
25
26
27
28
29
30
31
32
33
34
35
36
37
38
39
40
41
42
43
44
45
46
47
48
49
50
51
52
53
54
55
56
57
58
59
60
61
62
63
64
65
66
67
68
69
70
71
72
73
74
75
76
77
78
79
80
81
82
83
84
85
86
87
88
89
90
91
92
93
94
95
96
97
98
99
100
101
102
103
104
105import abc
# !这里的类一定要导入
class Person(metaclass=abc.ABCMeta):
def __init__(self, name, age):
self.__name = name
self.__age = age
@abc.abstractmethod
def behavior():
pass
@property
def name(self):
return self.__name
@name.setter
def setName(self,name):
self.__name = name
@property
def age(self):
return self.__age
@age.setter
def setAge(self,age):
self.__age = age
class Student(Person):
def __init__(self, name, age, school):
super().__init__(name, age)
self.__school = school
def behavior(self):
print("I'm studying")
@property
def school(self):
return self.__school
@school.setter
def setSchool(self,school):
self.__school = school
def behavior(self):
print("studying")
class Teacher(Person):
def __init__(self, name, age):
super().__init__(name, age)
def behavior(self):
print("teaching")
# !注意观察同样一个函数的输出结果
wx=Student("wx",18,"CUIT")
wx.behavior()
chg=Teacher("chg",18)
chg.behavior()
# ?一些原因我现在使用的是vscode写markdown,可能对python的格式会发生变化
# 23_10_19
首先文件存在的意义就是对数据持久化操作
- [ ] 学习如何打开权限
C语言差不多
| 操作模式 | 具体含义 |
| -------- | -------------------- |
| r | 读权限 |
| w | 写权限(会更新内容) |
| x | 文件存在就会抛出异常 |
| a | 追加模式 |
| b | 二进制模式 |
| t | 文本模式 |
| + | 更新(可读可写) |
老用心了哈哈哈

```python
# ?文件操作学习请注意
# 首先创建一个文本,我们使用'w'模式没有的话就会创建一个
with open("wxLearn.txt", "w") as f:
# 没有的话就会创建一个
inputStr = "wxLearn"
f.write(inputStr)
# !这样使用会自动close
# 普通的使用方法
f = open("wxLearn.txt", "r")
outputStr = f.readline()
print(outputStr)
f.close() # !一定要close
剩下的自己多去敲敲看吧
23_10_21
我感觉基本已经学习完了,后面主要就是开发会使用的了
现在的你可以愉快的敲python了嘛?
进入今天的练习吧
创建一个文件为my_base64.py
写一个抽象类(EnAndDecode)包含两个抽象函数
- encode(str)
- decode(str)
再写一个类base64实现他的方法
1
2
3
4
5
6
7
8
9
10
11
12
13
14
15
16
17
18
19
20
21
22
23
24
25
26
27
28
29
30
31import base64
from abc import abstractclassmethod, ABCMeta
class EnAndDecode(metaclass=ABCMeta):
def __init__(self) -> None:
pass
@abstractclassmethod
def decode():
pass
@abstractclassmethod
def encode():
pass
class Base64(EnAndDecode):
def __init__(self) -> None:
super().__init__()
def encode(string) -> str:
base64_bytes = string.encode("utf-8")
answer = base64.b64encode(base64_bytes)
return answer.decode("utf-8")
def decode(string) -> str:
base64_bytes = string.encode("utf-8")
answer = base64.b64decode(base64_bytes)
return answer.decode("utf-8")
经供参考,写的比我好的人有很多
23_10_22
其实就是一个语句,看下面的代码
base64项目添加异常处理
1
2
3
4
5
6
7
8
9
10
11
12
13
14
15
16
17
18
19
20
21
22
23
24
25
26
27
28
29
30
31
32
33
34
35
36
37
38
39
40
41
42
43
44
45
46
47
48
49
50
51
52
53
54
55
56
57
58
59
60
61
62
63
64
65
66
67
68
69
70
71
72
73
74
75
76
77
78
79
80
81
82
83
84
85
86
87
88
89
90
91
92
93
94
95
96
97
98
99
100
101
102
103
104
105
106
107
108import base64
from abc import abstractclassmethod, ABCMeta
class EnAndDecode(metaclass=ABCMeta):
def __init__(self) -> None:
pass
@abstractclassmethod
def decode():
pass
@abstractclassmethod
def encode():
pass
class Base64(EnAndDecode):
def __init__(self) -> None:
super().__init__()
@staticmethod
def encode(string) -> str:
try:
base64_bytes = string.encode("utf-8")
answer = base64.b64encode(base64_bytes)
return answer.decode("utf-8")
except Exception as e:
# 当运行出错
print(e)
@staticmethod
def decode(string) -> str:
try:
base64_bytes = string.encode("utf-8")
answer = base64.b64decode(base64_bytes)
return answer.decode("utf-8")
except Exception as e:
print(e)
@staticmethod
def encode_n(string, n):
for i in range(n):
try:
base64_bytes = string.encode("utf-8")
answer = base64.b64encode(base64_bytes)
string = answer.decode("utf-8")
except Exception as e:
print(e)
return string
@staticmethod
def decode_n(string):
count = 0
while True:
try:
base64_bytes = string.encode("utf-8")
string = base64.b64decode(base64_bytes)
string = string.decode("utf-8")
count += 1
except Exception as e:
return string, count
def menu():
print(
"""
1. base64加密
2. base64解密
3. base64加密n次
4. base64解密n次"""
)
def getOption():
while True:
option = input("你的选择是什么?:")
try:
option = int(option)
if option in [1, 2, 3, 4]:
return option
else:
print("请输入正确的选项")
except Exception as e:
print("请输入正确的选项")
if __name__ == "__main__":
# 菜单
menu()
# 选项
option = getOption()
if option == 1:
string = input("请输入你要加密的内容:")
print(Base64.encode(string))
elif option == 2:
string = input("请输入你要解密的内容:")
print(Base64.decode(string))
elif option == 3:
string = input("请输入你要加密的内容:")
n = int(input("你要加密几次?:")) # !这里可以做类型检查
print(Base64.encode_n(string, n))
elif option == 4:
string = input("请输入你要解密的内容:")
answer,count=Base64.decode_n(string)
print(f"你的密文一共加密{count}次,结果是:{answer}")
23_10_24
学习多进程
python里面的多进程
unix和linux
使用fork() 来调用系统创建一个进程
这样创建的进程是一个子进程,拷贝的父进程的
但是子进程都存在自己的PID
fork的它可以做到返回两次
在父进程里fork返回的是子进程的PID,在子进程里返回的永远都是0
win
multiprocessing
使用这个model里面的Process创建子进程
并且在这个里面还进行了更高级的封装
进程池(pool) 消息队列(Queue) 管道(Pipe)
下面是一段对比
不适用多进程
1
2
3
4
5
6
7
8
9
10
11
12
13
14
15
16
17
18
19
20
21
22
23
24
25
26from time import time, sleep
# 不使用多进程
def work_out():
start = time()
all = 1
for i in range(1, 100000):
all = all * i
# print(all)
end = time()
print(f"消耗的时间为 :{end-start}\n")
def main():
start = time()
work_out()
work_out()
end = time()
print(f"消耗时间为:{end-start}")
if __name__ == "__main__":
main()消耗的时间为 :2.4721951484680176
消耗的时间为 :2.4349334239959717
消耗时间为:4.907128572463989
使用多进程
1
2
3
4
5
6
7
8
9
10
11
12
13
14
15
16
17
18
19
20
21
22
23
24
25
26
27
28
29
30
31from time import time, sleep
from multiprocessing import Process
# 使用多进程
def work_out():
start = time()
all = 1
for i in range(1, 100000):
all = all * i
# print(all)
end = time()
print(f"消耗的时间为 :{end-start}\n")
def main():
start = time()
p1 = Process(target=work_out)
p1.start()
p2 = Process(target=work_out)
p2.start()
p1.join()
p2.join()
end = time()
print(f"消耗时间为:{end-start}")
if __name__ == "__main__":
main()消耗的时间为 :3.135038137435913
消耗的时间为 :3.1490530967712402
消耗时间为:3.279216766357422
也可以使用subprocess模块中类
创建子进程,然后子进程之间可以访问
我不知道怎么解释,看着有问题问我就行
23_10_30
赶着最后一天,给你分享点东西
反正要上python课你可以结合起来看看,或者到最后一起看
python的网络编程
1
2
3
4
5
6
7
8
9
10
11
12
13
14
15
16
17
18
19from threading import Thread
import requests
class Download(Thread):
def __init__(self, url):
super().__init__()
self.__url = url
def run(self):
fileName = self.__url[self.__url.rfind('/')+1:] # 获取文件名,从左一个/开始后面的
resp = requests.get(self.__url)
with open(fileName, "wb") as f:
f.write(resp.content)
def main():
Download(r"自己的").start() #! 我本来放了我的图床的,但是你是学web的,我怕被你发现了什么神奇的东西哈哈哈
main()
23_11_2
上课弄得
我们尝试使用tcp/ip
我下面放两段代码,我试了可以运行,但是课上做的,代码逻辑,代码结构,优化啊可能不是很完美
server.py
1 | |
client.py
1 | |